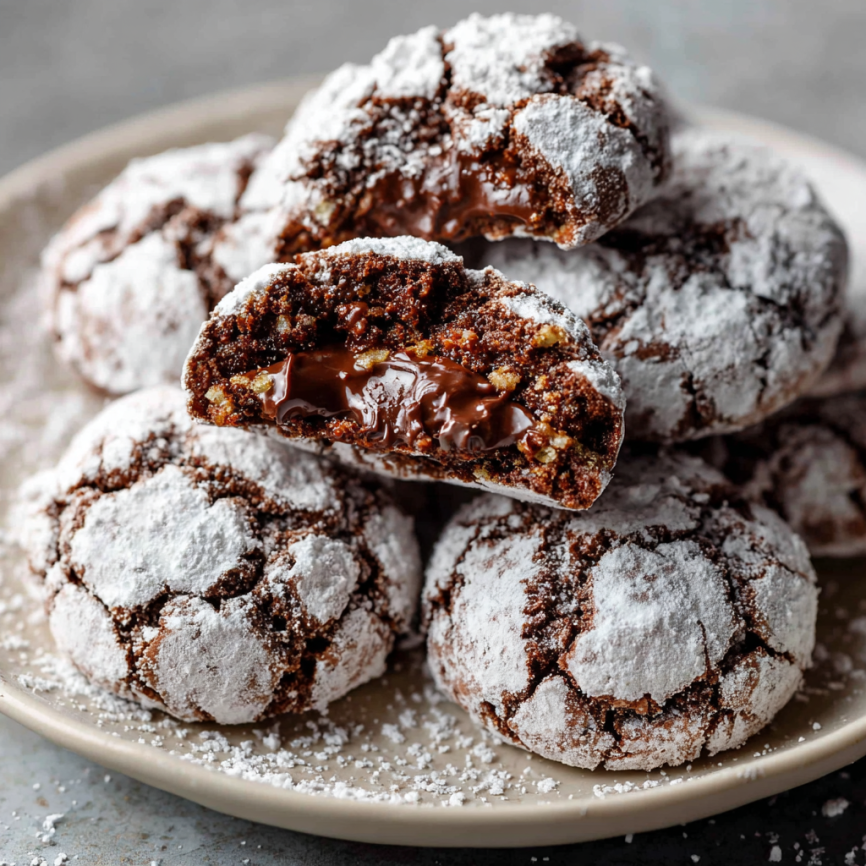
There’s something magical about biting into a cookie that combines the beloved flavors of chocolate and hazelnuts with that irresistible crinkled appearance. These Nutella crinkle cookies have become my go-to recipe whenever I want to create something that looks as impressive as it tastes. The first time I made them for a family gathering, they disappeared within minutes, leaving everyone asking for the recipe.
What makes these cookies truly special is their unique texture – soft and chewy on the inside with a delightfully cracked exterior dusted in powdered sugar. Additionally, the surprise Nutella filling in the center adds an extra layer of indulgence that elevates these treats from ordinary to extraordinary.
Why You’ll Fall in Love with This Recipe
Rich Chocolate-Hazelnut Flavor
The combination of cocoa powder in the dough and generous amounts of Nutella creates an intensely chocolatey experience. Meanwhile, the chopped hazelnuts provide a delightful crunch that perfectly complements the smooth, creamy texture of the spread.
Perfect Texture Balance
These cookies achieve the ideal balance between soft and structured. The chilled dough ensures they hold their shape while baking, yet remain tender and chewy once cooled. Furthermore, the dual sugar coating creates that signature crinkled appearance that makes them visually stunning.
Impressive Presentation
Despite their gourmet appearance, these cookies are surprisingly approachable for home bakers. The crackled surface dusted with powdered sugar creates an elegant look that’s perfect for special occasions or gift-giving.
Essential Ingredients
Main Cookie Components
- 2½ cups all-purpose flour (spooned and leveled for accuracy)
- 2 tablespoons unsweetened cocoa powder (enhances chocolate flavor)
- 1 teaspoon baking soda (provides proper lift)
- ½ teaspoon salt (balances sweetness)
- ¾ cup unsalted butter (softened to room temperature)
- ¾ cup packed brown sugar (adds moisture and depth)
- ⅓ cup granulated sugar (contributes to texture)
- 1 large egg plus 1 egg yolk (creates richness and proper spread)
- 1 teaspoon pure vanilla extract
- ¾ cup Nutella (the star ingredient)
- ¾ cup chopped hazelnuts (preferably toasted)
For Assembly and Coating
- ⅓ cup Nutella (for filling centers)
- ⅓ cup granulated sugar (first coating layer)
- ¾ cup confectioners’ sugar (final coating, plus extra for dusting)
Step-by-Step Instructions
Preparation Phase
Begin by toasting the chopped hazelnuts for optimal flavor. Spread them on a parchment-lined baking sheet and bake at 300°F for 5-7 minutes until slightly darkened. This optional step significantly enhances the nutty flavor profile.
Creating the Base Dough
In a medium bowl, whisk together flour, cocoa powder, baking soda, and salt until well combined. Set this dry mixture aside while you prepare the wet ingredients.
Using either a handheld or stand mixer with paddle attachment, beat the softened butter with both sugars on medium-high speed for 2-3 minutes. The mixture should become fluffy and light in color. Next, add the egg, egg yolk, and vanilla extract, beating until fully incorporated.
Incorporating the Star Ingredient
Add the Nutella to the butter mixture and beat on high speed until completely combined. Scrape down the bowl sides and bottom as needed to ensure even mixing. The mixture will be rich and glossy at this stage.
Final Assembly
Gradually add the dry ingredients to the wet mixture, beating on low speed until just combined. Fold in the toasted hazelnuts, mixing until evenly distributed. The resulting dough will be thick, soft, and quite sticky.
Essential Chilling Period
Cover the dough tightly and refrigerate for at least 2 hours, though up to 3 days is acceptable. This chilling step is absolutely crucial for achieving the proper texture and preventing excessive spreading during baking.
Shaping and Filling
Preheat your oven to 350°F and line baking sheets with parchment paper. Prepare two bowls – one with granulated sugar and another with confectioners’ sugar for coating.
The chilled dough will be crumbly initially, but your hands’ warmth will make it workable. Scoop slightly less than a tablespoon of dough and roll into balls. Create an indent in half of these balls using your thumb, then add a scant ½ teaspoon of Nutella to each indented piece.
Top the filled pieces with the remaining dough balls, gently pinching the edges to seal completely. Roll each stuffed ball between your palms to create smooth, round shapes.
Double Sugar Coating Technique
Roll each dough ball first in granulated sugar, ensuring complete coverage. Then roll generously in confectioners’ sugar – don’t be shy with this coating as it creates the signature crinkled appearance.
Place the coated balls 3 inches apart on prepared baking sheets, allowing room for spreading.
Baking to Perfection
Bake for 11-12 minutes, until edges appear set while centers remain soft. Avoid overbaking as this will result in hard cookies rather than the desired chewy texture.
Allow cookies to cool on the baking sheet for 5 minutes before transferring to a wire rack. The confectioners’ sugar coating may appear sticky and slightly yellow while warm – this is completely normal.
Serving Suggestions
Perfect Pairings
These rich cookies pair beautifully with a tall glass of cold milk or a steaming cup of coffee. For special occasions, serve alongside vanilla ice cream or fresh berries to balance the intense chocolate flavor.
Presentation Ideas
Arrange the cookies on a decorative platter and dust with additional confectioners’ sugar just before serving for that fresh, bakery-style appearance. They also make excellent gifts when packaged in clear cellophane bags tied with ribbon.
Creative Variations
Flavor Modifications
Consider substituting the hazelnuts with chopped almonds, walnuts, or even mini chocolate chips for different texture experiences. Each variation offers its own unique character while maintaining the core chocolate-Nutella appeal.
Alternative Fillings
While Nutella is traditional, experiment with other spreads like almond butter, cookie butter, or even a small piece of chocolate truffle for surprising center variations.
Size Adjustments
Create bite-sized versions by using smaller portions of dough, perfect for parties or cookie platters. Conversely, make jumbo versions for an extra-indulgent treat.
Make-Ahead Tips
Dough Storage
The prepared dough keeps beautifully in the refrigerator for up to 3 days, making it perfect for planned baking sessions. The extended chilling time actually improves the flavor development.
Freezing Options
Unbaked, shaped cookie balls (before sugar coating) freeze well for up to 3 months. Simply thaw for 30 minutes, then proceed with the coating and baking process.
Baked Cookie Storage
Completely cooled cookies maintain their quality for up to one week when stored in an airtight container at room temperature. For longer storage, freeze baked cookies for up to 3 months.
Important Notes
Equipment Recommendations
Success with this recipe relies on having the right tools. An electric mixer (handheld or stand) ensures proper creaming of butter and sugars. Quality baking sheets and either silicone mats or parchment paper prevent sticking and ensure even baking.
The Extra Egg Yolk Secret
The additional egg yolk serves a specific purpose beyond richness. It provides the extra moisture needed for proper dough spreading, which is essential for achieving the characteristic crinkled appearance.
Hazelnut Preparation Tips
Pre-chopped hazelnuts work best for this recipe. If using whole nuts, chop them by hand rather than using a food processor, which can create uneven pieces and overly fine particles that may dry out the dough.
Sugar Coating Troubleshooting
The confectioners’ sugar may absorb into the cookies due to Nutella’s natural oils, creating a slightly yellow tint. Combat this by applying a heavy initial coating and refreshing with additional powdered sugar after cooling.
Frequently Asked Questions
Q: Can I skip the Nutella filling in the center? A: Absolutely! Simply form larger dough balls using about 1.5 tablespoons of dough each, then proceed with the sugar coating and baking. This modification yields approximately 36 unfilled cookies.
Q: Why is chilling the dough so important? A: The chilling period is essential for firming up the butter and allowing the flour to fully hydrate. Without proper chilling, the cookies will spread too much during baking and lose their distinctive thick, chewy texture.
Q: Can I use a different type of nut? A: Yes, you can substitute hazelnuts with chopped almonds, pecans, or walnuts. However, hazelnuts provide the most authentic flavor pairing with Nutella. If omitting nuts entirely, replace with an equal amount of mini chocolate chips to prevent overspreading.
Q: How do I know when the cookies are done? A: Look for set edges while the centers still appear soft and slightly underbaked. The cookies will continue cooking slightly on the hot baking sheet after removal from the oven.
Q: Why do my cookies look yellow after baking? A: This occurs when the confectioners’ sugar absorbs into the cookie surface due to Nutella’s natural oils. Simply dust with fresh powdered sugar after cooling to restore the white appearance.
Q: Can I make these cookies smaller or larger? A: Certainly! Adjust the dough portion size accordingly and modify baking time as needed. Smaller cookies may need 8-10 minutes, while larger ones might require 13-15 minutes.
Prep Time: 3 hours (includes chilling) | Cook Time: 12 minutes | Total Time: 3 hours 30 minutes | Yield: 32 filled cookies


