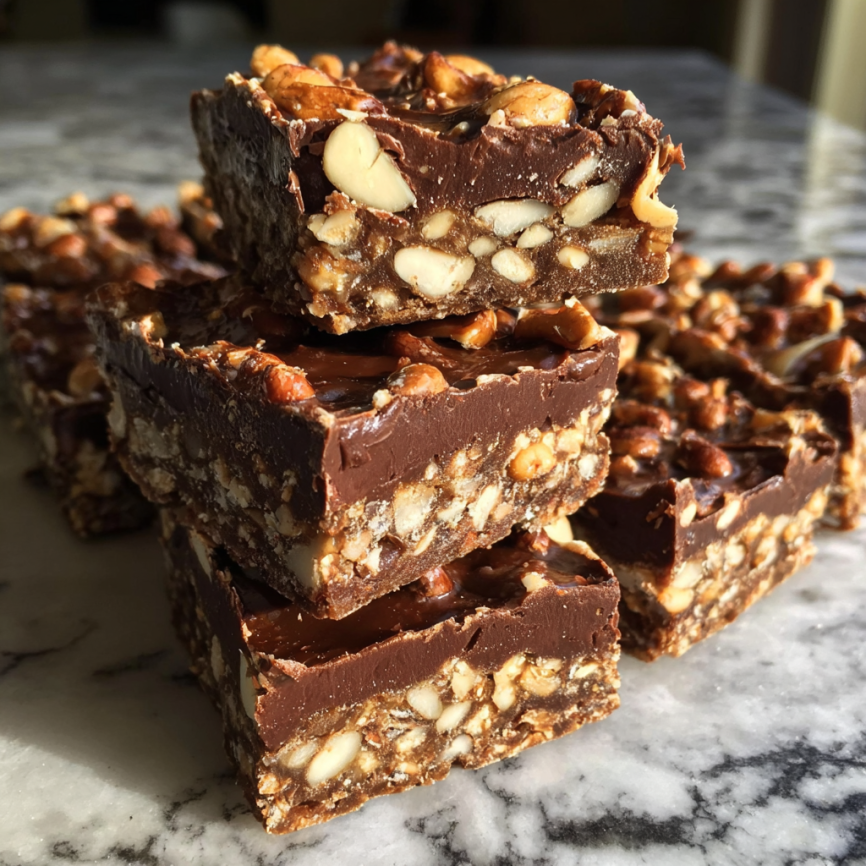
There’s something magical about discovering a recipe that requires zero baking but delivers maximum satisfaction. When I first stumbled upon these Nutella no-bake bars during a particularly hectic week, I was skeptical—could something so simple really be that good? After one bite, I was completely converted. These bars have become my go-to solution for last-minute gatherings, unexpected guests, and those moments when you need something sweet but the oven feels like too much work.
8 Reasons to Fall in Love with These Nutella No-Bake Bars
1. Incredibly Quick Assembly
Unlike traditional baked goods that require preheating ovens and lengthy preparation, these bars come together in just 15 minutes. Furthermore, the process is so straightforward that even novice bakers can achieve perfect results every time.
2. No Special Equipment Required
You won’t need any fancy mixers, thermometers, or specialized baking tools. Simply grab a large bowl, a pot for melting, and you’re ready to create magic. Additionally, cleanup is minimal since there’s no flour dust or sticky dough to deal with.
3. Perfect Texture Every Time
The combination of crushed biscuits and creamy Nutella creates an irresistible texture that’s both crunchy and smooth. Moreover, the walnuts add a delightful contrast that elevates each bite from ordinary to extraordinary.
4. Crowd-Pleasing Flavor
Nutella’s beloved hazelnut-chocolate combination appeals to virtually everyone. Consequently, these bars are perfect for potlucks, office parties, or family gatherings where dietary preferences vary.
5. Customizable Base
While the recipe is delicious as written, it serves as an excellent foundation for creativity. For instance, you can swap walnuts for pecans, add dried fruit, or incorporate different types of cookies for unique flavor profiles.
6. Make-Ahead Friendly
These bars actually improve with time, making them ideal for meal prep enthusiasts. In fact, they can be stored in the refrigerator for up to a week, developing richer flavors as they sit.
7. Budget-Friendly Ingredients
With just five basic ingredients, these bars won’t break the bank. Additionally, you likely already have most items in your pantry, making them perfect for spontaneous sweet cravings.
8. Impressive Presentation
Despite their simplicity, these bars look professionally made when cut into neat squares. Therefore, they’re perfect for gift-giving or bringing to events where you want to make a great impression.
Essential Ingredients for Success
Main Components
- 300g biscuits (digestive biscuits or graham crackers work beautifully)
- 200g Nutella (or your favorite chocolate-hazelnut spread)
- 100g butter (unsalted preferred for better flavor control)
- 100g walnuts (roughly chopped for optimal texture)
- 50g cocoa powder (unsweetened for rich chocolate depth)
Serving Suggestions
This recipe yields 12 generous bars, making it perfect for small gatherings or family treats. However, you can easily double the recipe for larger crowds by using a bigger pan and extending the chilling time slightly.
Step-by-Step Instructions
Preparing the Base
- Crumble the biscuits in a large bowl using your hands or a rolling pin until you achieve a mix of fine crumbs and small chunks. This varied texture creates the perfect foundation for your bars.
- Melt the butter in a pot over low heat, stirring occasionally to prevent burning. Once completely melted, remove from heat immediately to avoid overheating.
Creating the Binding Mixture
- Add Nutella to the melted butter while it’s still warm, then mix thoroughly until completely combined. The warmth helps create a smooth, glossy mixture that will bind everything together perfectly.
- Pour the mixture into the bowl with crumbled biscuits, stirring until every piece is well-coated. Take your time with this step to ensure even distribution.
Final Assembly
- Add chopped nuts and cocoa to the mixture, folding gently to maintain the nuts’ texture while evenly distributing the cocoa powder throughout.
- Transfer the mixture to a baking tin lined with parchment paper, pressing firmly to create an even layer. Use the back of a spoon or your hands to smooth the surface completely.
Setting and Finishing
- Refrigerate for 2 hours or until completely set. Resist the temptation to cut them early—proper chilling ensures clean cuts and the right texture.
- Cut into bars using a sharp knife, wiping the blade between cuts for the cleanest presentation.
Creative Serving Ideas
Classic Presentation
Serve these bars on a beautiful platter with a light dusting of powdered sugar for an elegant touch. Alternatively, arrange them in paper cupcake liners for individual portions at parties.
Elevated Accompaniments
Pair with fresh berries and a dollop of whipped cream for a restaurant-quality dessert. Additionally, a small scoop of vanilla ice cream transforms these bars into an indulgent sundae base.
Beverage Pairings
These rich bars complement coffee, espresso, or cold milk beautifully. For adults, they pair surprisingly well with port wine or a creamy liqueur.
Exciting Recipe Variations
Tropical Twist
Replace walnuts with toasted coconut flakes and add dried pineapple pieces for a tropical flavor profile. This variation brings sunshine to any gathering.
Double Chocolate Delight
Substitute chocolate wafer cookies for regular biscuits and add mini chocolate chips for intense chocolate lovers. Furthermore, a drizzle of melted dark chocolate on top creates an impressive finish.
Nutty Professor
Experiment with different nuts like pistachios, almonds, or pecans. Each variety brings its own unique flavor and texture to the bars.
Fruity Fresh
Incorporate dried cranberries, chopped dried apricots, or freeze-dried strawberries for a fruity contrast to the rich chocolate base.
Make-Ahead Tips for Success
Storage Solutions
Store completed bars in an airtight container in the refrigerator for up to one week. Layer parchment paper between stacks to prevent sticking.
Freezing Instructions
These bars freeze exceptionally well for up to three months. Wrap individual portions in plastic wrap, then place in a freezer-safe container. Thaw in the refrigerator for best texture.
Preparation Timeline
Make these bars up to three days ahead of serving for optimal flavor development. The ingredients meld together beautifully over time, creating an even more delicious treat.
Important Notes for Perfect Results
Temperature Matters
Ensure the butter is warm but not hot when adding Nutella to prevent the mixture from becoming too thick or seizing up.
Biscuit Selection
Choose sturdy biscuits that won’t completely dissolve but will still provide texture. Digestive biscuits, graham crackers, or vanilla wafers all work excellently.
Pressing Technique
When pressing the mixture into the pan, use steady, even pressure to create a compact bar that won’t crumble when cut.
Cutting Clean Lines
For professional-looking bars, use a sharp knife and wipe it clean between each cut. Slightly warming the knife blade helps achieve cleaner cuts through the chilled mixture.
Frequently Asked Questions
Can I use a different chocolate spread instead of Nutella?
Absolutely! Any chocolate-hazelnut spread will work perfectly in this recipe. You can also experiment with peanut butter or almond butter for different flavor profiles, though the texture may vary slightly.
What if I don’t have walnuts available?
Feel free to substitute with any nuts you prefer or have on hand. Almonds, pecans, hazelnuts, or even peanuts work wonderfully. You can also omit nuts entirely for those with allergies.
How do I know when the bars are properly set?
The bars should feel firm to the touch and not leave any residue on your finger when gently pressed. If they’re still soft after 2 hours, continue chilling for another 30 minutes.
Can I make these bars dairy-free?
Yes! Simply substitute the butter with a plant-based alternative and ensure your chosen chocolate spread is dairy-free. The texture remains virtually identical.
Why are my bars too crumbly or too soft?
Crumbly bars usually indicate insufficient binding mixture or inadequate pressing. Soft bars typically need more chilling time or may have been made with too much melted butter.
Can I add alcohol to these bars?
Certainly! A tablespoon of rum, bourbon, or amaretto can add sophisticated flavor depth. Add it to the melted butter and Nutella mixture for best incorporation.
How far in advance can I make these for a party?
These bars are actually better when made 1-2 days ahead, allowing flavors to meld completely. They maintain their quality for up to a week when properly stored.
What’s the best way to transport these bars?
Keep them chilled until just before serving, then transport in a cooler if traveling long distances. They hold up well at room temperature for several hours once properly set.
Recipe Summary:
- Total Time: 2 hours 15 minutes (15 minutes prep + 2 hours chilling)
- Yield: 12 bars
- Diet: Vegetarian
- Method: No-bake
- Cuisine: Italian-inspired
Nutrition per bar:
- Calories: 200
- Fat: 10g (Saturated: 4g, Unsaturated: 5g)
- Carbohydrates: 25g
- Fiber: 2g
- Protein: 3g
- Sugar: 12g
- Sodium: 50mg
- Cholesterol: 15mg


