Every Christmas, my grandmother would emerge from the kitchen carrying her signature dessert – a silky orange crème caramel that seemed to capture the essence of the holidays in every spoonful. The anticipation would build as she carefully unmolded the golden custard, revealing the glossy caramel cascade that would become the centerpiece of our festive table. Now, this treasured recipe has become my own holiday tradition, bringing the same magic to new generations.
Why This Orange Crème Caramel Will Become Your New Favorite
A Sophisticated Twist on Classic Elegance
Traditional crème caramel is undeniably beautiful, but the addition of orange transforms it into something extraordinary. The citrus notes brighten the rich custard while complementing the deep caramel flavors perfectly. Furthermore, the toffee shards add textural contrast that elevates each bite from simple to sublime.
The Perfect Make-Ahead Dessert
Holiday entertaining becomes stress-free when your dessert is prepared in advance. This crème caramel actually improves overnight, allowing the flavors to meld and the texture to reach optimal smoothness. Additionally, the dramatic presentation ensures your guests will be impressed without requiring last-minute preparation.
Feeds a Crowd Beautifully
With 16 generous servings, this recipe is ideal for holiday gatherings, dinner parties, or special celebrations. The large bundt pan format creates an impressive centerpiece that serves as both dessert and table decoration. Meanwhile, the cost-effective ingredients make it budget-friendly for entertaining.
Essential Ingredients
For the Golden Caramel
- 1 cup granulated sugar
- 1/4 cup water
For the Silky Custard
- 5 cups whole milk
- 1 cup granulated sugar
- 1/2 teaspoon salt
- 1 tablespoon pure vanilla extract
- 6 extra-large eggs, room temperature
- 3 strips fresh orange peel (avoid the white pith)
For Serving
- Toffee pieces for garnish
- Fresh orange slices (optional)
- Mint sprigs for decoration
Step-by-Step Instructions
Creating the Perfect Caramel Base
Begin by combining sugar and water in a heavy-bottomed saucepan over medium-low heat. Stir constantly until the sugar completely dissolves and the mixture starts to simmer. Once simmering, stop stirring and allow the syrup to bubble until it transforms into a light amber color.
Remove the pan from heat and carefully tilt it by the handle to distribute the caramel evenly. The residual heat will continue cooking the caramel, so work quickly. Immediately pour the hot caramel into your bundt pan or pie dish, tilting and swirling to coat the bottom evenly. Set aside to cool and harden completely.
Preparing the Orange-Infused Custard
In a medium saucepan, combine the milk, sugar, and orange peel strips. Stir gently to dissolve the sugar throughout the milk. Bring the mixture to a slow simmer over medium-low heat, then reduce heat to maintain a gentle simmer for exactly 20 minutes.
During this simmering time, the orange oils will infuse the milk with delicate citrus flavor. Stir in the vanilla extract, then remove from heat and allow to cool for a full hour until completely cool to the touch.
Assembling the Custard Mixture
Position your oven rack in the center and preheat to 176°C (350°F). Meanwhile, beat the room-temperature eggs with a hand mixer at medium speed for about 3 minutes until they become light and fluffy.
Once the milk has cooled completely, remove the orange peel strips and strain the milk through a fine-mesh strainer. Gradually beat the cooled, strained milk into the eggs using low speed to prevent incorporating air bubbles.
The Water Bath Technique
Pour the custard mixture over the hardened caramel in your prepared pan. Place this pan inside a larger oven-proof dish or roasting pan. Carefully pour hot water into the larger pan until it reaches within 1 inch of the top of your custard pan.
Transfer the entire water bath setup to the preheated oven. Bake for 50-55 minutes, or until the custard feels set when gently touched in the center. The water bath ensures even, gentle cooking that prevents curdling.
Cooling and Setting
Remove from the oven but leave the custard in the water bath until cooled to room temperature. This gradual cooling prevents cracking and ensures smooth texture. Once cooled, remove from the water bath and refrigerate overnight for optimal setting.
Serving Your Masterpiece
The Dramatic Unmolding
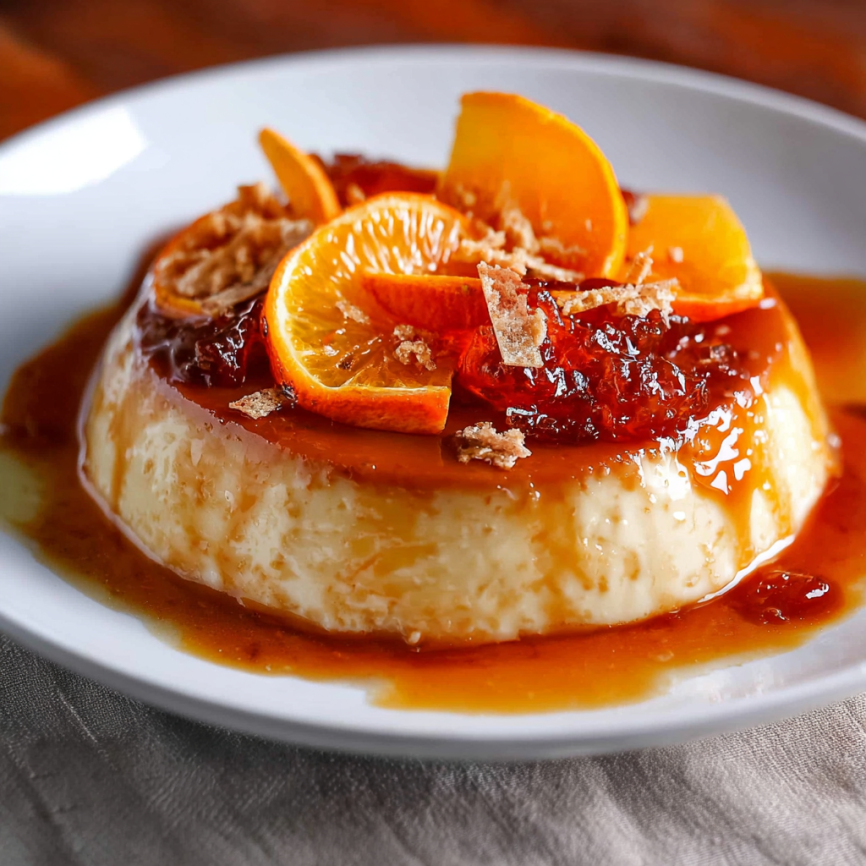
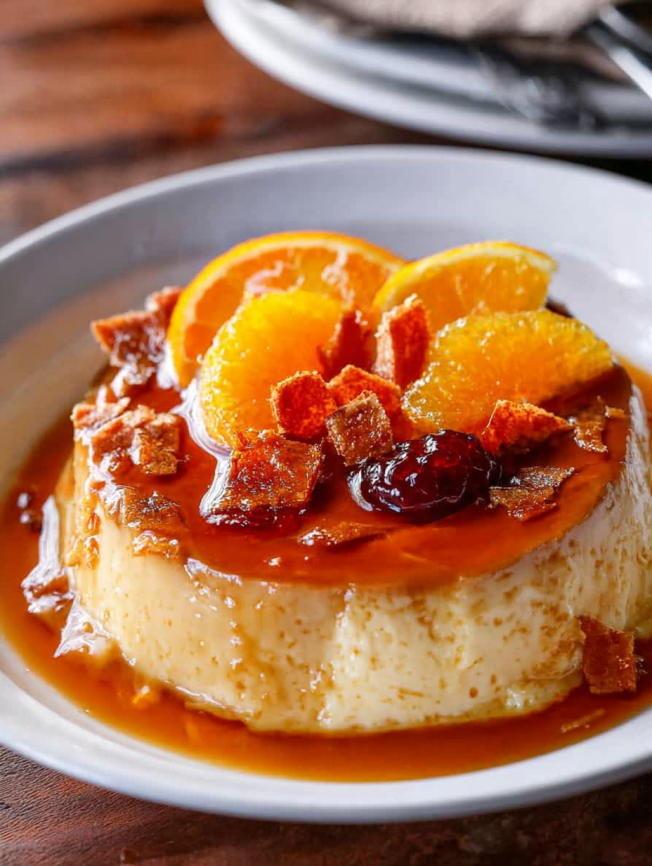
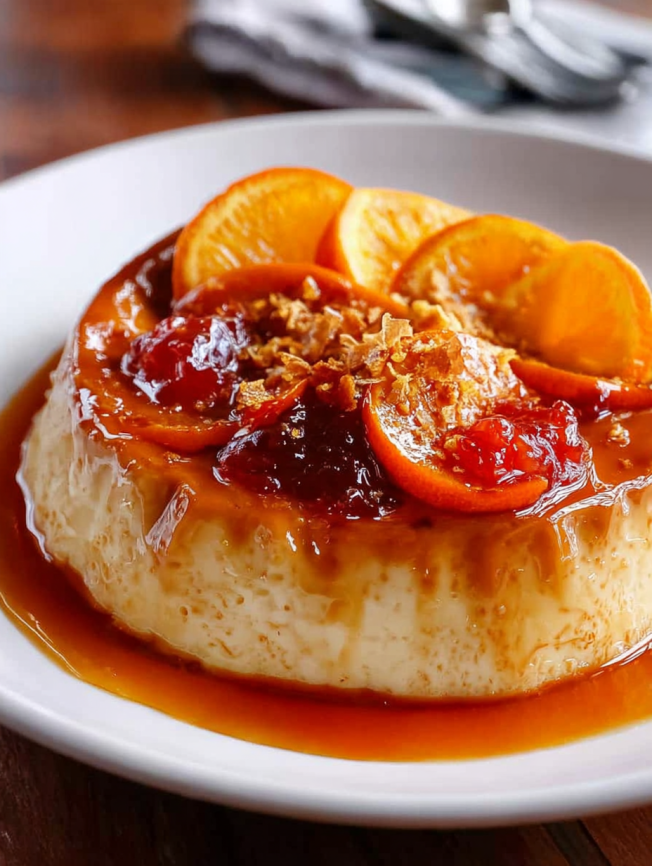
To serve, place your serving plate upside down on top of the custard pan. In one confident motion, flip both the plate and pan together. Gently lift the pan away, allowing the caramel to flow over the custard in golden ribbons.
Final Presentation
Break toffee into irregular shards using a knife, then scatter these pieces around the base of the custard. Add fresh orange slices and mint sprigs for color contrast. The combination of textures and flavors creates an unforgettable dessert experience.
Creative Variations
Seasonal Flavor Adaptations
Replace orange peel with lemon zest for a brighter profile, or try lime for a tropical twist. During autumn, add a cinnamon stick to the milk for warmth. Winter variations might include a few cardamom pods for exotic spice notes.
Chocolate Enhancement
Stir melted dark chocolate into the cooled milk before adding to eggs for a decadent chocolate-orange combination. Alternatively, drizzle melted chocolate over the finished custard for visual appeal.
Individual Servings
Divide the recipe among ramekins for personal portions. Reduce baking time to 35-40 minutes and adjust caramel quantities accordingly. This presentation works beautifully for intimate dinner parties.
Make-Ahead Strategies
Timeline Planning
Prepare this dessert up to three days before serving for optimal flavor development. The caramel softens slightly over time, creating an even more luscious sauce. Plan to make it at least 24 hours ahead for best results.
Storage Solutions
Keep covered in the refrigerator for up to four days. The custard maintains its silky texture throughout this period. For longer storage, individual portions freeze well for up to one month, though the caramel may crystallize slightly.
Serving Day Preparation
Unmold the custard up to 4 hours before serving and keep refrigerated. Add toffee shards and garnishes just before presentation to maintain their texture and visual impact.
Professional Tips
Caramel Mastery
Watch the caramel carefully during the final moments of cooking, as it can go from perfect to burnt quickly. The ideal color is light amber – it will continue cooking from residual heat. If the caramel hardens before you can spread it, briefly return the pan to low heat.
Temperature Control
Room temperature eggs incorporate more easily and create smoother custard. Cold eggs can cause the mixture to curdle when combined with warm milk. Plan ahead by removing eggs from refrigeration 30 minutes before use.
Water Bath Success
Use hot tap water in the water bath to prevent thermal shock to the custard. The water should reach at least halfway up the sides of the custard pan for even cooking. Cover the entire setup with foil if your oven runs hot.
Troubleshooting Guide
Preventing Common Issues
If your custard curdles, it’s likely due to overheating or combining hot milk with cold eggs. Strain the mixture before baking to remove any lumps. For lumpy caramel, ensure complete sugar dissolution before allowing it to boil.
Texture Problems
Grainy texture usually results from cooking at too high a temperature. The gentle water bath method prevents this issue. If the custard doesn’t set properly, it may need additional baking time or the oven temperature might be too low.
Frequently Asked Questions
Can I make this dessert without a bundt pan?
Absolutely! A 9-inch pie dish, cake pan, or even a large soufflé dish works beautifully. Adjust the caramel quantity to coat the bottom evenly, and cooking time may vary slightly depending on the depth of your chosen pan.
What if I don’t have orange peel?
Fresh orange zest works as a substitute, though use only 1 tablespoon since zest is more concentrated. Dried orange peel can work in a pinch, but fresh provides the best flavor. Avoid artificial orange extract, which can taste artificial.
How do I know when the caramel is the right color?
The caramel should be light amber, similar to the color of honey. It will continue cooking from residual heat, so err on the lighter side. Dark amber caramel can become bitter and overpower the delicate custard.
Why did my custard curdle?
Curdling typically occurs when hot milk is added too quickly to eggs, or when the mixture gets too hot during cooking. Always cool the milk completely before adding to eggs, and use the water bath method to ensure gentle, even cooking.
Can I prepare individual servings?
Yes! Divide the recipe among 8-10 ramekins, reducing baking time to 35-40 minutes. This presentation is elegant for dinner parties and allows for portion control. Each ramekin will need about 1 tablespoon of caramel.
How long can I store leftovers?
Covered in the refrigerator, this dessert keeps beautifully for up to 4 days. The texture actually improves over time as flavors meld. For best presentation, add fresh toffee shards just before serving leftover portions.
What type of toffee works best?
Store-bought toffee bits work wonderfully, or you can make your own by cooking sugar until hard crack stage. English toffee, butterscotch chips, or even crushed toffee candy bars add delicious texture and flavor contrast.
Can I freeze this dessert?
While possible, freezing isn’t recommended as it affects the smooth texture of the custard. The caramel may also crystallize upon thawing. For best results, enjoy within the 4-day refrigerated storage period.
Why isn’t my caramel flowing when I unmold?
If the caramel has hardened too much, let the unmolded custard sit at room temperature for 15-20 minutes. The caramel will gradually soften and begin to flow. You can also briefly dip the bottom of the pan in warm water before unmolding.