Prep Time: 30 minutes | Cook Time: 8 minutes | Total Time: 38 minutes | Serves: 4-6
The first time I witnessed a Bloomin’ Onion arrive at our table at Outback Steakhouse, I was absolutely mesmerized. This golden, flower-like creation seemed almost too beautiful to eat, with its crispy petals fanned out like an edible work of art. However, that first bite – crunchy, spicy, and perfectly seasoned – convinced me that this wasn’t just about looks. It was pure comfort food genius.
Years later, when I finally decided to tackle this iconic appetizer at home, I discovered that recreating restaurant magic in my own kitchen was not only possible but incredibly rewarding. The satisfaction of pulling apart those crispy petals and dipping them into that signature tangy sauce brings back all the excitement of dining out, right in my own dining room.
Why This Recipe Will Transform Your Appetizer Game
The Bloomin’ Onion represents everything great about comfort food – it’s indulgent, shareable, and absolutely unforgettable. This homemade version delivers all the drama and flavor of the restaurant original while giving you complete control over the ingredients and spice level.
Unlike many restaurant copycat recipes that fall short of expectations, this version truly captures the essence of the original. The secret lies in the double-coating technique and the perfectly balanced spice blend that creates that distinctive golden crust and bold flavor profile.
Furthermore, making this at home allows you to customize the heat level and experiment with different seasonings. You can make it milder for sensitive palates or amp up the spice for those who love extra heat. The impressive presentation makes it perfect for entertaining, game day gatherings, or any time you want to create a memorable dining experience.
Essential Ingredients
For the Star of the Show
- 1 large sweet onion (Vidalia, Walla Walla, or similar variety)
- 3 cups all-purpose flour
- 2 teaspoons paprika (for color and mild heat)
- 1 teaspoon garlic powder
- 1 teaspoon onion powder
- ½ teaspoon cayenne pepper (adjust to taste)
- ½ teaspoon black pepper
- ½ teaspoon dried oregano
- ½ teaspoon salt
Wet Batter Components
- 2 large eggs, room temperature
- 1 cup whole milk
For Perfect Frying
- Vegetable or canola oil (approximately 6-8 cups for deep frying)
Signature Dipping Sauce
- ½ cup mayonnaise (use high-quality for best flavor)
- 2 tablespoons ketchup
- 2 tablespoons prepared horseradish
- ½ teaspoon paprika
- ½ teaspoon salt
- ¼ teaspoon garlic powder
- ¼ teaspoon dried oregano
- Pinch of black pepper
- Dash of cayenne pepper (optional, for extra kick)
Serving and Presentation Ideas
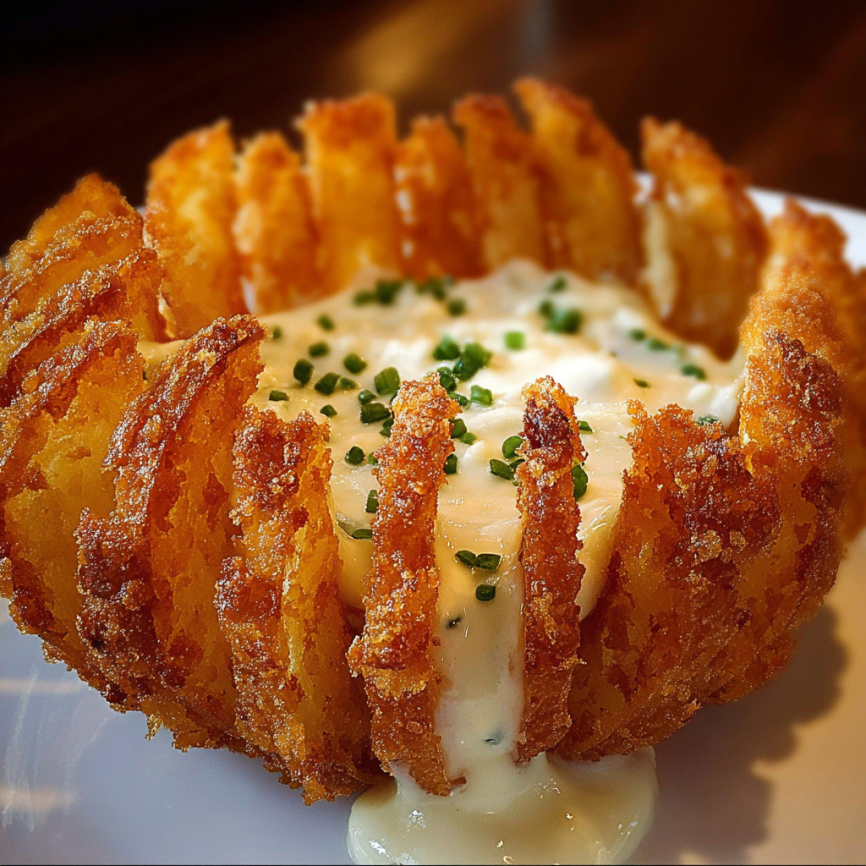
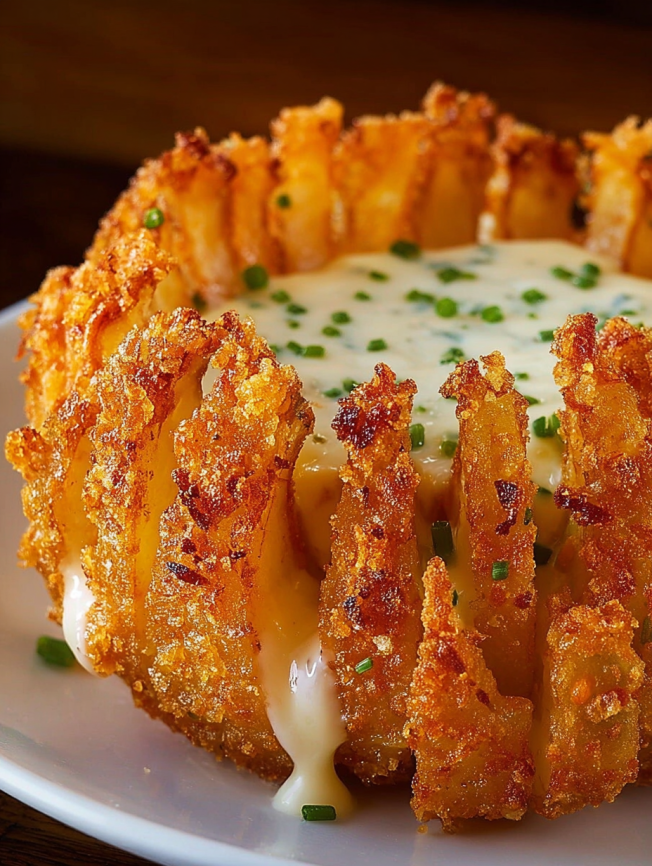
Present your Bloomin’ Onion on a large platter with the dipping sauce in a small bowl placed in the center. Consider garnishing with fresh parsley or chives for color contrast, and provide small plates and plenty of napkins for your guests.
Step-by-Step Instructions
Preparing the Onion Foundation
Begin by selecting the largest, most symmetrical sweet onion you can find – this makes all the difference in the final presentation. Remove about ½ inch from the top of the onion and peel away the papery outer layers, but crucially, leave the root end completely intact as this holds everything together.
Place the onion cut-side down on a cutting board and make 12-16 vertical cuts from the top toward the root, stopping about ½ inch before the bottom. The cuts should be evenly spaced around the circumference, creating segments that will become your “petals.”
Carefully turn the onion over and gently separate the layers with your fingers, being patient and gentle to avoid breaking the delicate connections. The goal is to create a flower-like appearance where each layer can fan out independently while remaining attached at the base.
Creating the Perfect Coating System
In a large, wide bowl, combine the flour with all the dry seasonings – paprika, garlic powder, onion powder, cayenne pepper, black pepper, oregano, and salt. Whisk these ingredients thoroughly to ensure even distribution of flavors and colors throughout the mixture.
In a separate bowl, whisk together the eggs and milk until completely smooth and well combined. This wet mixture helps the seasoned flour adhere to the onion and creates the foundation for that signature crispy coating.
The Double-Coating Technique
This step is crucial for achieving the restaurant-quality coating that makes the Bloomin’ Onion so special. First, thoroughly dredge the prepared onion in the seasoned flour mixture, making sure to work the flour deep between all the separated layers and petals.
Next, dip the flour-coated onion into the egg and milk mixture, again ensuring that the liquid reaches all the separated layers. Allow excess liquid to drip off before returning the onion to the seasoned flour for its second coating.
During this final flour coating, use your hands to press and work the seasoned flour mixture deep into every crevice and between every petal. This double-coating creates the thick, crispy shell that’s essential for the authentic texture.
The Crucial Chilling Step
Transfer your coated onion to a plate and refrigerate for at least 30 minutes. This chilling period is absolutely essential – it helps the coating set and adhere properly, preventing it from falling off during frying. Additionally, the cold onion will create better contrast with the hot oil, resulting in superior texture.
During this time, prepare your dipping sauce by combining all sauce ingredients in a small bowl and whisking until completely smooth. Refrigerate the sauce as well to allow the flavors to meld and develop.
Achieving Frying Perfection
Heat your oil to exactly 375°F (190°C) in a deep fryer or large, heavy pot. The oil temperature is critical – too hot and the coating will burn before the onion cooks through; too cool and the coating will be greasy rather than crispy.
Carefully lower the chilled onion into the hot oil, root-side up, using a slotted spoon or frying basket. The onion should sizzle immediately upon contact with the oil. Fry for 6-8 minutes, rotating occasionally if needed for even browning.
The onion is done when the coating is deep golden brown and crispy. Remove carefully and drain on paper towels for 2-3 minutes before serving. The internal onion should be tender while the coating remains crunchy.
Serving for Maximum Impact
Present your Bloomin’ Onion immediately while it’s still hot and the coating is at its crispiest. Place it on a large serving platter with the dipping sauce either alongside or in a small bowl nestled in the center of the onion.
Provide small plates and plenty of napkins, as this is definitely a hands-on eating experience. Encourage guests to pull apart the petals and dip each piece individually for the best flavor combination.
Creative Variations
Spice Level Adjustments
For a milder version, reduce the cayenne pepper to ¼ teaspoon and omit it from the dipping sauce. Conversely, for heat lovers, increase the cayenne to ¾ teaspoon and add a dash of hot sauce to the wet batter.
International Flavor Twists
Try an Italian-inspired version by adding dried basil and Italian seasoning to the flour mixture, or create an Asian fusion version with garlic powder, ginger powder, and a touch of five-spice powder.
Healthier Alternative
For a lighter version, try air frying at 375°F for 12-15 minutes, spraying with cooking oil halfway through. While the texture will be different, it’s still delicious and significantly reduces the oil content.
Dipping Sauce Variations
Experiment with different sauce combinations like ranch mixed with sriracha, thousand island dressing, or a spicy aioli made with mayo, garlic, and chipotle peppers.
Make-Ahead Tips
While the Bloomin’ Onion is best served immediately after frying, you can prepare several components in advance. The onion can be cut and the coating ingredients prepared up to 24 hours ahead, stored separately in the refrigerator.
The dipping sauce actually improves when made ahead, as the flavors have time to meld and develop. Prepare it up to 3 days in advance and store covered in the refrigerator.
You can also coat the onion up to 4 hours ahead and keep it refrigerated until ready to fry. However, avoid coating too far in advance, as the moisture from the onion can make the coating soggy.
Professional Tips for Success
Choosing the right onion is crucial – sweet varieties like Vidalia work best because they have a milder flavor that won’t overpower the seasoning, and they tend to be larger and more uniform in shape. Avoid storage onions, which can be too sharp and pungent.
When making your cuts, use a very sharp knife to ensure clean slices that won’t crush the onion’s structure. Take your time with this step, as uneven cuts will result in uneven cooking and presentation.
Oil temperature consistency is key to success. Use a reliable thermometer and adjust heat as needed to maintain 375°F throughout the frying process. If the temperature drops significantly when you add the onion, increase the heat slightly to compensate.
Safety Considerations
Deep frying requires extra caution and attention. Never leave hot oil unattended, and keep a fire extinguisher rated for grease fires nearby. If oil begins to smoke, it’s too hot – reduce heat immediately.
When lowering the onion into the oil, do so slowly and carefully to avoid splashing hot oil. Wear long sleeves and avoid loose clothing that could catch fire or get caught in equipment.
Have a plan for disposing of the used oil safely – never pour it down drains. Allow it to cool completely, then dispose of according to local regulations or save it for future frying if it’s still clean.

Frequently Asked Questions
Can I use a different type of onion? Sweet onions work best for this recipe because of their mild flavor and large size. Yellow onions can be substituted but may be more pungent, while white onions tend to be too sharp for most palates.
What if I don’t have a deep fryer? A large, heavy pot with at least 4 inches of oil works perfectly. Use a thermometer to monitor temperature and maintain proper heat throughout cooking. Make sure the pot is large enough that the oil won’t overflow when you add the onion.
How do I know when the oil is ready? Besides using a thermometer, you can test by dropping a small piece of the coating mixture into the oil – it should sizzle immediately and float to the surface. If it sinks or doesn’t sizzle, the oil isn’t hot enough.
Can I make this gluten-free? Yes, substitute the all-purpose flour with your favorite gluten-free flour blend. Rice flour or a combination of rice flour and cornstarch works particularly well for achieving crispiness.
Why is my coating falling off during frying? This usually happens when the coating isn’t pressed firmly enough into the onion layers or when the chilling step is skipped. Make sure to work the flour mixture deep between all layers and refrigerate for the full 30 minutes.
Can I reheat leftover Bloomin’ Onion? While best served fresh, leftovers can be reheated in a 375°F oven for 5-8 minutes to restore some crispiness. Avoid microwaving, as this will make the coating soggy.


