When I first discovered these irresistible little treats at a friend’s bake sale, I knew I had to unlock their secrets. The combination of a tender peanut butter cookie cup cradling rich, fudgy chocolate filling seemed almost too good to be true. After countless experiments in my kitchen, I finally perfected this recipe that delivers bakery-quality results every single time.
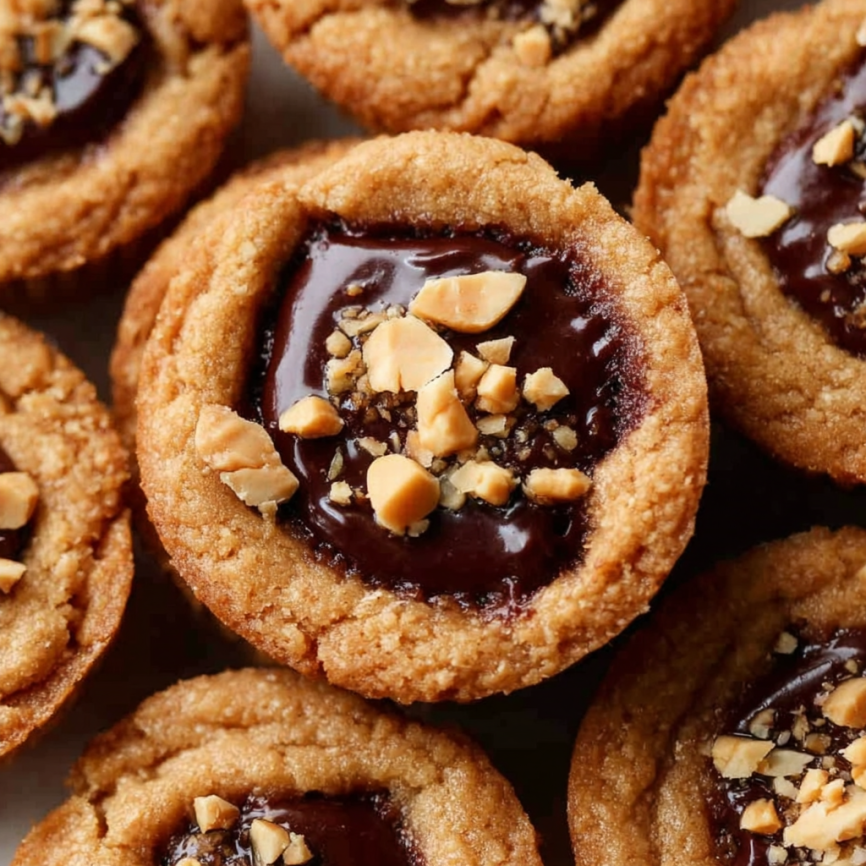
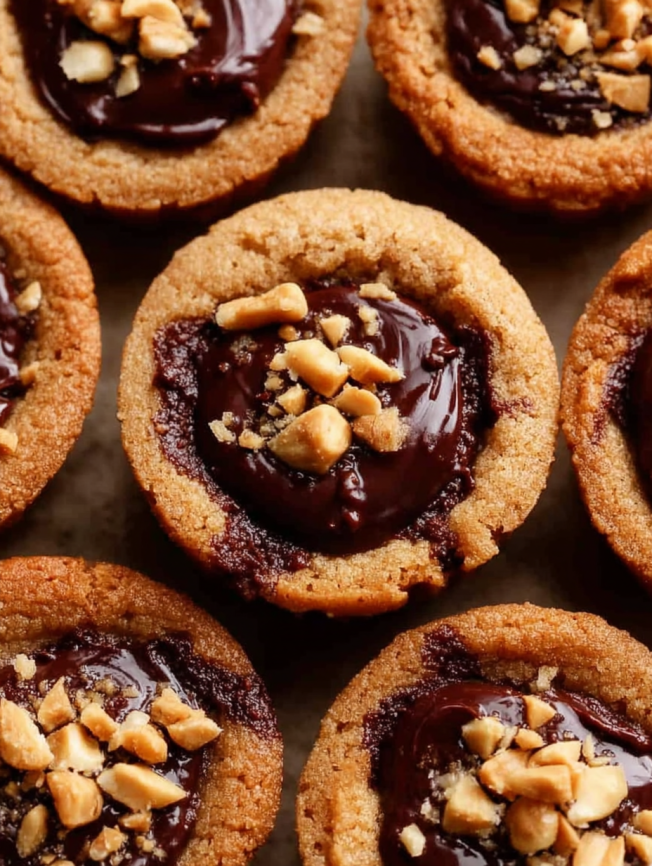
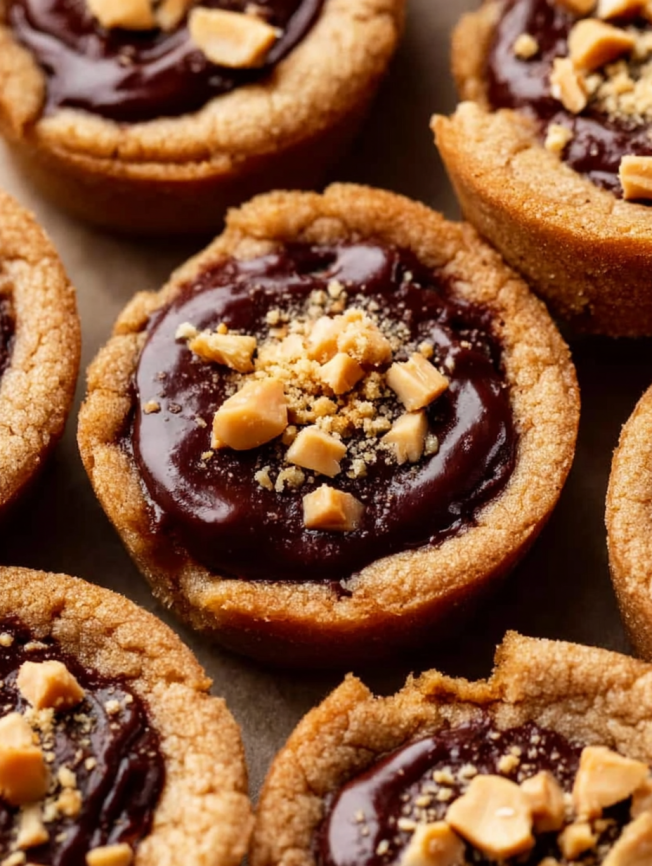
These aren’t your ordinary cookies – they’re edible little vessels of pure indulgence. Each bite delivers the perfect balance of salty-sweet peanut butter and luxuriously smooth chocolate. The secret ingredient that makes all the difference? Mascarpone cheese, which transforms ordinary chocolate filling into something truly extraordinary, keeping it creamy and soft for days.
Prep Time: 1 hour, 45 minutes
Cook Time: 14 minutes
Total Time: 3 hours (includes cooling)
Yield: 36-40 mini cups
Why These Cookie Cups Will Become Your New Obsession
Perfect Two-Bite Indulgence
These miniature masterpieces offer the ideal portion size for satisfying your sweet tooth without overwhelming guilt. Each cookie cup delivers maximum flavor impact in just two delightful bites. Furthermore, their elegant appearance makes them perfect for entertaining, yet they’re approachable enough for everyday treats.
Texture Symphony
The contrast between the slightly chewy peanut butter cookie base and the silky-smooth chocolate filling creates an unforgettable textural experience. Additionally, the optional toffee bits or chopped peanuts on top add a delightful crunch that elevates each bite to new heights of satisfaction.
Make-Ahead Friendly
Unlike many filled cookies that become soggy over time, these beauties actually improve as they sit. The mascarpone-enriched filling stays perfectly creamy, while the cookie cups maintain their structural integrity. This makes them ideal for meal prep, special occasions, or whenever you want impressive treats ready at a moment’s notice.
Essential Ingredients
For the Cookie Cups
- 1/2 cup (8 tbsp; 113g) unsalted butter, softened – Creates the tender, buttery base
- 1/2 cup (100g) packed brown sugar – Adds moisture and caramel notes
- 1/2 cup (100g) granulated sugar – Provides sweetness and structure
- 1 large egg, at room temperature – Binds ingredients and adds richness
- 2/3 cup (156g) creamy peanut butter – The star flavor of the cookie cups
- 1 teaspoon pure vanilla extract – Enhances overall flavor complexity
- 1 and 1/4 cups (156g) all-purpose flour (spooned & leveled) – Forms the cookie structure
- 1/2 teaspoon baking soda – Provides gentle lift and tenderness
- 1/2 teaspoon salt – Balances sweetness and enhances peanut butter flavor
For the Luxurious Fudge Filling
- 8 ounces (226g) semi-sweet chocolate, chopped – Creates the rich base
- 1 teaspoon vegetable oil or coconut oil – Ensures smooth melting
- 8 ounces (226g) mascarpone cheese, at room temperature – The secret to ultra-creamy texture
- 1/2 cup (120g) Heath toffee bits or chopped peanuts (optional) – Adds textural contrast
Step-by-Step Instructions
Creating the Perfect Cookie Dough
Begin by combining the softened butter with both brown and granulated sugars in a large bowl. Using either a hand mixer or stand mixer fitted with a paddle attachment, beat the mixture on medium-high speed for about 3 minutes until it becomes light and creamy. This thorough creaming process is crucial for achieving the proper cookie texture.
Next, add the room temperature egg and beat for about 1 minute until fully incorporated. Scrape down the sides and bottom of the bowl with a silicone spatula to ensure even mixing. Then, add the creamy peanut butter and vanilla extract, beating until the mixture is completely combined and smooth.
Incorporating the Dry Ingredients
Add the flour, baking soda, and salt to the wet ingredients. Begin mixing on low speed until the dry ingredients are just incorporated, then increase to medium speed and beat until everything is well combined. The resulting dough will be very creamy and soft – this is exactly what you want for easy shaping.
Cover the dough tightly and chill in the refrigerator for at least 1 hour, though it can stay chilled for up to 3 days. This chilling step is essential for making the dough easier to handle and ensuring the cookie cups hold their shape during baking.
Preparing for Baking
Preheat your oven to 325°F (163°C) – note that this is lower than the typical cookie baking temperature. Grease two mini muffin pans thoroughly with nonstick spray. While you can use mini cupcake liners, the dough is much easier to shape without them, creating better-formed cookie cups.
Shaping the Cookie Cups
Scoop the chilled dough into portions of about 1 tablespoon or 20g each, rolling them into balls. Place each dough ball into a prepared mini muffin cup. Here comes the crucial technique: using your thumb, press down firmly in the center of each dough ball to create an indent, simultaneously pressing the dough partway up the sides of the muffin cup.
The goal is to create little bowl shapes that will hold the filling. Don’t worry if they’re not perfect – you’ll have a chance to refine the shape after baking.
Baking to Perfection
Bake the cookie cups for 14-15 minutes, watching for lightly browned edges. Resist the urge to underbake these – they need to be fully set to maintain their cup shape. The cookies will puff up during baking, which is completely normal and expected.
Post-Baking Shaping
Remove the pans from the oven and place them on cooling racks. Here’s a critical step: let the cookie cups cool in the pan for just 5-10 minutes, then use the back of a rounded teaspoon to gently press into the center of each cookie cup, deepening the indent for the filling.
After this brief cooling period, carefully remove the cookie cups from the pans using a butter knife if needed. Place them on cooling racks to cool completely before filling – this prevents the chocolate from melting upon contact.
Creating the Silky Fudge Filling
Melting the Chocolate Base
Melt the chopped chocolate and oil together using either a double boiler or microwave method. For microwave melting, place the chocolate and oil in a large heat-proof bowl and melt in 20-second increments, stirring thoroughly after each interval until completely smooth and melted.
Allow the melted chocolate to cool slightly for about 3 minutes – this prevents the heat from breaking the mascarpone when combined.
Incorporating the Mascarpone Magic
Using a silicone spatula or spoon, gently fold the room temperature mascarpone into the slightly cooled chocolate until the mixture is completely smooth and uniform. The mascarpone should blend seamlessly, creating a luxuriously creamy filling that’s lighter than traditional ganache but just as rich.
Final Assembly
Spoon a heaping teaspoon of the chocolate-mascarpone filling into each cooled cookie cup, filling them generously. Top with toffee bits or chopped peanuts if desired, pressing them lightly into the filling so they adhere properly.
Serving Suggestions
Elegant Dessert Presentation
Arrange these cookie cups on a tiered serving stand for an impressive dessert display. Their uniform size and professional appearance make them perfect for formal events, holiday parties, or special celebrations. Consider dusting the serving plate with a light coating of cocoa powder for an extra elegant touch.
Casual Gathering Favorites
These treats are equally at home at casual gatherings, bake sales, or potluck dinners. Pack them in decorative boxes or arrange them on festive paper plates – their built-in portion control makes them ideal for events where guests are mingling and eating finger foods.
Gift-Giving Excellence
Package these cookie cups in clear containers or decorative tins for thoughtful homemade gifts. Their professional appearance and unique format make them memorable presents that recipients will truly appreciate and remember.
Creative Recipe Variations
Flavor Combinations
While the classic peanut butter-chocolate combination is hard to beat, consider these variations: almond butter cookies with dark chocolate filling, cashew butter with white chocolate, or even sunflower seed butter for those with nut allergies. Each variation offers its own unique flavor profile while maintaining the same appealing format.
Seasonal Adaptations
Transform these treats for different seasons by adjusting the toppings and presentation. Halloween versions could feature orange-tinted filling with crushed Oreo “dirt.” Christmas iterations might include peppermint extract in the filling with crushed candy canes on top. Valentine’s Day calls for pink-tinted filling and heart-shaped chocolate shavings.
Dietary Modifications
For gluten-free versions, substitute the all-purpose flour with a quality gluten-free flour blend. Dairy-free adaptations can use vegan mascarpone or thick coconut cream in place of traditional mascarpone, though the texture will be slightly different.
Make-Ahead Strategies
Dough Preparation
The cookie dough is incredibly make-ahead friendly. After mixing, it can be stored in the refrigerator for up to 3 days before shaping and baking. For longer storage, the shaped dough balls can be frozen for up to 3 months – simply bake directly from frozen, adding an extra minute or two to the baking time.
Component Assembly
Bake the cookie cups up to 2 days ahead and store them in airtight containers at room temperature. The filling can be prepared a day in advance and stored in the refrigerator – just bring it to room temperature and stir gently before using. This staged approach makes entertaining much more manageable.
Storage Solutions
Completed cookie cups can be stored at room temperature for up to 1 day or refrigerated for up to 5 days. They also freeze beautifully for up to 3 months, making them perfect for batch preparation and portion control.
Important Notes
The Mascarpone Difference
Mascarpone cheese is the secret ingredient that elevates this filling from good to extraordinary. Unlike regular cream cheese, mascarpone has a milder flavor and creamier texture that doesn’t compete with the chocolate. While cream cheese can be substituted in a pinch, the results won’t be quite as luxurious.
Temperature Considerations
Room temperature ingredients are crucial for this recipe’s success. Cold mascarpone won’t blend smoothly with the chocolate, while overly warm chocolate can cause the mascarpone to break. Similarly, room temperature eggs and butter cream together more effectively than cold ingredients.
Baking Temperature Precision
These cookie cups bake at 325°F (163°C), which is lower than many cookie recipes. This gentler temperature prevents overbrowning while ensuring the cookies bake through completely. Higher temperatures can cause the edges to burn before the centers are properly set.
Frequently Asked Questions
Can I use natural peanut butter instead of processed?
While natural peanut butter can be used, it produces a more crumbly cookie that’s harder to shape into cups. If using natural peanut butter, ensure it’s at room temperature and thoroughly stirred. Processed peanut butters like Jif or Skippy provide the most reliable results for this recipe.
What if I don’t have mini muffin pans?
You can adapt this recipe for standard muffin pans using about 2 tablespoons of dough per cup. The baking time will need adjustment – start checking after 12 minutes and continue baking until the edges are lightly browned. This modification will yield approximately 20 larger cookie cups.
Why did my cookie cups crack or crumble?
Cracking usually indicates overbaking or insufficient chilling time. Make sure to chill the dough for the full hour and avoid baking beyond the point where edges are lightly browned. Additionally, ensure you’re measuring flour correctly by spooning it into the measuring cup and leveling off.
Can I make the filling without mascarpone?
While mascarpone provides the ideal texture and flavor, you can substitute full-fat cream cheese, though it will have a tangier taste. Alternatively, make a traditional chocolate ganache and let it cool to a spoonable consistency, about 2 hours at room temperature.
How do I prevent the chocolate from seizing when melting?
Seizing occurs when chocolate comes into contact with small amounts of water or overheats. Use completely dry utensils and bowls, melt in short intervals, and stir gently. Adding a small amount of oil helps create a smoother melting process.
Can I double this recipe?
Absolutely! This recipe doubles beautifully. Just ensure you have enough mini muffin pan space or plan to bake in batches. The dough can wait in the refrigerator while previous batches bake, actually improving in texture during the extra chilling time.
These peanut butter fudge puddles represent the perfect marriage of familiar comfort food flavors with sophisticated presentation. The combination of techniques – proper creaming, strategic chilling, gentle baking, and luxurious filling – creates treats that look and taste like they came from an upscale bakery. Whether you’re impressing guests or treating yourself, these cookie cups deliver an unforgettable experience that will have everyone asking for the recipe.


