
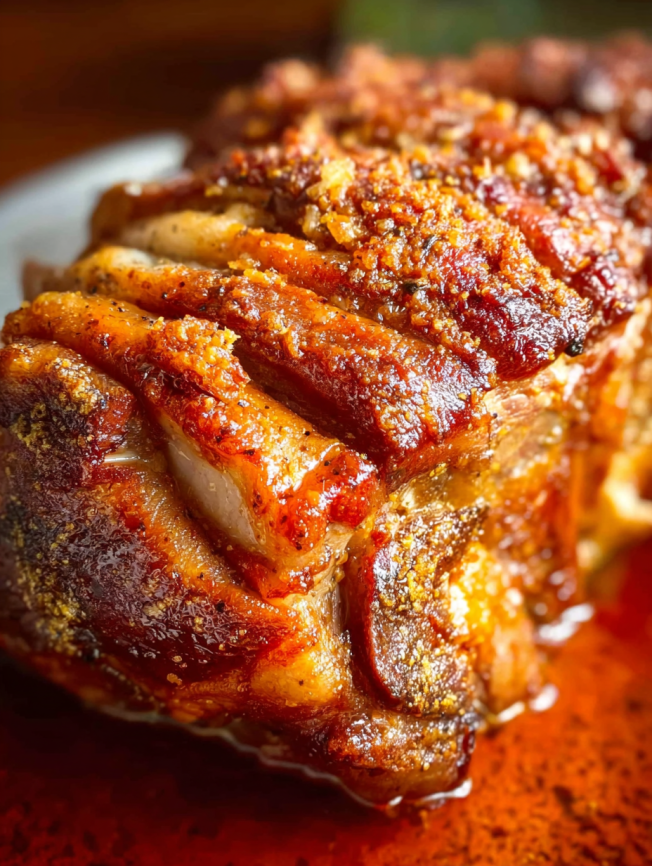
There’s something magical about the sound of crackling skin hitting your plate – that satisfying crunch that promises tender, juicy meat beneath. Growing up, Sunday dinners at my grandmother’s house always featured her legendary pork roast, complete with crackling so perfect it would shatter at the touch of a knife. After years of trial and error, I’ve finally mastered her technique, and today I’m sharing every secret with you.
This pork roast recipe transforms a simple cut of meat into a showstopping centerpiece that’ll have your family begging for seconds. Moreover, despite its impressive appearance, the actual hands-on time is surprisingly minimal – perfect for busy home cooks who want maximum impact with minimum fuss.
Why You’ll Love This Pork Roast Recipe
Foolproof Technique for Perfect Results
The beauty of this recipe lies in its simplicity. Unlike complicated roasts that require constant attention, this method uses a straightforward high-low-high temperature approach that virtually guarantees success. Furthermore, the ingredient list is refreshingly short – just four basic items that you likely already have in your pantry.
Restaurant-Quality Crackling at Home
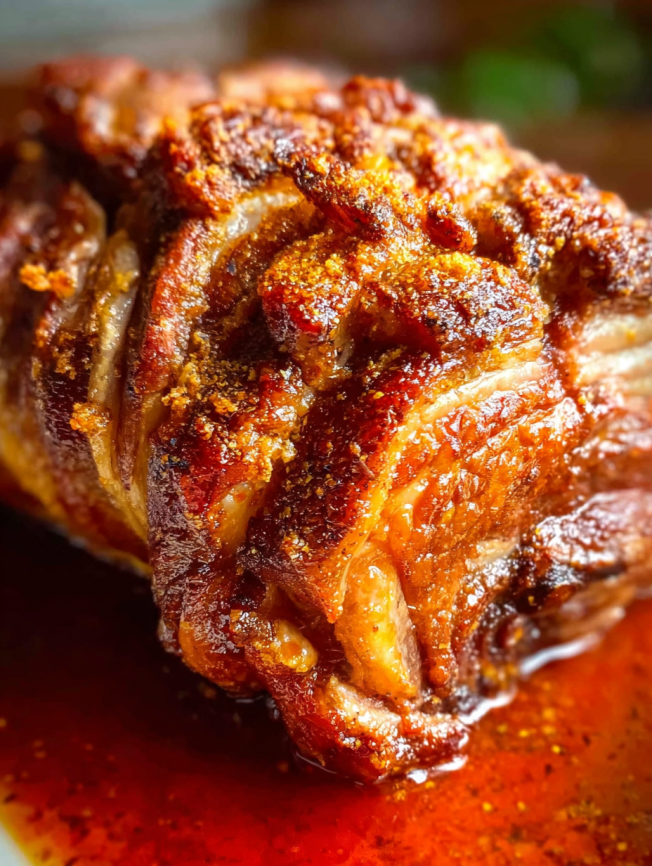
Achieving that perfect golden crackling might seem intimidating, but this recipe breaks down the process into manageable steps. The secret lies in proper preparation and patience – two elements that make all the difference between soggy skin and that coveted crispy exterior.
Versatile and Budget-Friendly
Pork shoulder is one of the most economical cuts available, yet when prepared correctly, it rivals any expensive restaurant dish. Additionally, this roast serves eight people generously, making it perfect for family gatherings or meal prep for the week ahead.
Essential Ingredients
Main Components
- 4 pounds boneless pork shoulder or butt, rind on – The star of the show; look for a cut with even fat distribution
- 2 teaspoons garlic powder – Adds aromatic depth without overpowering the pork’s natural flavor
- 1/4 cup olive oil – Creates the perfect base for seasoning and helps achieve golden crackling
- 1 teaspoon salt for meat, plus 1 tablespoon sea salt for rind – Essential for flavor development and crackling formation
Serving Suggestions
Complement your roast with classic sides like roasted vegetables, creamy mashed potatoes, or apple sauce. Similarly, a crisp green salad helps balance the richness of the pork, while roasted root vegetables add earthy sweetness to the plate.
Step-by-Step Instructions
Preparation Phase
Prep Time: 10 minutes (plus drying time) Cook Time: 2 hours 10 minutes Serves: 8 people
Begin by removing all plastic wrap from your pork shoulder. Next, lay the meat flat in a tray with the rind facing upward, ensuring it remains uncovered. Allow the pork to dry completely in the refrigerator for at least one hour, though overnight drying produces superior results.
Pre-Cooking Setup
Remove the pork from refrigeration 1-2 hours before cooking, allowing it to reach room temperature. Meanwhile, preheat your oven to 460°F (240°C) to ensure optimal initial searing.
Scoring and Seasoning
Using a sharp knife, carefully score the rind in 1-inch intervals, cutting through the skin but not into the meat. Subsequently, pat the skin completely dry with paper towels – any remaining moisture will prevent crackling formation.
Turn the pork skin-side down, then rub the garlic powder and one teaspoon of salt into the exposed meat. After that, drizzle olive oil over both the rind and meat, massaging it thoroughly with your fingers for even distribution. Finally, season the rind generously with sea salt, using approximately one tablespoon.
The Roasting Process
Transfer your seasoned pork to a roasting dish and roast for 50 minutes at 460°F until the rind begins crackling. Then, reduce the temperature to 350°F (180°C) and continue cooking for 1 to 1½ hours, depending on your preferred doneness level.
Final Crisping
Increase the oven temperature back to 440°F (230°C) for the final 10 minutes. This crucial step transforms the skin into magnificent golden crackling while ensuring the meat is perfectly cooked through.
Checking for Doneness
To verify proper cooking, pierce the thickest part of the meat with a knife – clear juices indicate doneness. Alternatively, use a meat thermometer to confirm an internal temperature of 160°F (71°C).
Resting Period
Remove the roast from the oven and allow it to rest for 15 minutes before carving. This resting period allows juices to redistribute throughout the meat, ensuring maximum tenderness.
Serving Suggestions
Classic Pairings
Serve your crackling pork roast alongside traditional accompaniments like fluffy mashed potatoes and seasonal vegetables. Additionally, apple sauce provides a delightful sweet contrast to the rich, savory meat.
Modern Twists
For contemporary presentation, try serving sliced pork over creamy polenta or alongside roasted Brussels sprouts with bacon. Furthermore, a tangy coleslaw adds freshness and crunch that complements the tender meat beautifully.
Recipe Variations
Herb-Crusted Version
Enhance the basic recipe by adding fresh rosemary and thyme to your seasoning mix. Simply combine chopped herbs with the garlic powder before rubbing into the meat for an aromatic upgrade.
Spiced Variation
Create an exciting flavor profile by incorporating paprika, cumin, and a pinch of cayenne pepper into your seasoning blend. This variation adds warmth and complexity without overwhelming the pork’s natural taste.
Asian-Inspired Twist
Transform the dish by using five-spice powder instead of garlic powder and finishing with a glaze made from soy sauce, honey, and rice vinegar during the final roasting stage.
Make-Ahead Tips
Advance Preparation
Score and season your pork up to 24 hours ahead, then store it covered in the refrigerator. This extended marinating time actually improves flavor development while saving precious time on cooking day.
Leftover Management
Properly stored leftover pork keeps for up to four days in the refrigerator. Moreover, it makes excellent sandwiches, salads, or can be incorporated into pasta dishes and grain bowls throughout the week.
Important Notes
Temperature Considerations
While 160°F is the safe minimum internal temperature, many prefer pork shoulder cooked to 195-205°F for maximum tenderness. At this higher temperature, the connective tissues break down completely, creating incredibly tender, pull-apart meat.
Crackling Troubleshooting
If your crackling isn’t as crispy as desired, remove the meat and place the skin under the broiler for 2-3 minutes. However, watch carefully to prevent burning, as the transition from perfect to charred happens quickly.
Storage Tips
Store leftover crackling separately from the meat to maintain its crispiness. If it loses crunch, simply reheat in a 400°F oven for 3-4 minutes to restore the texture.
Frequently Asked Questions
Can I use a different cut of pork?
While pork shoulder works best due to its fat content and connective tissue, you can substitute pork leg or even a bone-in shoulder. However, cooking times may vary, so always rely on internal temperature rather than time alone.
What if I can’t find pork with rind?
Ask your butcher to special order pork with skin, or look for it at specialty meat markets. Unfortunately, without the rind, you won’t achieve the signature crackling that makes this dish special.
My crackling isn’t crispy – what went wrong?
The most common culprits are insufficient drying time, inadequate scoring, or moisture during cooking. Next time, ensure the skin is completely dry before seasoning and avoid covering the roast during cooking.
Can I cook this in a slow cooker?
While you can cook pork shoulder in a slow cooker, you won’t achieve crackling using this method. The moist environment prevents the skin from crisping, so stick with oven roasting for best results.
How do I carve the roast properly?
Use a sharp carving knife to slice against the grain in ¼-inch thick pieces. Additionally, break the crackling into serving-sized pieces with your hands or kitchen shears for easier eating.
Is this recipe suitable for meal prep?
Absolutely! The cooked pork keeps well and actually improves in flavor after a day in the refrigerator. Simply reheat gently in the oven or use cold in salads and sandwiches.
Nutritional Information (per serving):
- Calories: 350
- Protein: 51g
- Fat: 14g
- Carbohydrates: 1g
- Sodium: 414mg
Prep Time: 10 minutes | Cook Time: 2 hours 10 minutes | Total Time: 2 hours 20 minutes | Serves: 8


