Introduction
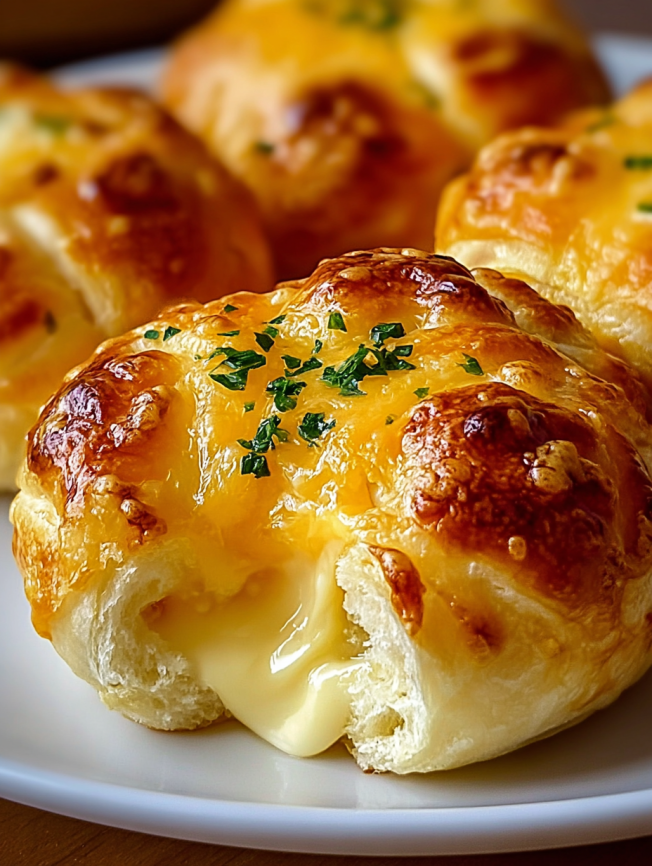
There’s something almost magical about watching a group of teenagers discover these cheese bombs for the first time. Last month, when my daughter brought friends over for a sleepover, I whipped up a batch of these golden beauties as a late-night snack. The kitchen fell silent except for the sounds of pure joy as they bit into the crispy exterior and encountered that glorious molten cheese center.
What started as a desperate attempt to use up leftover biscuit dough has become our family’s most requested appetizer. The genius lies in the simplicity – using store-bought Pillsbury biscuits as a shortcut to create something that tastes like it came from a gourmet bakery. The combination of buttery, flaky dough and stretchy mozzarella, all enhanced with aromatic garlic butter, creates an irresistible treat that disappears faster than I can make them.
Now, whenever we’re hosting game night, having friends over, or just craving the ultimate comfort food, these cheese bombs are my secret weapon for instant crowd-pleasing success.
Why You’ll Love This Recipe
Incredibly Quick and Easy
With just 25 minutes from start to finish, these cheese bombs satisfy those urgent comfort food cravings without requiring advanced baking skills. The Pillsbury biscuit shortcut eliminates the need for making dough from scratch, making this recipe accessible to even the most novice cooks.
Budget-Friendly Indulgence
Using affordable ingredients that you likely already have in your kitchen, these cheese bombs deliver gourmet flavor without the gourmet price tag. One tube of biscuits creates 16 generous portions, making them perfect for feeding crowds without breaking the bank.
Irresistible Texture Combination
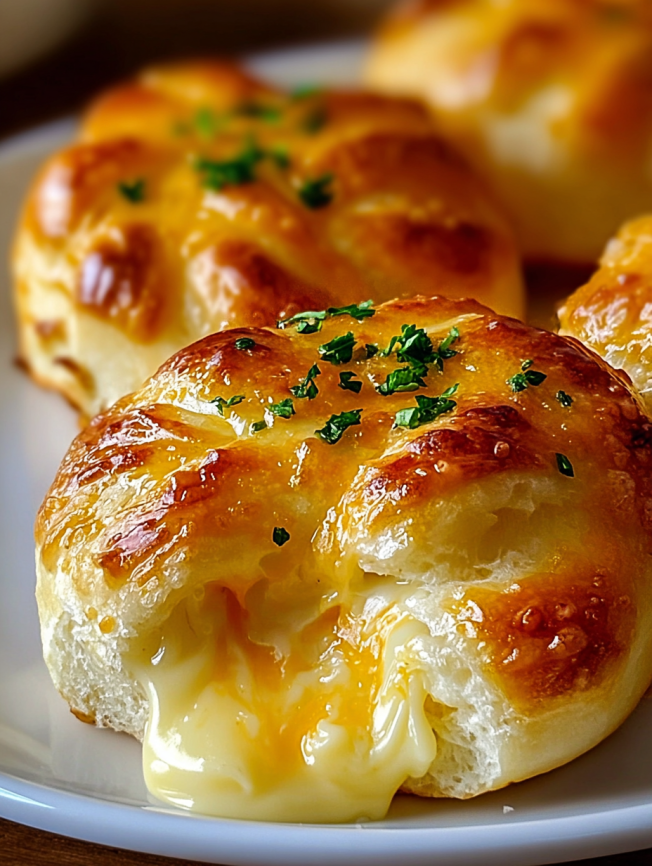
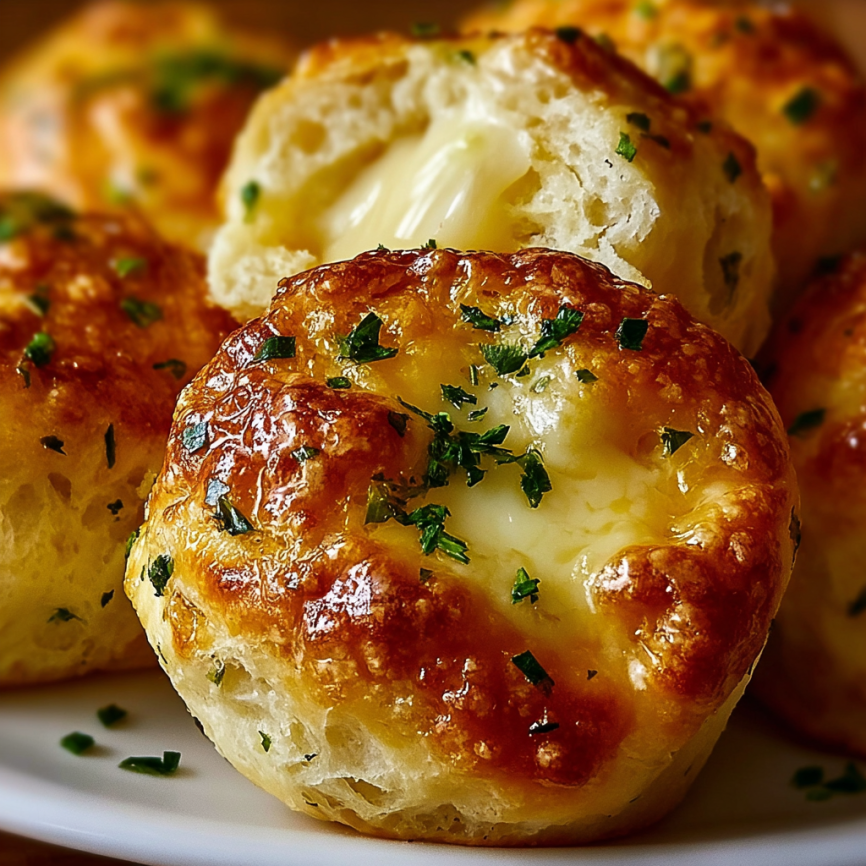
The contrast between the crispy, golden exterior and the gooey, melted cheese interior creates a textural experience that’s absolutely addictive. Each bite delivers that satisfying crunch followed by strings of molten mozzarella that make everyone smile.
Versatile Party Perfect
Whether you’re hosting a casual gathering, need a quick appetizer for unexpected guests, or want to elevate movie night at home, these cheese bombs adapt to any occasion while consistently delivering crowd-pleasing results.
Ingredients
Main Components
- 1 tube (16-count) Pillsbury Grands! biscuits
- 8 ounces mozzarella cheese, cut into 16 small cubes
- 4 tablespoons salted butter
- 1 teaspoon garlic powder
- 2 tablespoons fresh parsley, finely chopped
Optional Enhancements
- 2 tablespoons grated Parmesan cheese
- 1/2 teaspoon Italian seasoning
- Pinch of red pepper flakes
- Marinara sauce for dipping
Equipment Needed
- Large baking sheet
- Parchment paper
- Small microwave-safe bowl
- Pastry brush or spoon for butter application
Prep Time: 10 minutes
Cook Time: 15 minutes
Total Time: 25 minutes
Yield: 16 mini cheese bombs
Step-by-Step Instructions
Preparing Your Workspace
Start by preheating your oven to 375°F (190°C) and lining a large baking sheet with parchment paper. This prevents sticking and makes cleanup effortless. Having everything ready before you begin assembly ensures smooth, efficient preparation.
Preparing the Biscuit Dough
Remove the biscuits from the tube and separate them carefully on a clean work surface. Using a sharp knife, cut each biscuit in half horizontally, creating 32 pieces total. However, you’ll only use 16 pieces for this recipe, so save the extras for another use or double the cheese for more bombs.
Cheese Preparation Strategy
Cut your mozzarella cheese into 16 uniform cubes, approximately 1/2-inch in size. Consistency in size ensures even melting and prevents some bombs from being overstuffed while others lack enough cheese. Keep the cheese cubes cold until you’re ready to assemble, as this makes handling easier.
Assembly Technique
Take one piece of biscuit dough and gently flatten it with your palm or fingers, creating a small disc about 3 inches in diameter. Place one cheese cube in the center, then carefully wrap the dough around the cheese, pinching the seams tightly to seal completely.
Roll the sealed dough ball between your palms to create a smooth, round shape. This step is crucial – any gaps or loose seams will allow cheese to leak out during baking, so take your time ensuring each bomb is properly sealed.
Baking Setup and Process
Place each cheese bomb seam-side down on your prepared baking sheet, spacing them about 2 inches apart to allow for expansion during baking. The seam-side-down placement helps maintain the seal and creates a more attractive presentation.
Bake for 12-15 minutes, or until the tops are golden brown and the dough appears fully cooked. The bombs should have puffed up slightly and developed a beautiful golden color that indicates doneness.
Creating the Garlic Butter Finish
While the cheese bombs bake, prepare your garlic butter mixture. In a microwave-safe bowl, melt the butter completely, then stir in the garlic powder until well combined. If using Parmesan cheese, add it now and mix thoroughly.
The moment the cheese bombs come out of the oven, immediately brush them generously with the garlic butter mixture while they’re still hot. This allows the butter to absorb into the crispy exterior, creating layers of flavor.

Serving Suggestions
Immediate Service Strategy
These cheese bombs are at their absolute best when served immediately while the cheese is still molten and stretchy. Arrange them on a warm serving platter and provide small napkins, as they can be wonderfully messy to eat.
Dipping Sauce Pairings
While delicious on their own, these bombs pair beautifully with warm marinara sauce, ranch dressing, or garlic aioli. The tangy contrast of marinara particularly complements the rich, cheesy interior and buttery exterior.
Party Presentation Ideas
For entertaining, consider serving these in small paper boats or on individual appetizer plates. Garnish the serving platter with fresh herbs and provide small spoons for any dipping sauces to create an elevated presentation.
Menu Integration
These cheese bombs work wonderfully as part of a larger appetizer spread, paired with items like stuffed mushrooms, bacon-wrapped scallops, or a charcuterie board. They also make an excellent side dish for pasta dinners or hearty soups.
Recipe Variations
Cheese Alternatives
While mozzarella provides the classic stretchy texture, experiment with other cheeses for different flavor profiles. Sharp cheddar creates a more pronounced taste, while pepper jack adds a spicy kick. Cream cheese mixed with herbs offers a completely different but equally delicious experience.
Flavor Enhancement Options
Transform the basic recipe by mixing herbs directly into the melted butter. Try combinations like rosemary and thyme for an earthy flavor, or basil and oregano for Italian-inspired bombs. A pinch of smoked paprika adds depth and visual appeal.
Stuffing Variations
Beyond cheese, consider adding small pieces of cooked bacon, diced jalapeños, or even a small dollop of cream cheese mixed with chives. Just remember to keep additions small to prevent overstuffing and breaking the dough seal.
Seasonal Adaptations
During holidays, create themed versions by adding cranberries and brie for Thanksgiving, or incorporate fresh herbs from your garden during summer months. Halloween versions can include orange cheddar for festive color.
Make-Ahead Tips
Preparation Strategies
These cheese bombs can be assembled up to 4 hours ahead and stored covered in the refrigerator before baking. This advance preparation makes them perfect for entertaining, as you can focus on other dishes while these wait their turn in the oven.
Freezing Instructions
For longer storage, assemble the unbaked cheese bombs and freeze them on a baking sheet until solid, then transfer to freezer bags. They can be baked directly from frozen, adding 2-3 minutes to the cooking time.
Reheating Guidelines
While best served fresh, leftover cheese bombs can be reheated in a 350°F oven for 5-7 minutes to restore crispiness. Avoid microwaving, as this makes the exterior soggy and creates unevenly heated cheese that can burn your mouth.
Component Preparation
The garlic butter mixture can be prepared several days ahead and stored in the refrigerator. Simply reheat gently before brushing on the hot cheese bombs for the same fresh flavor impact.
Notes
Biscuit Selection Tips
Pillsbury Grands! biscuits work best for this recipe because their size and texture provide the ideal dough-to-cheese ratio. Regular-sized biscuits can work but may be more challenging to seal properly around the cheese cubes.
Sealing Success Secrets
The key to preventing cheese leakage is proper sealing technique. Make sure your hands are clean and slightly damp when working with the dough, as this helps the edges stick together more effectively during the pinching process.
Temperature Considerations
Allow the biscuits to come to room temperature for about 10 minutes before assembly if they’ve been refrigerated. This makes the dough more pliable and easier to work with, reducing the risk of tearing during wrapping.
Serving Temperature Awareness
Be cautious when serving these immediately after baking, as the melted cheese interior can be extremely hot. Consider letting them cool for 2-3 minutes to prevent burns while still maintaining that desirable stretchy cheese effect.

Frequently Asked Questions
Can I use different types of biscuits?
While Pillsbury Grands! work best, you can substitute with other refrigerated biscuit brands or even crescent roll dough. However, adjust your expectations for texture and cooking time, as different doughs behave differently during baking.
What’s the best way to cut the cheese?
Use a sharp knife to cut cold mozzarella into uniform cubes. If the cheese is too soft and sticky, place it in the freezer for 10-15 minutes to firm up before cutting. String cheese can also be broken into appropriate-sized segments.
How do I prevent the cheese from leaking out?
Proper sealing is crucial – make sure to pinch the dough edges firmly together and roll the ball to eliminate any visible seams. Additionally, don’t overstuff with cheese, as this puts too much pressure on the dough seal.
Can I make these without garlic powder?
Absolutely! Fresh minced garlic (1-2 cloves) can replace garlic powder, though the flavor will be more intense. You can also omit garlic entirely and use herb butter, or simply brush with plain melted butter and season with salt.
What if I don’t have parchment paper?
While parchment paper prevents sticking and makes cleanup easier, you can lightly grease your baking sheet with cooking spray or butter as an alternative. Just watch the bottoms carefully to prevent over-browning.
How do I know when they’re fully cooked?
The cheese bombs should be golden brown on all sides and sound hollow when tapped gently. If you’re unsure, use an instant-read thermometer – the internal temperature should reach 190°F (88°C) to ensure the biscuit dough is fully cooked.


