There’s something undeniably sophisticated about beautifully piped cookies arranged on a dessert tray. These chocolate butter cookies represent the perfect marriage of elegant presentation and incredible flavor – they’re what I reach for when I want to impress guests without spending hours in the kitchen. The first time I made these cookies, I was amazed by how professional they looked despite using just nine simple ingredients.
What sets these cookies apart is their unique texture and stunning appearance. Unlike traditional drop cookies, these are piped through a pastry bag to create gorgeous swirls and rosettes that look like they came from a French patisserie. The absence of leavening agents gives them a tender, shortbread-like crumb that literally melts in your mouth, while the rich chocolate flavor provides depth without being overwhelming.
Why These Piped Cookies Will Become Your Signature Treat
Bakery-Quality Appearance at Home
The piping technique transforms simple cookie dough into elegant, professional-looking treats that rival any high-end bakery. Each cookie emerges from the oven with perfectly defined ridges and swirls that maintain their shape beautifully. Moreover, the visual impact these cookies create makes them perfect for special occasions, gift-giving, or anytime you want to elevate your dessert presentation.
Incredibly Rich, Buttery Flavor
The combination of butter, chocolate, and a hint of espresso creates a sophisticated flavor profile that appeals to adult palates. The espresso powder doesn’t make these taste like coffee – instead, it enhances the chocolate notes and adds complexity. Additionally, the shortbread-like texture allows the rich flavors to linger on your palate longer than traditional cookies.
Surprisingly Simple Technique
While these cookies look complicated, the piping technique is actually quite forgiving and becomes easier with practice. The dough consistency is designed to hold its shape well, making it perfect for beginners trying piping for the first time. Furthermore, the recipe provides clear guidance on achieving the right consistency, taking the guesswork out of the process.
Versatile Finishing Options
These cookies serve as a perfect canvas for creative finishing touches. Whether you prefer them plain, dipped in chocolate, topped with cherries, or rolled in sprinkles, they adapt beautifully to various presentations and flavor combinations.
Essential Ingredients for Cookie Success
Core Cookie Components
- 1 cup (226g) unsalted butter, softened to room temperature
- ¾ cup (150g) granulated sugar
- 1 large egg, at room temperature
- 1½ teaspoons pure vanilla extract
- 2 cups (250g) all-purpose flour (spooned and leveled)
- ⅓ cup (27g) unsweetened cocoa powder
- ¼ teaspoon salt
- 2 tablespoons warm milk
- 1 teaspoon espresso powder
Optional Finishing Touches
- 4 ounces (113g) finely chopped semi-sweet chocolate
- Maraschino cherries
- Decorative sprinkles or coarse sugar
Ingredient Quality Tips
Room temperature butter is crucial for proper creaming and smooth piping consistency. The espresso powder should be completely dissolved in warm milk to prevent grittiness. High-quality cocoa powder makes a noticeable difference in the final chocolate flavor, so choose natural or Dutch-process varieties from reputable brands.
Step-by-Step Piping Instructions
Initial Setup and Preparation
Step 1: Before beginning, read through the entire recipe and clear space in your refrigerator for a baking sheet. This chilling step is non-negotiable – without it, your beautiful piped shapes will spread into unrecognizable blobs during baking.
Step 2: Line 2-3 large baking sheets with parchment paper or silicone baking mats. Alternatively, you can use ungreased bare pans, but avoid greasing them as this can cause excessive spreading.
Creating the Perfect Dough
Step 3: Using a large bowl and either a handheld or stand mixer fitted with a paddle attachment, beat the softened butter on medium-high speed until very soft and creamy, approximately 2 minutes. The butter should be noticeably lighter in color and increased in volume.
Step 4: Add the granulated sugar to the creamed butter and continue beating on medium-high speed until the mixture is smooth and well-combined, another 2 minutes. Next, incorporate the egg and vanilla extract, beating on high speed for about 1 minute until fully combined. Remember to scrape down the bowl sides and bottom as needed.
Step 5: Reduce mixer speed to low and gradually add the flour, cocoa powder, and salt. Once incorporated, increase speed to high and beat until the mixture is completely combined and uniform in color.
Achieving Pipeable Consistency
Step 6: Warm the milk to approximately 150°F (66°C) – about 20 seconds in the microwave works perfectly. Dissolve the espresso powder completely in the warm milk, then add this mixture to the cookie dough. Beat on medium speed until incorporated. The goal is a dough that’s creamy and pipeable while still maintaining enough structure to hold decorative shapes.
The Piping Process
Step 7: Fit your piping bag with a large decorative tip (such as Ateco 849, Wilton 8B, or similar). Start by adding just a small amount of dough to test the consistency. Pipe a 1-2 inch test swirl or line on your prepared baking sheet. If the dough is too thick to pipe smoothly, return it to the mixing bowl and add another ½ tablespoon of milk.
Step 8: Once you’ve achieved the right consistency, continue piping the remaining dough into 1-2 inch swirls or lines, spacing them about 3 inches apart. Don’t worry if the first few cookies seem difficult to pipe – the dough becomes more manageable as you work with it and it warms slightly from handling.
Essential Chilling Step
Step 9: Transfer the baking sheet with piped cookies to the refrigerator and chill for 20-30 minutes. This step is absolutely critical for maintaining the decorative shapes during baking.
Baking to Perfection
Step 10: While cookies chill, preheat your oven to 350°F (177°C). Bake the chilled cookies for 12-15 minutes, or until the edges appear set. Smaller cookies will require closer to 12 minutes, while larger ones may need the full 15 minutes.
Step 11: Allow cookies to cool on the baking sheet for 5 minutes before carefully transferring to a wire rack for complete cooling.

Creative Serving and Presentation Ideas
Elegant Tea Party Style
Arrange these cookies on tiered serving stands alongside delicate tea cups for an sophisticated afternoon tea presentation. The piped shapes create visual interest while the rich chocolate flavor pairs beautifully with both black teas and lighter herbal varieties.
Gift Box Collections
These cookies are ideal for homemade gift boxes due to their professional appearance and excellent keeping qualities. Layer them between parchment paper in decorative tins or clear containers tied with ribbons for impressive presents that show you care.
Dessert Table Centerpieces
Use these piped cookies as stunning focal points on dessert tables. Their uniform shape and elegant appearance make them perfect for weddings, parties, or holiday gatherings where presentation matters as much as taste.
Exciting Flavor and Decoration Variations
Chocolate-Dipped Elegance
Transform these cookies into show-stopping treats by dipping them in melted chocolate. Use high-quality baking chocolate rather than chips for the smoothest results. Semi-sweet, dark, milk, or white chocolate all work beautifully, and you can even create elegant patterns by drizzling contrasting chocolate colors over the dipped cookies.
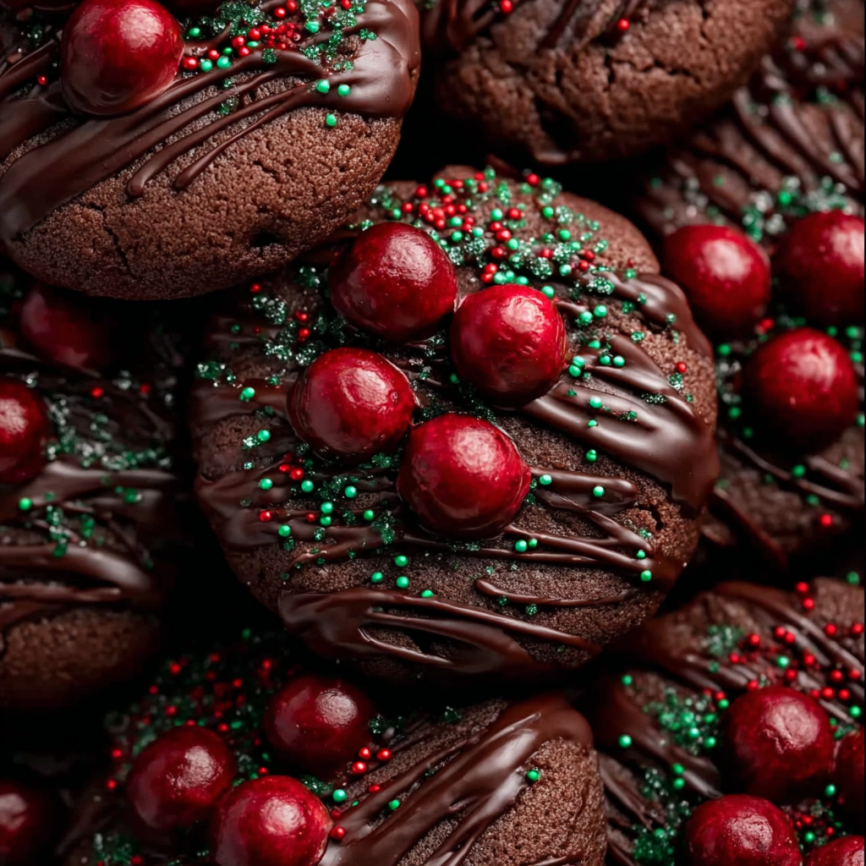
Cherry-Topped Classics
Place a maraschino cherry in the center of each piped swirl before chilling for a classic, retro-inspired look. The bright red color creates beautiful contrast against the chocolate cookie, while the sweet cherry flavor complements the rich chocolate perfectly.
Festive Sprinkle Variations
Roll the piped cookies in coarse sugar or decorative sprinkles before chilling to create festive versions perfect for holidays or celebrations. Choose colors that match your event theme for customized treats that coordinate with your décor.
Make-Ahead Strategies for Busy Bakers
Advanced Preparation Options
These cookies are exceptionally well-suited for advance preparation. Pipe the cookies and chill them on baking sheets for up to one day before baking, covering with plastic wrap if chilling longer than 30 minutes. This flexibility allows you to spread the work over multiple days when preparing for large events.
Freezer-Friendly Solutions
Both unbaked and baked cookies freeze excellently for up to three months. Freeze unbaked piped cookies on baking sheets, then transfer to freezer bags once solid. Bake directly from frozen, adding just an extra minute or two to the baking time. Alternatively, freeze completely cooled baked cookies in airtight containers.
Storage Optimization
Cookies without chocolate or cherries maintain freshness at room temperature for up to one week in airtight containers. Those with chocolate toppings should be refrigerated and will stay fresh for up to one week, though they’re best consumed within four days for optimal texture.
Professional Tips for Piping Success
Equipment Recommendations
Invest in quality piping tips for the best results – large star tips like Ateco 849 or Wilton 8B create the most impressive ridged swirls. If you don’t have proper piping equipment, you can create a makeshift piping bag by cutting a ½-inch corner off a heavy plastic bag, though the results won’t be quite as refined.
Dough Consistency Management
The key to successful piping lies in achieving the perfect dough consistency. Too thick, and the dough won’t pipe smoothly; too thin, and the shapes will spread excessively during baking. Add milk gradually and test frequently to find the sweet spot where the dough pipes easily but holds its shape.
Temperature Control Importance
Room temperature ingredients cream together more effectively, creating smoother dough. However, if your kitchen is very warm, you may need to chill the dough briefly before piping to prevent it from becoming too soft to hold decorative shapes.
Important Notes for Best Results
Chilling Requirements
Never skip the chilling step after piping – this is what allows the cookies to maintain their beautiful shapes during baking. The cold dough holds its form better as it heats up in the oven, resulting in cookies that look as good as they taste.
Espresso Powder Benefits
The espresso powder serves as a flavor enhancer rather than adding coffee taste. It deepens the chocolate notes and adds complexity to the overall flavor profile. If unavailable, instant coffee powder works as a substitute, but ensure it’s completely dissolved in the warm milk.
Piping Technique Troubleshooting
Don’t be discouraged if your first few cookies don’t pipe perfectly – this technique improves quickly with practice. The dough becomes more manageable as you work with it, and even slightly imperfect shapes look charming and homemade rather than mass-produced.

Frequently Asked Questions
Q: Can I make these cookies without a piping bag? A: While piping bags create the most professional results, you can use a cookie press if you have one, or create a makeshift piping bag by cutting the corner off a heavy plastic bag. However, avoid trying to roll and cut this dough as it won’t hold shapes well due to its soft, buttery composition.
Q: Why do my cookies spread too much during baking? A: Excessive spreading usually results from skipping the chilling step or adding too much milk to the dough. Always chill piped cookies for at least 20-30 minutes before baking, and add milk gradually until you achieve just enough moisture for smooth piping.
Q: Can I substitute different types of chocolate for dipping? A: Absolutely! Semi-sweet, dark, milk, or white chocolate all work well for dipping. Use high-quality baking chocolate bars rather than chips for the smoothest melting. If the melted chocolate seems too thick for dipping, stir in 1 teaspoon of vegetable oil to thin it slightly.
Q: How can I tell when the cookies are properly baked? A: Look for edges that appear set and no longer look wet or shiny. The centers may still seem slightly soft, but they’ll continue cooking from residual heat as they cool on the pan. Overbaking will make them hard rather than tender.
Q: What’s the best way to store chocolate-dipped cookies? A: Allow chocolate-dipped cookies to set completely at room temperature for about 1 hour before storing. Layer them between parchment paper in airtight containers and refrigerate for up to one week. Bring to room temperature before serving for the best texture and flavor.
Q: Can I make these cookies ahead for a party? A: These cookies are perfect for advance preparation! Bake them up to one week ahead and store in airtight containers. For chocolate-dipped versions, dip them 1-2 days before serving to ensure the chocolate stays fresh and glossy. The flavors actually improve slightly after the first day as they meld together.


