Prep Time: 1 hour, 15 minutes
Cook Time: 30 minutes
Total Time: 2 hours
Yield: 6-8 servings
A Summer Romance on Your Plate
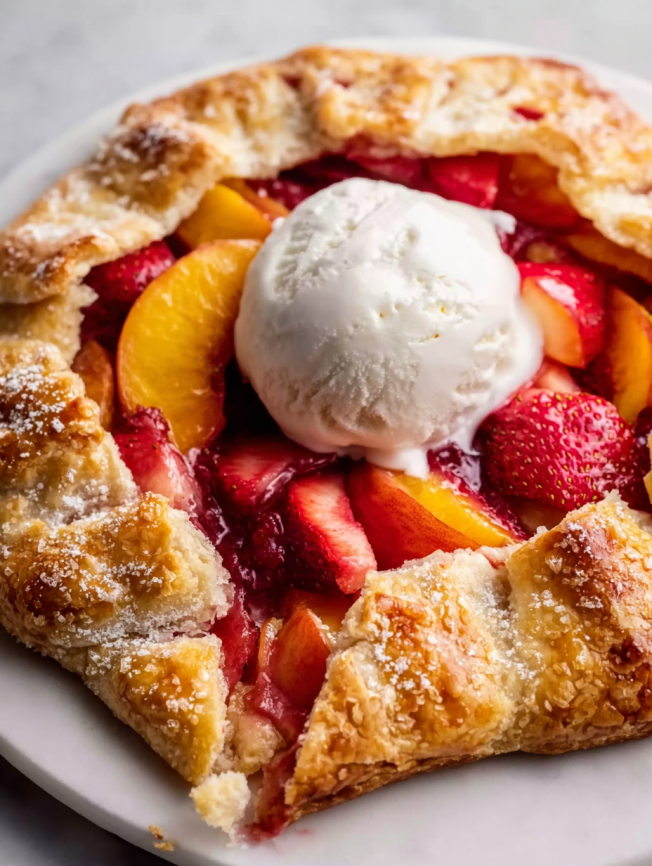
There’s something magical about the first bite of a rustic galette that transports me back to lazy summer afternoons spent at my grandmother’s kitchen table. She would roll out buttery pastry with practiced hands, never worrying about perfect edges or symmetrical folds. Instead, she embraced the rustic charm that makes galettes so irresistibly homey. This strawberry peach galette captures that same spirit – combining the sweet juiciness of peak summer fruits with a gloriously flaky, golden-brown all-butter crust that crackles with each forkful.
Unlike traditional pies that require precise crimping and perfect presentation, galettes celebrate imperfection beautifully. The free-form nature means every fold tells a story, and the exposed fruit creates an artistic canvas of vibrant colors that’s simply stunning on any dessert table.
Why You’ll Fall in Love with This Recipe
Perfect for Beginners
This galette proves that stunning desserts don’t require advanced pastry skills. The forgiving nature of the rustic style means slight imperfections only add to its charm. Additionally, the simple ingredient list uses pantry staples you likely already have on hand.
Celebrates Seasonal Produce
Summer’s bounty shines brightest in this recipe, where ripe peaches and strawberries take center stage. Furthermore, the minimal seasoning allows the natural fruit flavors to truly sparkle without overwhelming sweetness.
Make-Ahead Friendly
Busy schedules become manageable when you can prepare components ahead of time. Both the dough and filling can be made up to three days in advance, making this an ideal dessert for entertaining or special occasions.
Essential Ingredients
For the Buttery Crust
- 1½ cups (188g) all-purpose flour (spooned & leveled), plus extra for dusting
- 2 tablespoons (25g) granulated sugar
- ¼ teaspoon salt
- ½ cup (8 tablespoons; 113g) cold unsalted butter, cubed
- ¼ cup (60ml) ice-cold water, plus more as needed
For the Egg Wash & Finishing
- 1 large egg beaten with 1 tablespoon (15ml) milk
- Coarse sugar (optional, for sprinkling)
For the Luscious Filling
- 1½ cups (about 230g) fresh peaches, peeled and sliced ¼-inch thick (approximately 2 medium peaches)
- 1½ cups (about 230g) fresh strawberries, sliced
- 3 tablespoons (38g) granulated sugar
- 2 teaspoons cornstarch
- 1 teaspoon pure vanilla extract
Serving Suggestions
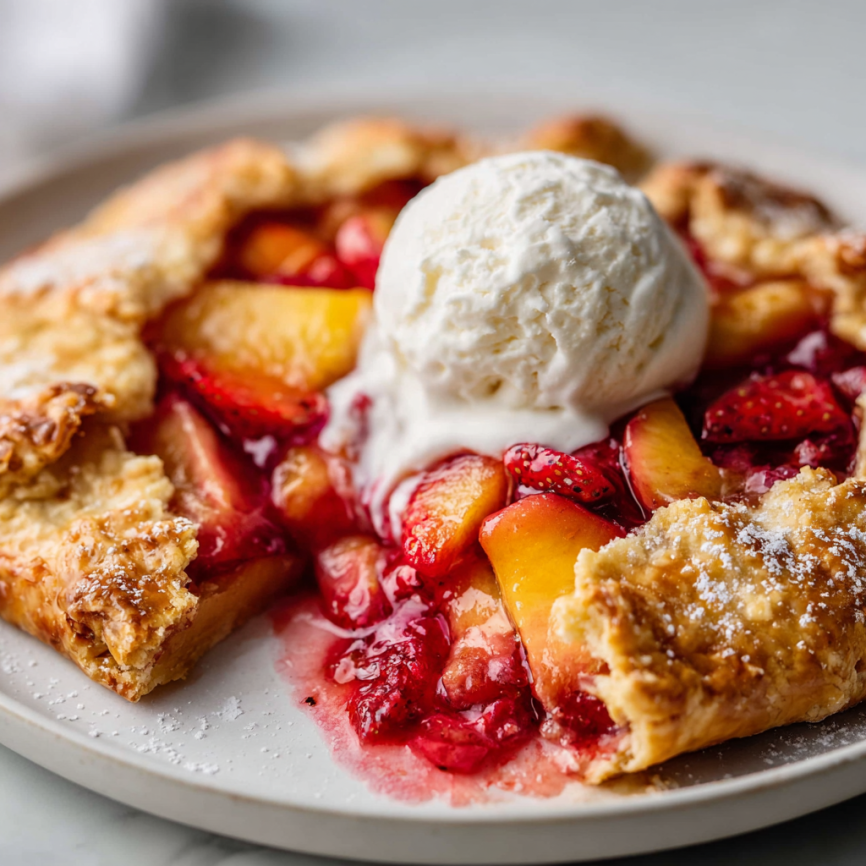
Vanilla ice cream creates the perfect temperature contrast against the warm galette. Alternatively, try dollops of fresh whipped cream, a drizzle of heavy cream, or even a scoop of peach sorbet for an extra fruity experience.
Step-by-Step Instructions
Creating the Perfect Crust
Step 1: Combine flour, sugar, and salt in a medium bowl, whisking until evenly distributed. Using a pastry cutter or two forks, cut the cold butter into the mixture until it resembles coarse, pea-sized crumbs. This texture ensures a flaky crust.
Step 2: Gradually add ice water while stirring gently until the flour appears moistened. If the mixture seems too dry, incorporate one additional tablespoon of water. Next, turn the dough onto a lightly floured surface and gently work it into a cohesive ball using your hands.
Step 3: Flatten the dough into a thick disk, then wrap tightly in plastic wrap, parchment paper, or aluminum foil. Refrigerate for at least one hour, though you can store it up to three days (or freeze for up to three months).
Preparing the Fruit Filling
Step 4: While the dough chills, gently combine all filling ingredients in a medium bowl. Toss until the fruit is evenly coated with sugar, cornstarch, and vanilla. Cover and refrigerate until ready to assemble.
Assembly and Shaping
Step 5: Line a large baking sheet with parchment paper or a silicone baking mat. Ensure your refrigerator has adequate space for the assembled galette, as proper chilling is crucial for maintaining shape.
Step 6: On a lightly floured surface, roll the chilled dough into a 12-inch circle. Don’t worry about achieving perfect symmetry – rustic charm is the goal! If desired, trim the edges for a cleaner appearance, then carefully transfer the dough to your prepared baking sheet.
Step 7: Spoon the fruit mixture (discarding any accumulated juices) into the center, leaving a 2-3 inch border around the edges. Gently fold the dough edges over the filling, creating pleated overlaps as needed. Press the edges lightly to seal, then brush the crust generously with egg wash and sprinkle with coarse sugar if using.
Final Chilling and Baking
Step 8: Refrigerate the assembled galette for 15-20 minutes while the oven preheats (or up to 8 hours if covered). This chilling step prevents the galette from losing its shape during baking.
Step 9: Preheat your oven to 425°F (218°C).
Step 10: Bake until the filling bubbles enthusiastically and the crust achieves a beautiful golden-brown color, approximately 30-35 minutes. Cool on the baking sheet for 10 minutes before slicing to allow the filling to set slightly.
Irresistible Serving Ideas
Temperature Matters
Serve this galette slightly warm for the ultimate comfort dessert experience. The contrast between the warm, flaky crust and cool vanilla ice cream creates textural magic that’s hard to resist.
Beverage Pairings
Coffee lovers will appreciate how the buttery crust complements a rich espresso or cappuccino. For evening entertaining, consider pairing with a light dessert wine or champagne that won’t overpower the delicate fruit flavors.
Presentation Tips
Dust individual slices with powdered sugar for an elegant finish. Alternatively, garnish with fresh mint leaves or a few whole berries for added visual appeal and aromatic freshness.
Creative Recipe Variations
Berry Medley Version
Replace peaches with an equal amount of mixed berries – blueberries, blackberries, and raspberries create a stunning color palette. Increase cornstarch to 3 teaspoons to handle the extra berry juices.
Spiced Autumn Twist
Transform this into a fall dessert by substituting pears and apples for the summer fruits. Add ½ teaspoon cinnamon and ¼ teaspoon nutmeg to the filling for warming spice notes.
Citrus Brightened Version
Enhance the fruit flavors by adding 1 tablespoon fresh lemon juice and 1 teaspoon lemon zest to the filling mixture. This addition brightens the overall taste and helps prevent browning.
Gluten-Free Adaptation
Substitute the all-purpose flour with a 1:1 gluten-free flour blend. The texture may be slightly different, but the results remain deliciously satisfying.
Smart Make-Ahead Tips
Dough Preparation
The pastry dough actually improves with time, as the flour fully hydrates and the butter firms up properly. Make it up to three days ahead and store covered in the refrigerator. For longer storage, wrap the disk tightly and freeze for up to three months.
Filling Components
Prepare the fruit mixture early in the day and refrigerate until assembly time. However, don’t let it sit longer than 8 hours, as the fruits will release too much liquid and make the bottom crust soggy.
Complete Assembly
Once shaped, the galette can be refrigerated up to 8 hours before baking. Cover lightly with plastic wrap after the first hour to prevent the surface from drying out.
Freezing Instructions
Freeze the completely assembled but unbaked galette on the baking sheet until solid, then wrap carefully and store up to one month. Bake directly from frozen, adding 5-10 extra minutes to the cooking time.
Important Recipe Notes
Butter Temperature Success
Extremely cold butter creates the flakiest crust texture. Place cubed butter in the freezer for 15 minutes before incorporating it into the flour mixture. This ensures the butter doesn’t melt during mixing, which would result in a tough crust.
Fruit Selection and Preparation
Fresh, ripe fruit produces the best results, though frozen fruit works in a pinch. If using frozen strawberries and peaches, thaw completely first, then pat dry with paper towels to remove excess moisture. This prevents a soggy bottom crust.
Equipment Essentials
A pastry cutter makes quick work of cutting butter into flour, though two knives or a food processor can substitute. Additionally, a silicone baking mat prevents sticking better than parchment paper and can go straight from refrigerator to oven.
Chilling Strategy
If your refrigerator can’t accommodate the full baking sheet, assemble the galette on parchment paper, then transfer the entire parchment to a refrigerator shelf. After chilling, carefully move everything back to the baking sheet for oven time.
Storage Guidelines
Leftover galette keeps covered in the refrigerator for up to four days. Reheat individual slices in a 350°F oven for 5-8 minutes to restore the crust’s crispness, rather than using the microwave which makes pastry soggy.
Frequently Asked Questions
Q: Can I use frozen fruit instead of fresh? A: Absolutely! Thaw frozen peaches and strawberries completely, then pat them dry with paper towels before mixing with the other filling ingredients. The extra moisture in frozen fruit can make the galette soggy if not properly drained.
Q: My dough seems too crumbly to roll out. What went wrong? A: This usually means the dough needs a bit more moisture. Add ice water one tablespoon at a time until the dough holds together when gently pressed. Remember, the dough should feel slightly tacky but not sticky.
Q: How do I know when the galette is perfectly baked? A: Look for a golden-brown crust and bubbling fruit filling. The bottom should be firm and lightly browned when you lift the galette with a spatula. If the edges brown too quickly, tent them with aluminum foil.
Q: Can I make individual mini galettes instead? A: Definitely! Divide the dough into 6-8 portions and roll each into 6-inch circles. Reduce the filling per galette accordingly and bake for 15-20 minutes. These make charming individual desserts for dinner parties.
Q: What’s the best way to prevent a soggy bottom crust? A: Several techniques help: use very cold butter in the dough, discard excess fruit juices before filling, bake on the lowest oven rack, and avoid overfilling. Also, serve the galette within a few hours of baking for optimal texture.
Q: Can I substitute other fruits in this recipe? A: Yes! Try combinations like apple-cranberry, pear-blueberry, or plum-raspberry. Adjust the sugar based on your fruit’s natural sweetness, and consider the moisture content when determining cornstarch amounts.
Q: How far ahead can I make this for a dinner party? A: For best results, bake the galette the day you plan to serve it. However, you can prepare the dough up to three days ahead and the filling up to one day ahead. Assemble and bake on serving day for optimal texture and flavor.


