I still remember the afternoon I created these Salted Caramel Apple Crisp Bars quite by accident. I’d planned to make a traditional apple crisp for a potluck, but then I spotted a jar of salted caramel sauce in my pantry and had a sudden inspiration. What if I could transform that beloved fall dessert into portable, shareable bars? As the bars baked and my kitchen filled with the intoxicating scent of cinnamon-spiced apples and buttery oats, I knew I was onto something special.
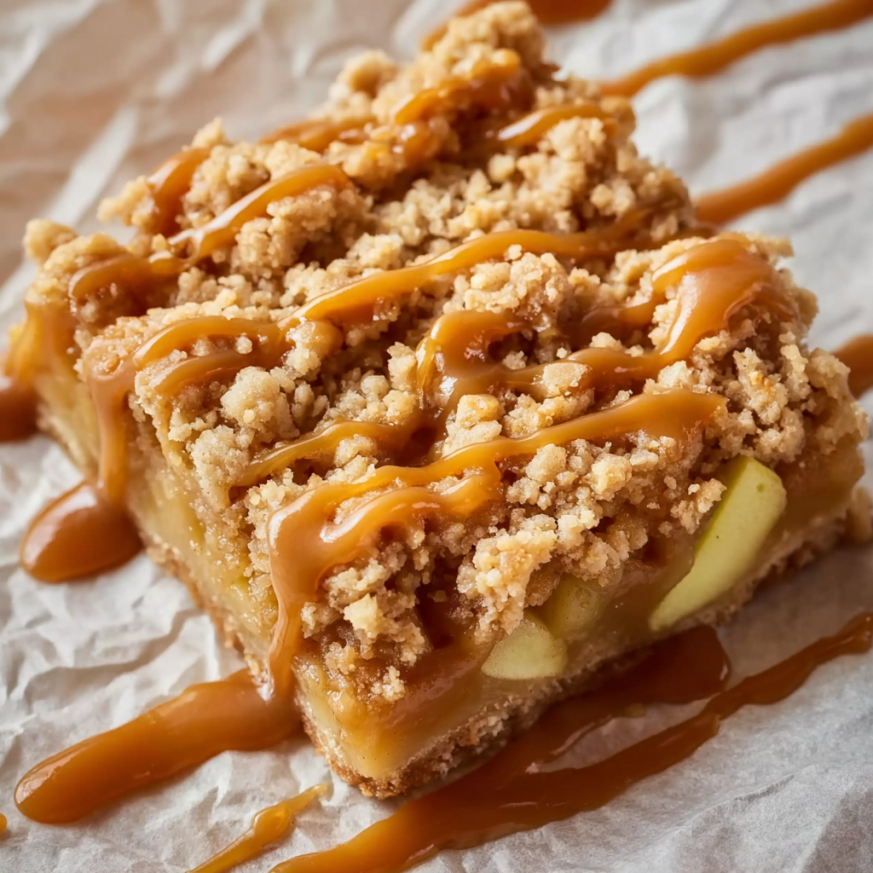
When I finally sliced into that first pan and saw the layers—the golden, crispy topping, the tender apple filling glistening with caramel, and the buttery crust holding it all together—I couldn’t wait to taste it. That first bite was pure magic. The combination of sweet-tart apples, rich salted caramel, and crunchy oat topping created a perfect harmony of flavors and textures. Since that day, these bars have become my most requested fall dessert, beloved by everyone from my picky nephew to my sophisticated foodie friends.
Why You’ll Love This Recipe
It captures all the best parts of apple crisp in a portable form. Traditional apple crisp is delicious but difficult to transport and serve at gatherings. These bars solve that problem beautifully while delivering all the same comforting flavors. Moreover, they’re much easier to share and portion control becomes effortless.
The salted caramel elevates everything. While apple crisp is wonderful on its own, the addition of salted caramel sauce takes it to an entirely new level. The caramel adds richness and depth, while the salt balances the sweetness and enhances all the other flavors. It’s that perfect sweet-and-salty combination that keeps you reaching for just one more piece.
They’re surprisingly simple to make. Despite looking and tasting impressive, these bars come together with basic ingredients and straightforward techniques. There’s no complicated pastry work or finicky steps—just mix, layer, and bake. Even novice bakers can achieve bakery-worthy results.
The texture combination is absolutely perfect. Each bite offers a delightful contrast between the buttery, crispy oat topping, the tender, juicy apple filling, and the firm yet crumbly crust. This variety of textures makes every bite interesting and satisfying.
They’re incredibly versatile. These bars work beautifully for everything from casual family dinners to elegant holiday gatherings. Serve them warm with vanilla ice cream for dessert, pack them in lunch boxes for a special treat, or bring them to potlucks where they’ll disappear within minutes. They also make wonderful gifts when packaged in decorative boxes.
Ingredients
For the Crust and Topping:
- 2 cups all-purpose flour
- 1 cup rolled oats (old-fashioned, not instant)
- 1 cup brown sugar, packed
- 1 teaspoon cinnamon
- ½ teaspoon salt
- 1 cup unsalted butter, melted
For the Filling:
- 4 cups apples, peeled and diced (about 4-5 medium apples)
- ½ cup salted caramel sauce (store-bought or homemade)
Optional Garnish:
- Additional salted caramel sauce for drizzling
- Flaky sea salt for sprinkling
- Vanilla ice cream for serving
Step-by-Step Instructions
Preparing Your Workspace and Ingredients
Begin by preheating your oven to 350°F (175°C). This ensures your oven reaches the perfect temperature by the time you’re ready to bake. While the oven heats, prepare your 9×13 inch baking pan by lining it with parchment paper, leaving some overhang on the sides. This creates convenient “handles” that make removing the bars much easier once they’re baked and cooled.
Selecting and Preparing the Apples
Choosing the right apples makes a significant difference in the final result. For the best flavor balance, use a combination of sweet and tart varieties. Honeycrisp and Granny Smith make an excellent pairing—the Honeycrisp provides natural sweetness and holds its shape well, while the Granny Smith adds tartness and prevents the filling from becoming too sweet. Alternatively, you can use Fuji, Gala, or Braeburn apples for different flavor profiles.
Peel your apples using a vegetable peeler or paring knife, then cut them into quarters and remove the cores. Dice the apple quarters into roughly ½-inch pieces. Uniform sizing is important because it ensures even cooking—you don’t want some pieces turning to mush while others remain undercooked. As you work, place the diced apples in a bowl with a splash of lemon juice if you’re not using them immediately. This prevents browning and adds a bright flavor note.
Making the Crust and Topping Mixture
In a large mixing bowl, combine the flour, rolled oats, brown sugar, cinnamon, and salt. Whisk these dry ingredients together thoroughly to ensure the spices and sugar are evenly distributed throughout. The combination of flour and oats creates the perfect base—the flour provides structure while the oats add texture and that classic crisp topping flavor.
Pour the melted butter over the dry ingredients. Using a fork or your hands, mix everything together until the mixture becomes crumbly and resembles coarse sand. Every bit of the flour mixture should be moistened by the butter, but it shouldn’t form a solid mass. The texture should be similar to streusel topping—clumpy yet crumbly. This mixture serves double duty as both the crust and the topping, which makes this recipe particularly efficient.
Assembling the Layers
Take half of your crumbly mixture (about 3 cups) and press it firmly into the bottom of your prepared baking pan. Use your hands or the bottom of a measuring cup to pack it down evenly, creating a solid, compact crust layer. This base needs to be firmly pressed; otherwise, it won’t hold together when you slice the bars later. Make sure to extend the crust all the way to the edges and into the corners of the pan.
Once your crust is prepared, evenly distribute the diced apples over the top. Spread them out so every bite of the finished bars will have plenty of apple filling. The layer should be relatively even in thickness, though it doesn’t need to be perfect.
Now comes the star ingredient—drizzle the salted caramel sauce over the apples. Use a spoon to help distribute it somewhat evenly, though it doesn’t need to cover every single piece of apple. As the bars bake, the caramel will melt and flow around the apples, coating them in delicious sweetness. If you’re using a thick caramel sauce, you might want to warm it slightly in the microwave for 10-15 seconds to make it easier to drizzle.
Finally, sprinkle the remaining crumbly mixture over the caramel-drizzled apples. Distribute it evenly, creating a complete layer that covers most of the filling. Some small gaps are fine—in fact, they add to the rustic, homemade appearance. Gently press down on the topping just slightly to help it adhere.
Baking to Perfection
Place your assembled pan in the preheated oven and bake for 40-45 minutes. You’ll know the bars are done when the topping turns a beautiful golden brown and you can see the apple filling bubbling around the edges. The top should be crispy and set, not soft or doughy.
If you notice the topping browning too quickly (this can happen if your oven runs hot), loosely tent the pan with aluminum foil about halfway through baking. This protects the surface from over-browning while still allowing the bars to cook through completely.
Cooling and Slicing
This is perhaps the most difficult step: letting the bars cool completely before cutting them. I know it’s tempting to dig in right away, but patience is crucial here. The bars need time to set, or they’ll fall apart when you try to slice them. Let them cool in the pan for at least 2 hours, or until they reach room temperature.
Once cooled, use the parchment paper overhang to lift the entire slab of bars out of the pan and onto a cutting board. Using a sharp knife (wipe it clean between cuts), slice into squares or rectangles of your desired size. For neat, clean cuts, you can refrigerate the bars for about 30 minutes before slicing—this firms everything up nicely.
Serving Suggestions
These Salted Caramel Apple Crisp Bars are delicious at room temperature, but serving them warm takes them to another level. Reheat individual portions in the microwave for 15-20 seconds, then top with a scoop of vanilla ice cream that slowly melts into the warm apple filling. The contrast between hot and cold, crispy and creamy, is absolutely divine.
For a more elegant presentation, place a bar on a dessert plate and drizzle with additional warmed salted caramel sauce. Add a small dollop of freshly whipped cream and a sprinkle of flaky sea salt on top. Garnish with a cinnamon stick or a few fresh apple slices for a restaurant-quality appearance.
These bars also make a wonderful breakfast or brunch treat when served alongside coffee or tea. The oats and apples make them feel slightly more breakfast-appropriate than a traditional dessert. Pair them with scrambled eggs and bacon for a sweet-savory brunch spread that will impress your guests.
For fall gatherings and potlucks, arrange the bars on a large platter or cake stand. Provide small dessert plates and forks, along with a bowl of extra caramel sauce for those who want to add more. Consider setting out vanilla ice cream or whipped cream in a separate bowl so guests can customize their portions.
During the holiday season, these bars make excellent gifts. Cut them into smaller squares, wrap individually in cellophane or wax paper, and package in decorative tins or boxes. They transport well and stay fresh for several days, making them perfect for shipping to distant friends and family.
Recipe Variations
Triple Apple Bars
Add ½ cup of apple butter to the filling along with the diced apples, and replace half of the salted caramel with cinnamon-spiced apple cider syrup. Sprinkle ½ cup of finely chopped dried apples into the topping mixture. This variation intensifies the apple flavor and creates a more complex taste profile.
Pecan Crunch Bars
Fold 1 cup of chopped pecans into the crust and topping mixture for added crunch and nutty flavor. The pecans toast beautifully as the bars bake, adding another layer of deliciousness. You can also sprinkle some pecans on top before baking for extra visual appeal.
Maple Bourbon Apple Bars
Replace the salted caramel sauce with maple bourbon sauce (maple syrup mixed with a tablespoon of bourbon and a pinch of salt). This grown-up variation has sophisticated flavors perfect for dinner parties. The bourbon adds depth without making the dessert taste boozy.
Pear and Ginger Version
Replace 2 cups of the apples with peeled, diced pears, and add 1 tablespoon of fresh grated ginger to the filling. The pear adds a different texture and sweetness, while the ginger provides warmth and spice. This variation is particularly elegant and unexpected.
Chocolate Caramel Apple Bars
Sprinkle 1 cup of semi-sweet chocolate chips over the apples before adding the caramel sauce. The chocolate melts into the filling, creating pockets of rich, chocolatey goodness. For an extra decadent touch, use dark chocolate chips and drizzle melted chocolate over the cooled bars.
Cranberry Apple Bars
Add 1 cup of fresh or dried cranberries to the apple filling. The cranberries provide tartness and a pop of color that’s perfect for Thanksgiving and Christmas gatherings. The sweet caramel balances the tart cranberries beautifully.
Make-Ahead Tips
These bars are wonderfully convenient for advance preparation, making them perfect for busy schedules and planned entertaining.
Prepare components separately: You can mix the dry crust/topping mixture up to 2 days ahead and store it in an airtight container at room temperature. Dice the apples no more than 4 hours before assembling, and toss them with a little lemon juice to prevent browning. Store them in the refrigerator until ready to use.
Assemble and refrigerate: You can fully assemble the bars (but not bake them) up to 24 hours in advance. Cover the pan tightly with plastic wrap and refrigerate. When ready to bake, let the pan sit at room temperature for 20 minutes, then bake as directed, adding 5-10 extra minutes to the baking time if needed.
Bake completely ahead: These bars actually improve slightly after a day, as the flavors meld together. Bake them completely, let them cool, then cover tightly and store at room temperature for up to 3 days, or refrigerate for up to 5 days. Reheat individual portions in the microwave before serving.
Freeze for later: Salted Caramel Apple Crisp Bars freeze exceptionally well. Cut the cooled bars into individual portions, wrap each one tightly in plastic wrap, then place them in a freezer-safe container or bag. Freeze for up to 3 months. Thaw overnight in the refrigerator or for a few hours at room temperature. Reheat in the microwave or oven before serving.
Freezing unbaked bars: You can also freeze the assembled but unbaked bars. Wrap the pan tightly in plastic wrap, then aluminum foil. Freeze for up to 2 months. When ready to bake, you can bake directly from frozen (add 15-20 minutes to the baking time) or thaw overnight in the refrigerator before baking as directed.
Notes
Butter temperature matters: The butter should be melted but not hot. If it’s too hot, it can make the mixture too wet and greasy. Let melted butter cool for about 5 minutes before mixing with the dry ingredients.
Don’t skip the parchment paper: While you can grease the pan, parchment paper makes removing the bars so much easier and ensures clean edges. The overhang creates handles that allow you to lift the entire batch out in one piece.
Caramel sauce consistency: If using homemade caramel, it should be pourable but not too thin. Store-bought caramel sauces vary in thickness—choose one that’s labeled as “sauce” rather than “topping,” as sauces tend to have better consistency for baking.
Apple quantity flexibility: The “4 cups” measurement is approximate. Depending on how you dice your apples and how tightly you pack them, you might use anywhere from 4-5 medium apples. It’s fine if you have a generous amount of apple filling—that’s actually preferable to having too little.
Preventing soggy bottoms: Make sure to press the bottom crust layer very firmly and bake the bars fully until the edges are bubbling. This ensures the bottom crust sets properly and doesn’t become soggy from the apple juices.
Storing properly: Once completely cooled, store leftover bars in an airtight container. They’ll stay fresh at room temperature for 2-3 days, or refrigerated for up to 5 days. The topping may soften slightly over time, but they’ll still taste delicious.
Reheating tips: For best results, reheat individual portions in the microwave for 15-20 seconds, or place them on a baking sheet in a 300°F oven for 10 minutes. This restores some of the crispness to the topping.
Frequently Asked Questions
Can I use quick oats instead of rolled oats? It’s best to stick with old-fashioned rolled oats for this recipe. Quick oats are more finely cut and will create a different texture—less chunky and crispy. If you only have quick oats, they’ll work in a pinch, but the topping won’t have as much textural interest.
What’s the best type of apple to use? A combination of sweet and tart apples works best. Try mixing Granny Smith with Honeycrisp, Fuji, or Gala. Avoid very soft apples like Red Delicious or McIntosh, as they’ll turn to mush during baking. Firm apples that hold their shape are essential.
Can I make my own salted caramel sauce? Absolutely! Homemade salted caramel is wonderful in this recipe. You’ll need about ½ cup, which you can make by cooking ¾ cup sugar with ¼ cup butter, ½ cup heavy cream, and ½ teaspoon salt. Just make sure it cools to room temperature before using.
My bars fell apart when I cut them. What went wrong? This usually happens when the bars haven’t cooled completely before cutting. The filling needs time to set, which can take 2-3 hours. For the cleanest cuts, refrigerate the bars for 30 minutes before slicing. Also, make sure the bottom crust layer was pressed firmly enough.
Can I make these gluten-free? Yes! Replace the all-purpose flour with a 1-to-1 gluten-free baking flour blend. Make sure your oats are certified gluten-free as well. The texture may be slightly different but still delicious.
How do I know when the bars are done baking? Look for golden-brown topping and bubbling around the edges where you can see the apple filling. The top should feel set when you gently touch it, not soft or doughy. If you’re unsure, it’s better to bake a few minutes longer than to underbake.
Can I reduce the sugar? You can reduce the brown sugar to ¾ cup if you prefer less sweetness, especially if using very sweet apples. However, don’t eliminate it completely, as the sugar helps create the proper texture in the crust and topping.
What if I don’t have salted caramel sauce? You can use regular caramel sauce and add a pinch of extra salt to the apple filling. Alternatively, maple syrup makes a delicious substitution, though the flavor profile will be different. You could also use apple butter for a more concentrated apple flavor.
Can I double this recipe? Yes, but you’ll need to use two 9×13 inch pans rather than trying to fit everything in one larger pan. The bars need to be a certain thickness to bake properly and achieve the right ratio of crust to filling to topping.
Why is my topping browning too quickly? Every oven is different, and some run hotter than others. If your topping is browning before the bars are fully cooked, loosely tent the pan with aluminum foil about halfway through baking. This protects the surface while allowing the inside to finish cooking.
Nutrition Facts (Per Serving)
Please note: This nutritional information is approximate based on 16 servings and should not be used as definitive health advice.
- Serving Size: 1 bar (1/16 of recipe)
- Calories: 285
- Total Fat: 12g
- Saturated Fat: 7g
- Unsaturated Fat: 4g
- Trans Fat: 0g
- Cholesterol: 30mg
- Sodium: 180mg
- Total Carbohydrates: 42g
- Dietary Fiber: 2g
- Sugars: 26g
- Protein: 3g
Recipe Details:
- Prep Time: 20 minutes
- Cook Time: 45 minutes
- Total Time: 65 minutes (plus cooling time)
- Category: Dessert
- Method: Baking
- Cuisine: American
- Yield: 16 bars
- Difficulty: Easy
- Diet: Vegetarian