Growing up in Texas, I learned that brisket isn’t just food—it’s a way of life. When my uncle would fire up his smoker every Sunday, the whole neighborhood knew something special was happening. Now, years later, I’ve taken that smoky, tender brisket and transformed it into these incredible beer cheese bombs that disappear faster than I can make them.
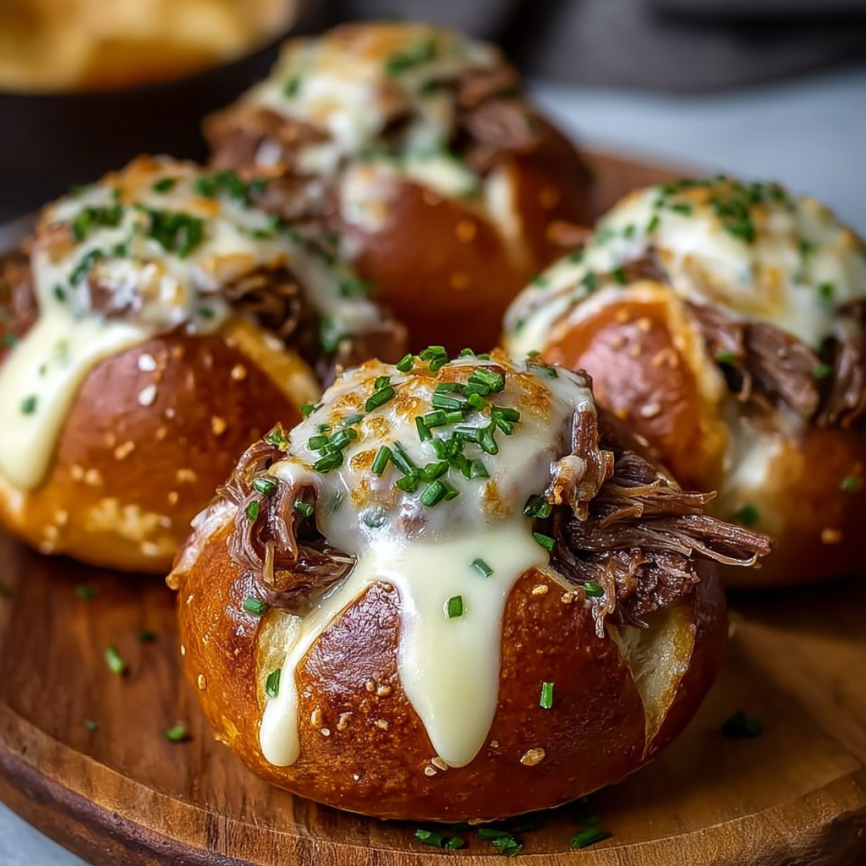
These aren’t your ordinary appetizers. Picture this: golden-brown pretzel buns that crack open to reveal smoky, pulled brisket swimming in rich beer cheese. Furthermore, they’re surprisingly easy to make, even though they look like something from a fancy gastropub.
Why You’ll Fall in Love with These Beer Cheese Bombs
Perfect Party Food: These handheld beauties require no utensils, making them ideal for game day gatherings or casual entertaining. Additionally, they’re substantial enough to satisfy hungry guests without being too filling.
Incredible Flavor Combination: The smokiness of the brisket pairs beautifully with the tangy richness of beer cheese. Meanwhile, the pretzel coating adds that perfect salty crunch that ties everything together.
Make-Ahead Friendly: You can prepare these earlier in the day and simply pop them in the oven when guests arrive. Consequently, you’ll spend more time enjoying the party and less time in the kitchen.
Customizable Base: While this recipe calls for brisket, you can easily substitute pulled pork, shredded chicken, or even vegetables for different dietary preferences.
Essential Ingredients
For the Filling
- 240 ml beer cheese dip – Look for a quality store-bought version, or make your own with sharp cheddar and your favorite beer
- 450 g smoked brisket, pulled apart – Leftover brisket works perfectly, or pick some up from your local BBQ joint
For the Dough Base
- 1 can (340 g) ready-to-bake biscuit dough – Choose the flaky layers variety for best results
For the Pretzel Treatment
- 480 ml slightly warm water – Not hot enough to cook the dough, just warm to the touch
- 60 g baking soda – This creates the authentic pretzel flavor and texture
- Coarse salt for sprinkling – Pretzel salt or kosher salt works best
- Melted butter for brushing – Adds richness and helps achieve that golden color
Serving Suggestions
Serve these bombs alongside crispy pickle spears, spicy mustard for dipping, or a fresh coleslaw to cut through the richness. Moreover, they pair wonderfully with ice-cold beer or your favorite game day beverages.
Step-by-Step Instructions
Preparation Phase
Step 1: Prepare Your Workspace Preheat your oven to 190°C (375°F) and allow it to fully heat while you prepare the bombs. Line a baking sheet with parchment paper and set aside.
Step 2: Create the Filling In a medium mixing bowl, combine the pulled brisket and beer cheese dip. Gently fold the ingredients together until the brisket is evenly coated with cheese. The mixture should hold together but not be overly wet.
Assembly Process
Step 3: Shape the Bombs Remove the biscuit dough from the can and separate into individual pieces. On a lightly floured surface, gently flatten each biscuit into a roughly 4-inch circle. Don’t roll too thin, as you need enough dough to properly seal the filling.
Place approximately 2 tablespoons of the brisket mixture in the center of each flattened biscuit. Carefully bring the edges of the dough up and around the filling, pinching firmly to create a tight seal. Roll gently between your palms to form smooth, round balls.
The Pretzel Bath
Step 4: Prepare the Baking Soda Solution In a clean bowl, dissolve the baking soda in warm water, stirring until completely dissolved. This alkaline bath is what gives these bombs their authentic pretzel flavor and beautiful golden color.
Step 5: Dip and Season Working quickly, dip each stuffed dough ball into the baking soda solution, ensuring it’s completely submerged for about 5 seconds. Immediately place the dipped bombs on your prepared baking sheet, leaving space between each one.
Sprinkle the tops generously with coarse salt while the dough is still damp from the baking soda bath.
Baking to Perfection
Step 6: Bake Until Golden Place the baking sheet in your preheated oven and bake for 12-15 minutes. Watch for that beautiful deep golden-brown color that signals they’re ready. The bombs should sound hollow when gently tapped.
Step 7: Final Touch Remove from the oven and immediately brush each bomb with melted butter. This step adds flavor and creates an irresistible glossy finish.

Creative Serving Ideas
Game Day Presentation
Arrange these bombs on a wooden cutting board alongside small bowls of spicy brown mustard, horseradish sauce, and pickled jalapeños. Create height by using small pedestals or overturned bowls under your serving dishes.
Elegant Appetizer Option
For more formal gatherings, slice each bomb in half to showcase the filling and arrange on a platter with microgreens and a drizzle of beer cheese sauce.
Family Meal Style
Serve these as a fun dinner option with a simple green salad and roasted vegetables. Kids especially love the handheld nature and rich flavors.
Delicious Variations to Try
Pulled Pork Paradise
Substitute the brisket with pulled pork and add a tablespoon of your favorite BBQ sauce to the filling mixture. The tangy sweetness pairs beautifully with the beer cheese.
Buffalo Chicken Twist
Use shredded buffalo chicken instead of brisket and replace the beer cheese with a mixture of cream cheese and buffalo sauce. Top with crumbled blue cheese before baking.
Vegetarian Delight
Create a meat-free version using sautéed mushrooms, caramelized onions, and extra cheese. Add fresh herbs like thyme or rosemary for additional flavor depth.
Breakfast Bomb Version
Fill with scrambled eggs, crumbled bacon, and cheese for an amazing breakfast or brunch option. Serve with maple syrup for dipping.
Make-Ahead Tips
Day-Before Preparation
You can assemble these bombs completely and store them covered in the refrigerator overnight. Simply brush with melted butter and bake as directed when ready to serve.
Freezer-Friendly Option
Assembled, unbaked bombs freeze beautifully for up to three months. Freeze on a baking sheet first, then transfer to freezer bags. Bake directly from frozen, adding 3-5 extra minutes to the cooking time.
Filling Prep
The brisket and beer cheese mixture can be prepared up to three days in advance. Store covered in the refrigerator and bring to room temperature before assembling.
Important Notes for Success
Sealing is Critical: Take extra care when pinching the dough seams closed. Any gaps will allow the filling to leak out during baking, creating a mess and potentially burning on your baking sheet.
Don’t Skip the Baking Soda Bath: This step is essential for achieving authentic pretzel flavor and texture. Without it, you’ll have regular biscuit bombs instead of pretzel bombs.
Temperature Matters: Serve these warm for the best experience. The cheese should be melty and the pretzel exterior should have a slight chew.
Quality Ingredients: Since this recipe has so few components, each one matters. Choose high-quality brisket and beer cheese for the best results.
Essential Equipment
- Large oven preheated to 190°C
- Medium mixing bowl for combining filling
- Baking sheet lined with parchment paper
- Clean bowl for baking soda solution
- Pastry brush for butter application
- Kitchen scale for accurate measurements (recommended)
Dietary Considerations
Allergen Information: Contains wheat (gluten) and dairy. The biscuit dough may also contain soy and eggs depending on the brand chosen.
Nutritional Highlights: Each serving provides approximately 345 calories with a good balance of protein (14g) from the brisket and moderate carbohydrates (29g) from the pretzel coating.

Frequently Asked Questions
Can I use homemade biscuit dough instead of canned? Absolutely! Homemade biscuit dough works wonderfully. Just ensure it’s not too sticky to work with and has enough structure to hold the filling securely.
What if I can’t find beer cheese dip? You can easily make your own by melting sharp cheddar cheese with a splash of beer and a bit of cream cheese for smoothness. Alternatively, any creamy cheese sauce will work as a substitute.
How do I prevent the filling from leaking out? The key is proper sealing technique. Pinch the dough edges firmly together and roll the seam-side down on your baking sheet. Additionally, don’t overfill each bomb.
Can these be reheated the next day? Yes, though they’re best fresh. Reheat in a 180°C oven for 5-7 minutes to restore the pretzel texture. Avoid microwaving, as this will make them soggy.
What’s the best way to store leftover bombs? Store cooled bombs in an airtight container in the refrigerator for up to three days. For longer storage, freeze for up to three months.
Can I make mini versions for parties? Definitely! Use smaller portions of filling and dough to create bite-sized versions. Reduce the baking time to 8-10 minutes and watch carefully to prevent overbrowning.
What beer works best in the cheese dip? Medium-bodied beers like wheat beers or light lagers work best. Avoid hoppy IPAs or dark stouts, as they can overpower the cheese flavor.
Is there a gluten-free option? Yes, substitute gluten-free biscuit dough and ensure your beer cheese is made with gluten-free beer. The texture will be slightly different but still delicious.


