When my teenage son first told me about Snoop Dogg’s famous cookies, I was skeptical. Could they really be as amazing as everyone claimed? One batch later, and I was completely sold. These aren’t just cookies—they’re an experience. The combination of peanut butter and chocolate chips creates something magical, and the texture is unlike any cookie I’d made before: crispy edges giving way to a soft, almost cake-like center that’s absolutely luxurious.
The name “Rolls Royce” isn’t just clever marketing—these cookies truly are the luxury vehicle of the cookie world. They’re rich, indulgent, and impossibly buttery, with enough chocolate chips in every bite to satisfy even the most devoted chocolate lover. Whether you’re a longtime fan of Snoop or just someone who appreciates an exceptional cookie, this recipe deserves a spot in your regular rotation.
Total Time: 27 minutes
Yield: 36 cookies (or 18 jumbo)
Servings: 36 cookies
Course: Dessert, Snack
Why You’ll Love This Recipe
The genius of these cookies lies in their simplicity and their perfect balance of flavors. Peanut butter and chocolate are a classic combination, but the specific ratios here—along with the generous amount of butter—create something that transcends ordinary peanut butter chocolate chip cookies.
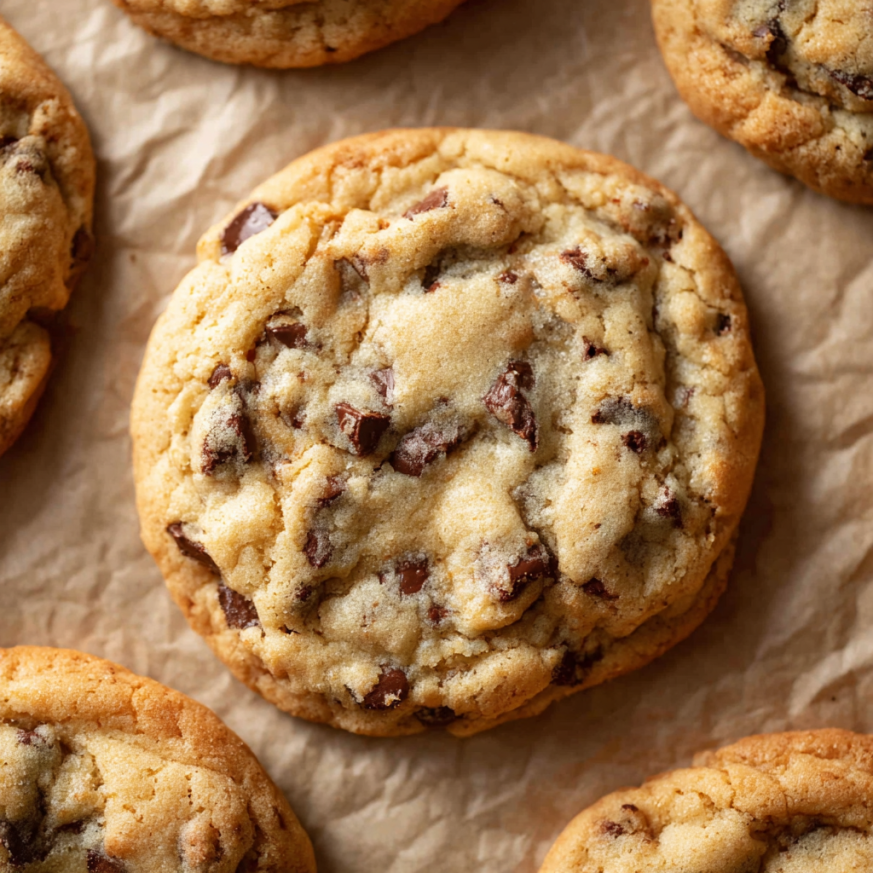
The texture is what really sets these apart. They’re delicate and tender, almost fragile, which is unusual for a cookie packed with so much richness. That buttery softness contrasts beautifully with the chocolate chips, which stay slightly melted and gooey inside while the cookie edges crisp up just enough to provide structure.
Celebrity-Approved Recipe
There’s something fun about making a recipe associated with a celebrity, especially one as iconic as Snoop Dogg. Whether you’re serving these at a party or bringing them to a gathering, the name alone sparks conversation. People love the story behind them almost as much as they love eating them.
The recipe has been shared and adapted countless times across the internet, with home bakers consistently raving about the results. When a recipe generates that kind of enthusiasm from so many people, you know it’s something special.
Flexible Sizing Options
One of the best features of this recipe is the flexibility in cookie size. Small cookies are perfect for parties, cookie platters, or when you want to enjoy something sweet without overindulging. Jumbo cookies, on the other hand, are impressive and satisfying—the kind of treat that feels like a real indulgence.
The recipe provides specific instructions and timing for both sizes, taking the guesswork out of baking. You can even make a batch of each size from the same dough, giving you options for different occasions or preferences.
Ingredients
- 1 cup (2 sticks) butter, at room temperature
- ½ cup creamy peanut butter
- ½ cup packed light brown sugar
- ½ cup granulated sugar
- 1 large egg
- 1 teaspoon pure vanilla extract
- 1½ cups all-purpose flour
- 1 teaspoon baking soda
- ½ teaspoon salt
- 2 cups semisweet chocolate chips
Step-by-Step Instructions
Preparing Your Workspace
Preheat your oven to 375°F. This slightly higher temperature creates those crispy edges while keeping the centers soft. While the oven heats, line your baking sheets with parchment paper. Parchment prevents sticking and promotes even browning on the bottom of the cookies.
Having multiple baking sheets ready speeds up the process considerably. While one batch bakes, you can scoop dough onto another sheet, creating an efficient assembly line. If you only have one or two sheets, you can reuse them between batches—just let them cool completely before adding new dough, as warm sheets will cause the dough to spread too much.
Creaming the Fats and Sugars
In a large mixing bowl, combine the softened butter, peanut butter, brown sugar, and granulated sugar. Using an electric mixer on medium speed, beat these ingredients together for 2-3 minutes until the mixture is light, fluffy, and well-blended. This creaming process is crucial—it incorporates air into the mixture, contributing to the cookie’s tender texture.
The mixture should lighten in color and increase slightly in volume. If you’re mixing by hand with a wooden spoon, this will take longer and require more effort, but it’s absolutely doable. Just keep mixing until everything is completely smooth with no streaks of butter or peanut butter visible.
Room temperature butter is essential for proper creaming. If you forgot to take your butter out ahead of time, cut it into small pieces to help it soften faster, or place it near (not on) a warm stove for a few minutes. Never microwave butter to soften it for cookies—it melts unevenly and creates greasy, flat cookies.
Adding the Wet Ingredients
Crack the egg into the butter mixture and add the vanilla extract. Beat on medium speed for about a minute until the egg is completely incorporated and the mixture looks smooth and homogeneous. The egg adds moisture and helps bind everything together, while the vanilla enhances all the other flavors.
Make sure to scrape down the sides and bottom of the bowl with a rubber spatula after adding the egg. Ingredients often get stuck in these areas, and you want everything evenly mixed for consistent cookies.
Incorporating the Dry Ingredients
In a separate bowl, whisk together the flour, baking soda, and salt. Whisking ensures these ingredients are evenly distributed, which is particularly important for the baking soda—uneven distribution can create cookies that rise inconsistently.
Add the dry ingredients to the wet mixture all at once. Using a wooden spoon or the mixer on low speed, stir just until the flour disappears and the dough comes together. You should see no streaks of flour, but avoid overmixing. Once you add flour to a wet mixture, gluten starts developing, and too much mixing creates tough, dense cookies instead of tender ones.
The dough will be thick and slightly sticky at this stage—that’s exactly what you want. If it seems dry or crumbly, you may have packed your flour too densely when measuring. Next time, spoon flour into your measuring cup and level it off rather than scooping directly from the bag.
Folding in the Chocolate Chips
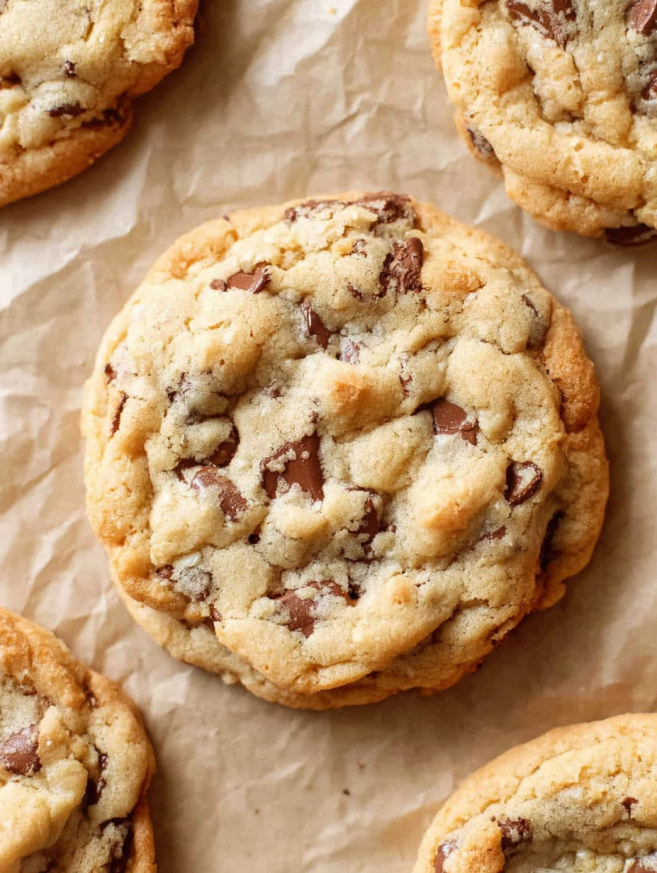
Add the chocolate chips to the dough and fold them in with a sturdy spoon or spatula. Make sure they’re distributed evenly throughout the dough so every cookie gets plenty of chocolate. Two full cups of chocolate chips is generous—you’ll have chocolate in every bite.
Feel free to reserve a few chocolate chips to press into the tops of the cookies after scooping for a more professional, bakery-style appearance. This ensures every cookie shows off those beautiful chocolate chips, even if some sink during baking.
Scooping and Spacing
For small cookies, use a regular cookie scoop (about a heaping tablespoon) to portion the dough. For jumbo cookies, use a large cookie scoop that holds about 3 tablespoons. Consistent sizing ensures even baking—all cookies on a sheet will be done at the same time.
Place the scooped dough balls about 2 inches apart on your prepared baking sheets. These cookies spread moderately during baking, and proper spacing prevents them from running into each other. Small cookies need slightly less space than jumbo ones, which spread more.
Don’t flatten the dough balls before baking. They should go into the oven as rounded mounds. They’ll spread and flatten naturally during baking, creating those characteristic crispy edges and soft centers.
Baking to Perfection
For small cookies, bake for 8-10 minutes. They should look just set around the edges with centers that still appear slightly underdone—pale and puffy. For jumbo cookies, bake for 11-12 minutes, looking for the same visual cues but adjusting for their larger size.
The cookies will continue baking from residual heat after you remove them from the oven, so pulling them when they still look slightly underbaked ensures they don’t overcook. Overbaked cookies lose that delicate, tender texture that makes these special.
Rotate the baking sheet halfway through baking if your oven has hot spots. This ensures even browning and consistent texture across all cookies.
The Critical Cooling Period
When you remove the cookies from the oven, resist the urge to immediately transfer them to a cooling rack. Let them rest on the baking sheet for 5 minutes. During this time, they’ll finish cooking and firm up enough to move without falling apart.
After 5 minutes, use a wide spatula to carefully transfer the cookies to a wire cooling rack. The cookies will still be soft and fragile, so handle them gently. Let them cool completely on the rack—this usually takes 20-30 minutes.
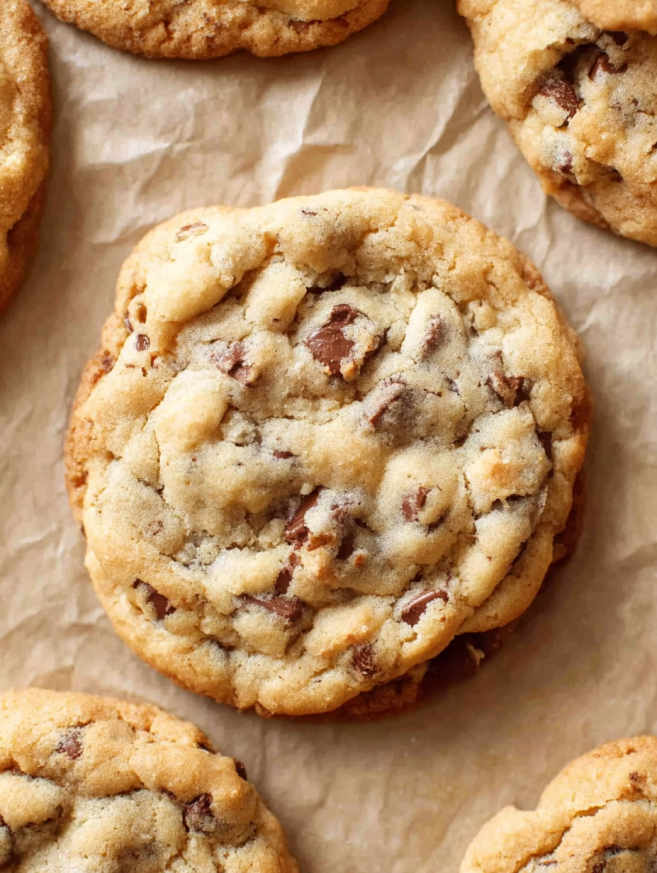
As they cool, the texture will continue to develop. Warm cookies are delicious but very soft. Fully cooled cookies have that perfect contrast of crispy edges and tender centers that defines the Rolls Royce cookie experience.
Serving Suggestions
These cookies are absolutely perfect on their own—no embellishments needed. Their rich flavor and luxurious texture make them completely satisfying as a standalone treat.
Classic Presentations
Serve these cookies with cold milk for the ultimate classic cookie experience. The rich, buttery flavor paired with cold milk is nostalgic and comforting. For adults, coffee or espresso provides a sophisticated pairing that highlights the chocolate notes.
Stack them on a pretty plate or in a cookie jar for casual everyday snacking. Their attractive appearance—golden brown with visible chocolate chips—makes them look bakery-worthy without any special presentation.
Ice Cream Sandwiches
Use two cookies to sandwich a scoop of vanilla ice cream for an indulgent dessert. The cookies’ buttery flavor pairs beautifully with vanilla, while their soft texture makes them perfect for biting through without the ice cream squishing out. Roll the edges in mini chocolate chips or chopped peanuts for extra flair.
For an easier version, slightly soften ice cream, spread it on one cookie, top with another, and freeze until firm. Make several at once and keep them wrapped individually in the freezer for ready-made treats.
Creative Serving Ideas
Crumble these cookies over vanilla or chocolate ice cream for a decadent sundae topping. The buttery, peanut-buttery crumbs add incredible texture and flavor. You can also layer crumbled cookies with pudding and whipped cream in parfait glasses for an easy trifle-style dessert.
Warm a cookie in the microwave for 10-15 seconds before serving to recreate that fresh-from-the-oven experience. The chocolate chips will soften and become gooey, and the cookie will smell amazing.
Recipe Variations
Different Chocolate Options
While semisweet chocolate chips are classic and perfect, you can absolutely experiment with other varieties. Milk chocolate chips create a sweeter, more mellow flavor that kids often prefer. Dark chocolate chips (60-70% cacao) offer a more sophisticated, less sweet option that adults tend to love.
Try using a combination of different chocolates—half semisweet and half milk chocolate, or a mix of semisweet and dark. Some bakers even add white chocolate chips for visual contrast and additional sweetness, though this makes already sweet cookies even sweeter.
Chocolate chunks instead of chips create dramatic pools of melted chocolate throughout the cookies. The larger pieces make each bite feel even more indulgent.
Peanut Butter Variations
Crunchy peanut butter instead of creamy adds texture and more pronounced peanut flavor. The small peanut pieces distributed throughout create little pockets of crunch that contrast nicely with the soft cookie texture.
For a more intense peanut butter flavor, increase the peanut butter to ¾ cup and reduce the butter slightly to ¾ cup (1½ sticks). This creates a more assertive peanut butter cookie with chocolate chips rather than a buttery cookie with peanut butter undertones.
Natural peanut butter can be used but may affect the texture. Natural varieties are oilier and less sweet than regular peanut butter. If using natural, make sure to stir it thoroughly before measuring, and be aware the cookies might spread more.
Mix-In Additions
Add ½ cup of chopped peanuts along with the chocolate chips for extra crunch and peanut flavor. Toasted peanuts work especially well—their roasted flavor complements the peanut butter beautifully.
Fold in ½ cup of toffee bits or butterscotch chips along with (or instead of some of) the chocolate chips. These add caramel notes that play nicely with both the peanut butter and chocolate.
For a sophisticated twist, add ½ teaspoon of instant espresso powder to the dry ingredients. Coffee enhances chocolate flavor without making the cookies taste like coffee, creating deeper, more complex chocolate notes.
Size and Shape Variations
Make these into cookie bars by pressing the dough into a 9×13-inch pan and baking at 350°F for 25-30 minutes. Cut into squares once cooled. This is much faster than scooping individual cookies and perfect for feeding a crowd.
Create thumbprint cookies by rolling dough into balls, making an indentation with your thumb, and filling with jam or a few chocolate chips before baking. This creates a different but equally delicious presentation.
Roll the dough into a log, wrap it tightly in plastic wrap, and refrigerate or freeze. Slice into rounds and bake whenever you want fresh cookies—this is perfect for having cookie dough ready to go.
Make-Ahead Tips
Cookie dough is wonderfully freezer-friendly, making these cookies perfect for advance preparation or keeping dough on hand for spontaneous baking sessions.
Freezing Cookie Dough
Scoop the dough into balls as directed, then place them on a parchment-lined baking sheet. Freeze until solid (about 2 hours), then transfer the frozen dough balls to a freezer-safe bag or container. They’ll keep for up to 3 months.
Bake frozen dough balls directly from the freezer without thawing, adding 1-2 minutes to the baking time. This is incredibly convenient—you can bake exactly the number of cookies you want whenever a craving hits.
Label the container with the date and baking instructions so you remember the temperature and timing later. Future you will appreciate this thoughtfulness!
Refrigerating Dough
Cookie dough can be refrigerated for up to 3 days before baking. In fact, many bakers swear that cookies taste better when the dough has been chilled overnight. The resting period allows the flour to fully hydrate and the flavors to meld together.
Cold dough spreads less during baking, which can create thicker cookies with more pronounced edges. If you prefer flatter cookies, let the dough come to room temperature before scooping and baking.
Storing Baked Cookies
Once baked and completely cooled, these cookies keep well at room temperature in an airtight container for up to 3 days. After that, they begin to dry out and lose their tender texture, though they’re still perfectly edible for up to a week.
To maintain maximum freshness, place a piece of bread in the container with the cookies. The cookies will absorb moisture from the bread, staying soft longer. Replace the bread if it becomes hard or stale.
For longer storage, freeze baked cookies in an airtight container or freezer bag for up to 3 months. Place parchment or wax paper between layers to prevent them from sticking together. Thaw at room temperature for about an hour before serving—they’ll taste freshly baked.
Notes
Room temperature butter is crucial for proper creaming and texture. Butter should be soft enough that your finger leaves an indentation when pressed into it, but not so soft that it’s greasy or melting. This usually takes about 30-60 minutes on the counter.
Don’t substitute margarine or shortening for the butter in this recipe. Butter provides essential flavor that makes these cookies special. With the name “Rolls Royce,” these cookies are meant to be luxurious, and butter is key to that luxury.
Peanut butter measurement matters. Scoop peanut butter into your measuring cup and level it off rather than packing it in. Creamy peanut butter works best—the kind you find in regular grocery stores (like Jif or Skippy) rather than natural varieties that separate.
Brown sugar should be packed into the measuring cup. Press it down firmly with your fingers or the back of a spoon to eliminate air pockets. Properly packed brown sugar will hold its shape when turned out of the measuring cup.
Don’t overbake these cookies. They should look slightly underdone when you remove them from the oven—the centers will appear pale and puffy. They’ll continue baking on the hot pan after removal, finishing to perfection as they cool.
FAQ
Why are my cookies flat and greasy?
Flat, greasy cookies usually indicate butter that was too warm or even melted. Make sure your butter is properly softened but still holds its shape—not shiny or greasy. Also check that you’re measuring ingredients accurately, particularly the flour. Too little flour relative to fat will create spreading issues.
Can I use natural peanut butter?
Natural peanut butter (the kind with just peanuts and salt) can work but may affect texture and spread. These peanut butters are oilier and lack the stabilizers found in regular peanut butter, which can make cookies spread more. If using natural, make sure it’s thoroughly stirred and consider refrigerating the dough before baking.
My cookies are too hard. What happened?
Hard cookies typically result from overbaking. These cookies should look slightly underdone when you remove them from the oven. Also check your oven temperature with an oven thermometer—many ovens run hot. Overmixing the dough after adding flour can also create tough cookies by overdeveloping gluten.
Can I make these without eggs?
For an egg-free version, you can substitute 1 tablespoon of ground flaxseed mixed with 3 tablespoons of water (let it sit for 5 minutes to gel) or use a commercial egg replacer. The texture may be slightly different—often a bit denser—but they’ll still be delicious.
Why do some of my cookies spread more than others?
Inconsistent spreading usually comes from inconsistent dough portions. Using a cookie scoop ensures uniform size, which promotes even baking. Also make sure your baking sheets are completely cool between batches—warm sheets cause excessive spreading. Consistent oven temperature matters too.
Can I reduce the sugar in this recipe?
You can reduce the sugar by up to 25% (reduce each type of sugar by 2 tablespoons), but it will affect both texture and flavor. Sugar contributes to the cookies’ crispy edges and tender centers—it’s not just for sweetness. The cookies will be less sweet, less crispy, and may brown differently.
What’s the best way to measure flour?
Use the spoon-and-level method: use a spoon to scoop flour into your measuring cup, then level it off with a straight edge. Don’t scoop directly from the bag with the measuring cup, as this packs the flour and gives you more than the recipe calls for, resulting in dry, crumbly cookies.
Can I make these gluten-free?
Yes, substitute a gluten-free all-purpose flour blend (with xanthan gum) for regular flour using a 1:1 ratio. The texture will be slightly different—often a bit more crumbly—but they should still be quite good. Make sure all other ingredients are certified gluten-free if needed.
Should I use salted or unsalted butter?
Unsalted butter is always preferable for baking because it allows you to control the salt level. If you only have salted butter, reduce the added salt in the recipe to ¼ teaspoon. The cookies will still turn out well, just potentially a bit saltier than intended.
Prep Time: 15 minutes
Cook Time: 12 minutes (for jumbo cookies)
Total Time: 27 minutes
Yield: 36 small cookies or 18 jumbo cookies
Course: Dessert, Snack
Cuisine: American
Method: Baking
Nutrition (per small cookie):
- Serving Size: 1 small cookie
- Calories: 166kcal
- Carbohydrates: 16g
- Protein: 2g
- Fat: 11g
- Saturated Fat: 6g
- Polyunsaturated Fat: 1g
- Monounsaturated Fat: 3g
- Trans Fat: 0.2g
- Cholesterol: 14mg
- Sodium: 121mg
- Potassium: 88mg
- Fiber: 1g
- Sugar: 10g
- Vitamin A: 163IU
- Calcium: 13mg
- Iron: 1mg