The first time I tasted authentic fry bread at a Native American powwow, I was struck by how something so simple could be so incredibly satisfying. Years later, when my teenage son suggested we “make tacos but different,” I remembered that pillowy, golden bread and wondered what magic might happen if we used it as our taco base. The result was nothing short of revolutionary – the soft, fluffy texture of fresh fry bread creates the perfect foundation for classic taco fillings, resulting in a fusion that honors both traditions while creating something entirely new.
What makes these tacos truly special isn’t just their unique presentation, but how the warm, slightly sweet fry bread complements and enhances every single topping. Furthermore, the generous size of each piece of fry bread makes this feel less like a snack and more like a complete, satisfying meal that brings families together around the table.
Why This Recipe Will Transform Your Taco Night Forever
Cultural Fusion at Its Best: This recipe respectfully combines two beloved food traditions, creating something that celebrates both Native American heritage and Mexican-inspired flavors. The result honors the integrity of both cuisines while creating an entirely new and exciting dining experience.
Texture Revolution: Instead of crispy corn tortillas or soft flour tortillas, the pillowy fry bread provides a unique base that’s simultaneously soft and substantial. Additionally, the slightly sweet, yeasty flavor of the bread creates an unexpected but perfect complement to savory taco fillings.
Interactive Family Fun: Making fry bread from scratch turns dinner preparation into an engaging family activity where everyone can participate. Moreover, the dramatic transformation from simple dough to golden, puffy bread creates excitement and anticipation that makes the meal feel special.
Impressive Yet Approachable: While these tacos look like something from a gourmet restaurant, they use simple ingredients and techniques that any home cook can master with confidence. The visual impact far exceeds the actual difficulty level.
Essential Ingredients for Authentic Results
Traditional Fry Bread Base
- 2 cups all-purpose flour (creates the perfect tender texture)
- ½ teaspoon salt (enhances flavor and strengthens gluten)
- 1 tablespoon baking powder (provides the signature fluffy rise)
- 1 cup warm water (temperature matters for proper dough development)
- Vegetable oil for frying (neutral oil with high smoke point)
Seasoned Beef Filling
- 1 pound lean ground beef (85/15 blend works perfectly)
- 2 tablespoons taco seasoning (store-bought or homemade blend)
- ¼ cup warm water (helps distribute seasonings evenly)
Optional Pinto Bean Enhancement
- 2 cans (15 oz) pinto beans, drained and rinsed
- 1 tablespoon olive oil
- ½ teaspoon cumin (adds warm, earthy depth)
- ½ teaspoon salt
- ¼ teaspoon black pepper
- ¼ teaspoon onion powder
Fresh Taco Toppings
- Crisp lettuce, chopped (provides essential crunch and freshness)
- Red tomatoes, diced (adds juicy brightness)
- Shredded cheddar cheese (melts beautifully on warm bread)
- Sour cream (cooling contrast to warm, seasoned meat)
- Fresh cilantro, finely chopped (aromatic finishing touch)
Perfect Pairings: These substantial tacos work beautifully with light sides like Mexican street corn, a simple avocado salad, or fresh fruit. The rich bread and hearty toppings create such a satisfying meal that minimal accompaniments are needed.
Step-by-Step Instructions for Fry Bread Perfection
Creating the Perfect Dough
In a large mixing bowl, whisk together the flour, salt, and baking powder until evenly distributed. Create a well in the center of the dry ingredients, then slowly pour in the warm water while stirring with a wooden spoon or clean hands.
Mix gently until a soft, slightly sticky dough forms – don’t overwork it, as this can make the finished bread tough rather than tender. The dough should be cohesive but not smooth like bread dough. Cover with a clean kitchen towel and allow it to rest for exactly 10 minutes. This resting period allows the flour to fully hydrate and the baking powder to begin working.
Preparing the Savory Fillings
While the dough rests, heat a large skillet over medium heat and add the ground beef. Cook, breaking it apart with a spatula, until completely browned and no pink remains, approximately 8-10 minutes. Drain any excess fat to prevent greasy tacos.
Stir in the taco seasoning and warm water, mixing thoroughly to ensure even distribution. Reduce heat to low and simmer for 5 minutes, stirring occasionally, until the mixture thickens and the flavors meld together beautifully.
Optional Bean Preparation
If including pinto beans, heat olive oil in a small saucepan over medium heat. Add the drained beans along with cumin, salt, black pepper, and onion powder. Cook on low heat for 10 minutes, stirring occasionally, until heated through and the spices are well-incorporated. Keep warm until serving time.
The Frying Process
Heat approximately 2 inches of vegetable oil in a deep, heavy skillet to exactly 350°F. Use a cooking thermometer for accuracy – proper temperature is crucial for achieving the perfect texture without greasiness.
Divide the rested dough into 4 equal portions. On a lightly floured surface, gently shape each portion into a round disc approximately 6-8 inches in diameter and ½ inch thick. Don’t worry about perfect circles – rustic shapes add character and authenticity.
Achieving Golden Perfection
Carefully lower one piece of dough into the hot oil, being careful not to splash. The bread should immediately begin to puff and bubble. Fry for 1-2 minutes per side until golden brown and beautifully puffed. The first side will puff dramatically, creating that signature airy texture.
Using tongs or a slotted spoon, transfer the fried bread to a paper towel-lined plate to drain excess oil. Repeat with remaining dough pieces, maintaining oil temperature between each batch.
Assembly and Serving
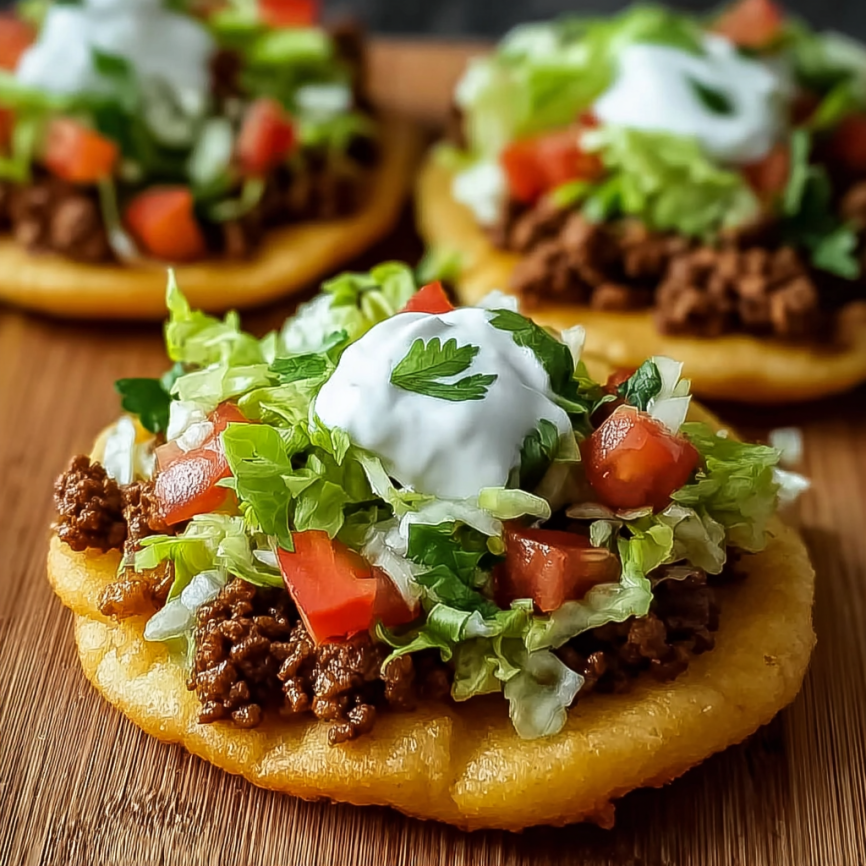
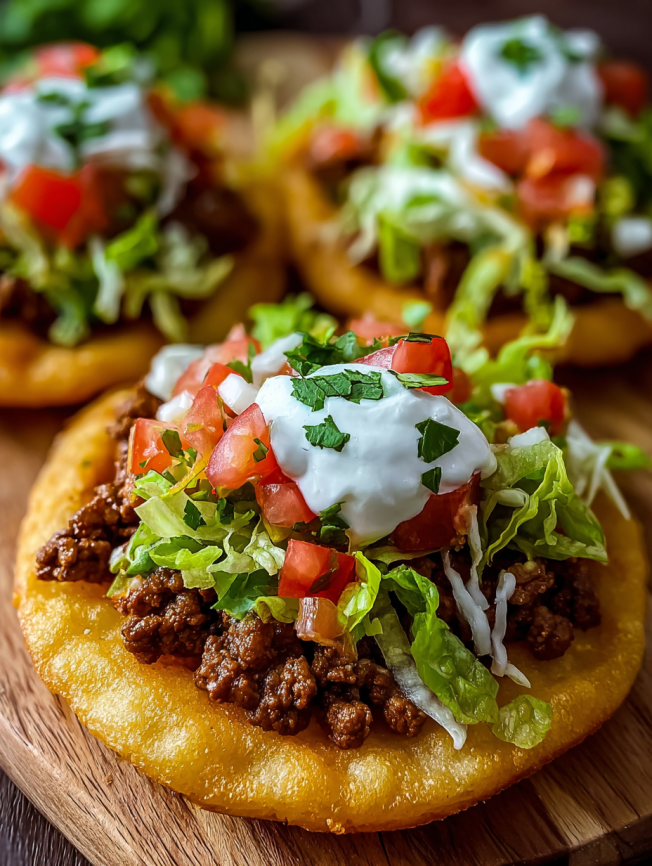
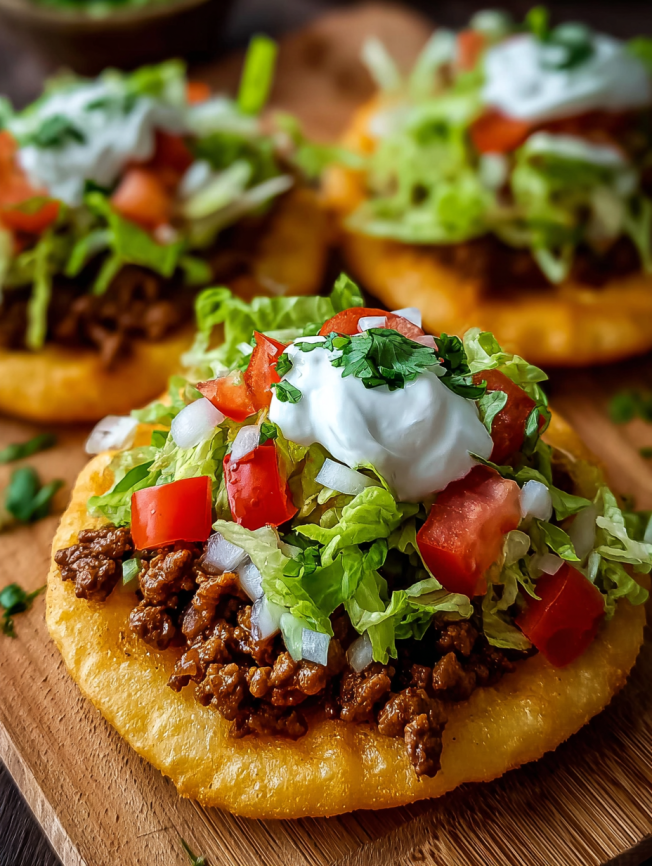
Place each warm piece of fry bread on an individual plate. Working quickly while the bread is still warm, layer with crisp lettuce, seasoned ground beef, diced tomatoes, and shredded cheese. The heat from the bread will begin melting the cheese slightly.
Add dollops of sour cream and sprinkle with fresh cilantro for the finishing touches. Serve immediately while the fry bread retains its optimal texture and warmth.
Creative Serving and Presentation Ideas
Transform these into an interactive family meal by setting up a build-your-own taco bar. Arrange all the toppings in separate bowls, allowing each person to customize their perfect combination. This approach makes everyone feel involved and accommodates different taste preferences within the family.
For more formal entertaining, present each assembled taco on individual plates garnished with lime wedges and a small side of guacamole or salsa. The rustic beauty of handmade fry bread creates an impressive presentation that guests will remember long after the meal ends.
Consider cutting the fry bread into smaller pieces for appetizer-sized portions, perfect for parties or gatherings where you want to offer something unique and memorable.
Exciting Recipe Variations
Breakfast Fry Bread Tacos
Replace the ground beef with scrambled eggs, crispy bacon, and breakfast sausage. Top with shredded cheese, diced jalapeños, and salsa for a morning twist that transforms breakfast into an adventure.
Chicken and Green Chile Version
Substitute seasoned shredded chicken for the ground beef and add roasted green chiles to the filling. Top with pepper jack cheese and avocado slices for a southwestern flavor profile that’s both familiar and exciting.
Vegetarian Bean and Cheese Style
Skip the meat entirely and focus on well-seasoned pinto or black beans, sautéed bell peppers and onions, and multiple types of cheese. Add roasted corn and fresh herbs for a satisfying plant-based option.
Sweet Dessert Variation
Serve the warm fry bread with honey, cinnamon sugar, fresh berries, and whipped cream for a dessert that celebrates the bread’s versatility and natural sweetness.
Smart Make-Ahead and Storage Strategies
While fry bread is undoubtedly best when served immediately after frying, you can prepare several components ahead of time. The dough can be mixed and allowed to rest in the refrigerator for up to 24 hours – just bring it back to room temperature before shaping and frying.
The seasoned ground beef and beans can be prepared up to three days in advance and stored in the refrigerator. Reheat gently before serving, adding a splash of water if needed to restore the proper consistency.
All cold toppings should be prepped and arranged just before serving to maintain maximum freshness and crunch. Having everything ready allows you to focus on frying the bread at the last minute for optimal results.
Professional Tips for Fry Bread Success
Dough Consistency: The dough should be soft and slightly sticky but not wet. If it seems too dry, add water one tablespoon at a time. If too wet, add flour gradually until it reaches the proper consistency.
Oil Temperature Control: Maintain steady oil temperature throughout frying. If the temperature drops too low, the bread will absorb excess oil and become greasy. Too high, and it will brown before cooking through.
Shaping Technique: Don’t roll the dough with a rolling pin – gentle hand-shaping preserves the air bubbles that create the characteristic fluffy texture. Uneven thickness adds to the rustic, homemade appeal.
Safety First: When working with hot oil, keep a lid nearby to smother any potential flare-ups, and never leave the oil unattended. Have your draining station set up before you begin frying.
Frequently Asked Questions
Can I make the fry bread ahead of time? Fry bread is best served immediately, but if necessary, you can keep it warm in a 200°F oven for up to 30 minutes. Reheat briefly in a dry skillet to restore some crispness if it becomes too soft.
What if I don’t have a thermometer for the oil? Drop a small piece of dough into the oil – it should sizzle immediately and rise to the surface. If it browns too quickly, the oil is too hot. If it doesn’t sizzle much, the oil needs more heat.
Can I bake the bread instead of frying? While baking is possible (400°F for 12-15 minutes), it won’t produce the same light, airy texture that makes traditional fry bread special. The fried version is truly worth the extra effort.
How do I prevent the bread from becoming too greasy? Maintain proper oil temperature and don’t overcrowd the pan. Always drain on paper towels immediately after frying, and serve as soon as possible for the best texture.
What’s the best oil for frying? Vegetable oil, canola oil, or peanut oil work best due to their neutral flavors and high smoke points. Avoid olive oil, which can break down at frying temperatures and affect the taste.
Can I make smaller or larger pieces? Absolutely! Adjust the cooking time accordingly – smaller pieces cook faster, while larger pieces need more time. Just ensure they cook through completely while achieving proper browning.
How do I store leftover components? Store leftover meat filling in the refrigerator for up to 3 days. Unfortunately, fry bread doesn’t store well and should be consumed immediately for best results.
Recipe Summary
- Prep Time: 20 minutes
- Cook Time: 20 minutes
- Total Time: 40 minutes
- Serves: 4 generous portions
- Difficulty: Moderate
- Cuisine: Native American Fusion
Required Equipment: Large mixing bowl, large skillet for frying, medium skillet for beef, small saucepan for beans, slotted spoon or tongs, cooking thermometer (recommended), paper towels for draining
Nutritional Information (per serving): 675 calories, 32.4g fat, 58.2g carbohydrates, 35.8g protein
Allergy Information: Contains gluten (flour), dairy (cheese and sour cream). Always check individual ingredient labels for specific allergens and consult healthcare providers for serious dietary restrictions.