
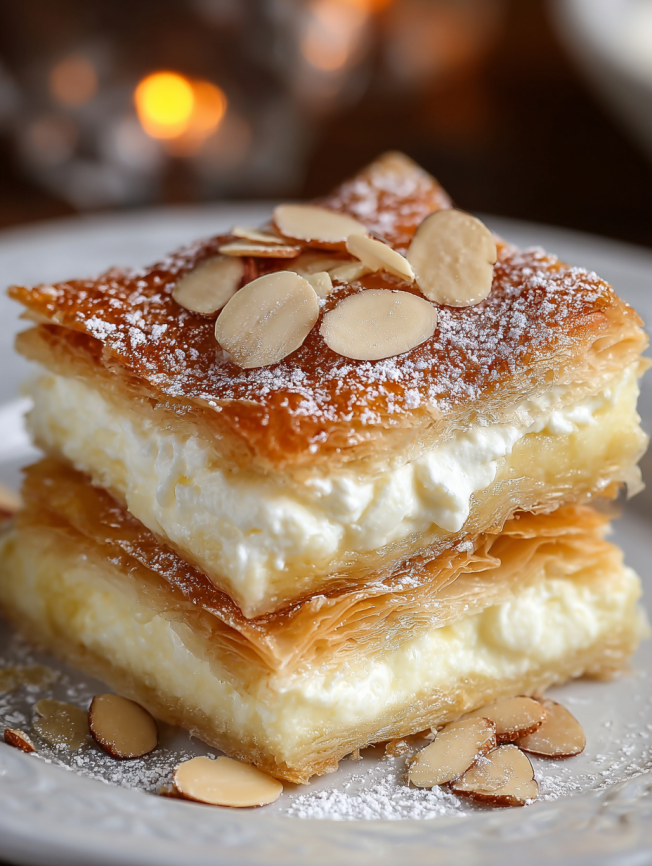
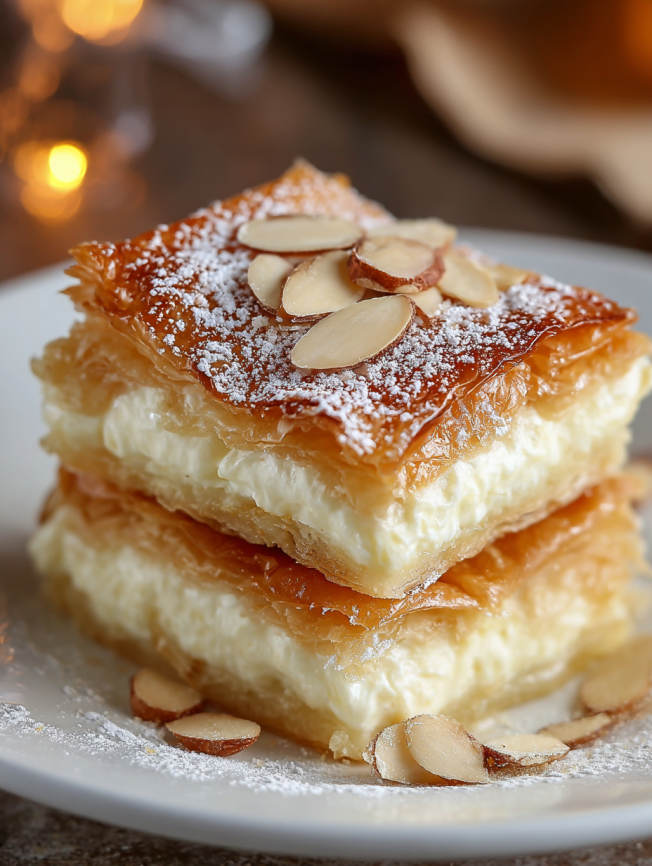
Five years ago, during a family trip to New Mexico, I discovered the magic of sopapillas at a small local restaurant. The warm, flaky pastry drizzled with honey captivated me instantly. When I returned home, I couldn’t stop thinking about those delightful flavors. That’s when inspiration struck – what if I could transform this beloved Mexican treat into a show-stopping cheesecake? After several kitchen experiments, this Sopapilla Cheesecake was born, combining the crispy, cinnamon-sugar goodness of traditional sopapillas with the rich creaminess of classic cheesecake.
This dessert represents the perfect marriage of two beloved treats, creating something entirely new yet comfortingly familiar. The contrast between the flaky puff pastry layers and the smooth cream cheese filling creates a textural symphony that keeps you coming back for more.
Why This Recipe Will Win Your Heart
Fusion Brilliance: This dessert captures the essence of traditional Mexican sopapillas while delivering the satisfying richness of New York-style cheesecake. Moreover, it’s much simpler to make than either dessert would be separately.
Impressive Simplicity: Despite its sophisticated appearance and complex flavors, this recipe requires no special skills or equipment. Additionally, the use of store-bought puff pastry eliminates the need for complicated dough preparation.
Crowd-Pleasing Appeal: The familiar flavors of cinnamon and vanilla make this dessert accessible to all palates. Furthermore, its generous size makes it perfect for feeding large groups at gatherings and celebrations.
Versatile Serving Options: This cheesecake works beautifully as a standalone dessert or paired with various accompaniments. Consequently, you can easily customize the presentation to match any occasion or preference.
Essential Ingredients
Creamy Foundation
- 3 packages (225g each) cream cheese, room temperature – The heart of our cheesecake layer
- 1.5 cups white sugar – Provides sweetness and helps achieve the perfect consistency
- 1.5 teaspoons vanilla extract – Adds aromatic depth and rounds out the flavors
Pastry Components
- 2 cans puff pastry (225g each) – Creates those coveted flaky layers reminiscent of sopapillas
- 0.5 cups melted butter – Essential for achieving golden, crispy perfection
- 0.5 cup white sugar (for sprinkling) – Forms the sweet, caramelized top layer
- 1 teaspoon ground cinnamon – The signature spice that ties everything together
Finishing Touch
- 0.25 cup sliced almonds – Adds delightful crunch and visual appeal
Serving Companions
Consider pairing with vanilla ice cream for temperature contrast. Alternatively, fresh berries provide a lovely tartness that balances the rich sweetness. A drizzle of honey pays homage to traditional sopapilla service, while chocolate sauce appeals to those seeking extra indulgence.
Detailed Step-by-Step Instructions
Preparation Phase
Step 1: Preheat your oven to 180°C (350°F). This temperature ensures even baking while preventing the pastry from burning before the filling sets properly.
Creating the Filling
Step 2: In a large mixing bowl, combine room temperature cream cheese, 1.5 cups white sugar, and vanilla extract. Beat the mixture thoroughly until completely smooth and creamy, with no lumps remaining. This process typically takes 3-4 minutes with an electric mixer.
Assembly Process
Step 3: Carefully unroll one can of puff pastry and press it evenly into the bottom of a rectangular baking pan. Ensure the pastry reaches all corners and creates a uniform base layer.
Step 4: Pour the prepared cream cheese mixture over the pastry base, spreading it evenly with a spatula. The filling should cover the entire surface uniformly.
Top Layer Construction
Step 5: Open the second can of puff pastry and cut it into manageable pieces. Arrange these pieces strategically over the cream cheese layer, creating an attractive patchwork pattern that will become beautifully golden during baking.
Step 6: In a small bowl, whisk together melted butter, remaining sugar, and ground cinnamon until well combined. Drizzle this aromatic mixture evenly over the entire surface of the assembled dessert.
Baking Process
Step 7: Place the pan in the preheated oven and bake for 30-35 minutes, monitoring carefully until the top achieves a gorgeous golden-brown color and becomes deliciously crispy.
Step 8: During the final 5 minutes of baking, sprinkle sliced almonds over the surface. This timing prevents them from burning while ensuring they become perfectly toasted.
Final Steps
Step 9: Remove from the oven and allow the dessert to cool for several minutes before cutting. This cooling period helps the filling set properly for clean, beautiful slices.
Creative Serving Suggestions
Serve this dessert warm or at room temperature, cut into generous squares. The contrast between the crispy exterior and creamy interior is most pronounced when slightly warm. For elegant presentation, dust each portion lightly with powdered sugar just before serving.
During Mexican-themed dinners, accompany with traditional café de olla (Mexican spiced coffee) or horchata for an authentic cultural experience. The dessert also pairs wonderfully with a small glass of dessert wine or coffee liqueur for adult gatherings.
Exciting Recipe Variations
Flavor Enhancements
Chocolate Indulgence: Add 2 tablespoons of cocoa powder to the cream cheese mixture and drizzle with chocolate sauce before serving. Include mini chocolate chips between layers for extra richness.
Citrus Twist: Incorporate lemon or orange zest into the cream cheese filling for bright, refreshing notes. Top with candied citrus peel instead of almonds for visual appeal.
Spiced Version: Enhance the cinnamon with additional Mexican spices like nutmeg, cardamom, or a pinch of cayenne pepper for complexity and warmth.
Dietary Adaptations
Lighter Alternative: Use reduced-fat cream cheese and substitute part of the sugar with sugar alternatives. Greek yogurt can replace some cream cheese for added protein and tanginess.
Gluten-Free Option: Replace puff pastry with gluten-free alternatives or create a crust using crushed gluten-free cookies mixed with butter.
Make-Ahead Tips
This dessert actually improves with time, making it ideal for advance preparation. Bake the cheesecake up to two days before serving and store it covered in the refrigerator. The flavors meld beautifully, and the texture becomes even more perfect.
For busy entertaining schedules, prepare the cream cheese filling a day ahead and store it covered. Then, assembly becomes quick and effortless on the day of your event.
When preparing for large gatherings, consider making multiple pans. The recipe doubles easily, and having extra ensures everyone gets to enjoy this special treat.
Important Notes (Notas)
Temperature Matters: Ensure cream cheese reaches room temperature before mixing to prevent lumps and achieve the smoothest possible texture.
Pastry Handling: Work quickly with puff pastry to prevent excessive warming, which can make it difficult to handle and less likely to achieve maximum flakiness.
Storage Flexibility: This dessert freezes beautifully for 2-3 months when properly wrapped. Thaw overnight in the refrigerator before serving.
Serving Versatility: The dessert complements various accompaniments including ice cream, chocolate icing, or fresh fruit, making it adaptable to different preferences and occasions.
Cheese Experimentation: While cream cheese is traditional, you can experiment with mascarpone or even ricotta for different flavor profiles and textures.
Frequently Asked Questions
Q: Can I use phyllo dough instead of puff pastry? A: While phyllo creates a different texture, it can work as a substitute. However, you’ll need to brush each layer with butter and use more sheets to achieve proper thickness. The result will be more delicate and crispy rather than flaky.
Q: My cream cheese mixture has lumps. How can I fix this? A: Ensure your cream cheese is completely at room temperature before mixing. If lumps persist, strain the mixture through a fine-mesh sieve or use an immersion blender to smooth it out completely.
Q: Can I prepare this dessert without almonds? A: Absolutely! The almonds are optional and can be omitted entirely or replaced with other nuts like pecans, walnuts, or pistachios. You could also use toasted coconut flakes for a different flavor profile.
Q: How do I know when the dessert is properly baked? A: The top should be golden brown and sound hollow when gently tapped. Additionally, the edges should pull slightly away from the pan, and the center should be set but still slightly jiggly.
Q: Can I make individual portions instead of one large pan? A: Yes! Use muffin tins or small ramekins, adjusting the baking time to 15-20 minutes. This creates beautiful individual servings perfect for dinner parties or portion control.
Q: What’s the best way to cut clean slices? A: Use a sharp knife wiped clean between cuts. For the cleanest slices, chill the dessert completely, then use a thin, sharp blade and make smooth, decisive cuts rather than sawing motions.
Q: Can I reduce the sugar content? A: You can reduce the sugar by up to 1/4 cup in the filling without significantly affecting texture. However, reducing the cinnamon-sugar topping will impact the characteristic sopapilla flavor and appearance.
Q: How long does this dessert stay fresh? A: When stored covered in the refrigerator, it maintains quality for 3-4 days. The pastry may soften slightly over time, but the flavors actually improve as they meld together.
Recipe Summary:
- Total Time: 55 minutes
- Preparation Time: 20 minutes
- Baking Time: 35 minutes
- Servings: 12 generous portions
- Cuisine: Mexican-American fusion
- *Method:


