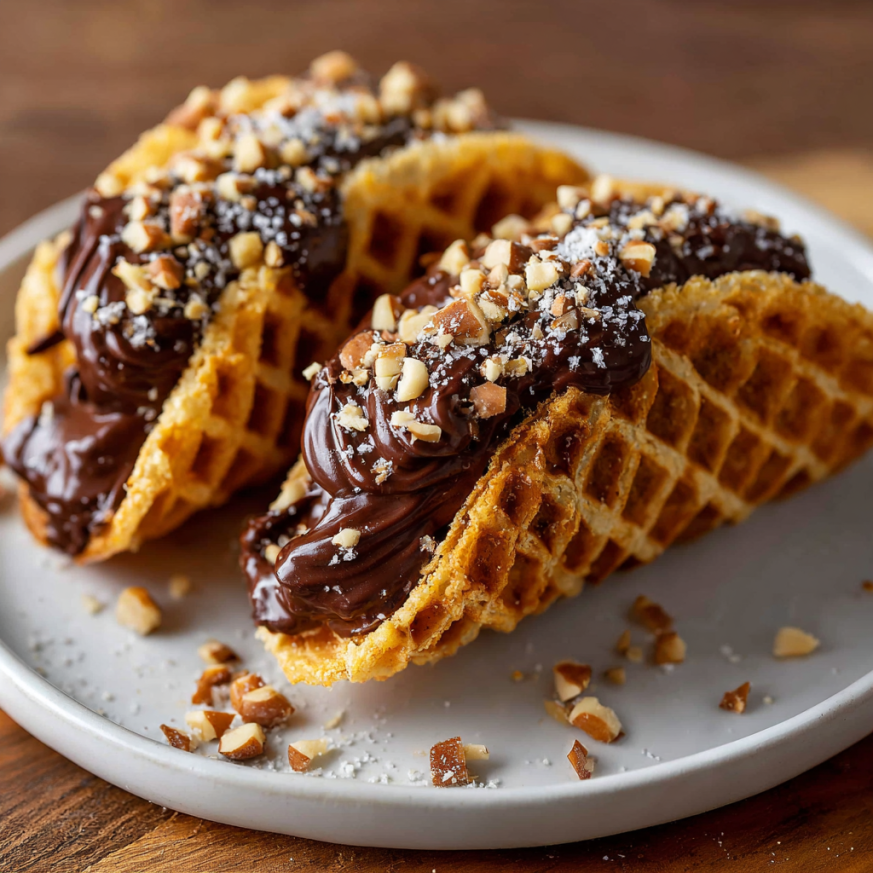
The day I discovered you could transform stroopwafels into taco shells was a revelation that changed my dessert game forever. I’d been mourning the discontinuation of classic Choco Tacos when a friend suggested we make our own using Dutch stroopwafel cookies. That first bite—the caramelized waffle crunch meeting cold vanilla ice cream, all wrapped in rich chocolate and peanuts—was nothing short of magical. These homemade versions are honestly better than any store-bought treat I’ve ever tried.
What makes these stroopwafel choco tacos so special is the combination of textures and flavors working in perfect harmony. The thin, caramel-filled stroopwafel cookies become pliable when warmed, allowing you to fold them into taco shapes that add a distinctive spiced sweetness. Combined with creamy ice cream and a chocolate-peanut coating, every bite delivers crunch, creaminess, and just the right amount of indulgence.
Why You’ll Love This Recipe
A nostalgic treat reimagined. If you’ve been missing those beloved Choco Tacos from your childhood, this recipe brings them back—but better. The stroopwafel adds a caramelized depth that elevates the entire experience beyond simple nostalgia.
Surprisingly easy to make. Despite looking like something from an artisan ice cream shop, these treats come together with minimal effort and no special equipment required. A microwave, some patience, and a freezer are all you really need.
Customizable to your taste. Love different ice cream flavors? Prefer almonds over peanuts? Want to try white chocolate instead of dark? This recipe welcomes all your creative substitutions and personal preferences.
Perfect for entertaining. These individual frozen treats are ideal for parties, summer gatherings, or impressing dinner guests. They look incredibly professional yet remain completely approachable for home cooks.
Make-ahead freezer friendly. Prepare a whole batch in advance and store them in the freezer for up to a month. Whenever you need a special dessert, simply grab one and enjoy—no last-minute stress required.
Ingredients You’ll Need
Main Components
- 1 pint vanilla ice cream – Or any flavor you prefer; coffee and caramel work beautifully
- 8 stroopwafels – Find these in the cookie or international aisle
- 1 ½ cups chocolate chips or chopping chocolate – Milk, dark, or semi-sweet based on preference
- ½ cup chopped roasted peanuts – Or substitute with almonds, pecans, or hazelnuts
Optional Additions
- Caramel sauce for drizzling
- Sea salt flakes for finishing
- Sprinkles for extra fun
- Different nut varieties for customization
Step-by-Step Instructions
Warm and Shape the Stroopwafels
Begin by softening your stroopwafel cookies to make them pliable enough to fold without cracking. Place each cookie in the microwave for 15-20 seconds, checking frequently to avoid overheating. The cookies should feel warm and flexible but not hot or melted.
Alternatively, you can warm them in a dry skillet over medium heat for 20-30 seconds per side. This method gives you more control and creates an even warmth across the entire cookie. Whichever heating method you choose, work quickly—the cookies firm up again as they cool.
While each stroopwafel is still warm and flexible, carefully fold it into a taco shape. The cookie should bend easily at the center, creating that classic taco curve. Press gently to establish the fold without cracking the delicate waffle.
To help them hold their shape while cooling, place the folded cookies in a muffin tin with each taco nestled between two cups. If you don’t have a muffin tin handy, position two small ramekins or cups close together and rest the taco between them. Some people even use actual taco holders, which work perfectly! Let the shaped cookies cool completely at room temperature for about 10-15 minutes until they’re rigid and hold their taco form.
Fill with Ice Cream
Once your stroopwafel shells have cooled and set into their taco shape, it’s time for the fun part—adding ice cream! Take your ice cream out of the freezer and let it soften slightly for 5-10 minutes. This makes scooping and filling much easier without breaking your delicate shells.
Using a spoon or small ice cream scoop, generously fill each taco shell. Don’t be shy here—pack in enough ice cream to create a satisfying bite, but avoid overfilling to the point where it squishes out the sides. Aim for a nice mound that sits just above the rim of the shell.
If your ice cream starts melting during this process (warm kitchens are tricky!), don’t panic. Simply transfer the filled tacos to a parchment-lined baking sheet and pop them into the freezer for 15-20 minutes to firm everything back up. This also helps the ice cream stick to the cookie shell rather than sliding around.
Prepare the Chocolate-Peanut Coating
While your filled tacos are chilling, prepare the chocolate coating. Melt your chocolate using either a double boiler or the microwave. For the microwave method, heat in 30-second intervals, stirring thoroughly between each burst until the chocolate is completely smooth and melted.
Once melted, stir half of your chopped peanuts directly into the warm chocolate. This ensures every bite has that satisfying nutty crunch throughout the coating, not just on top. The mixture should be thick but still pourable—if it seems too thick, add a tiny bit of coconut oil or vegetable oil to thin it slightly.
Keep the remaining peanuts in a separate bowl for sprinkling on top later. Having this ready makes the assembly process much smoother.
Coat and Finish the Tacos
Remove your frozen tacos from the freezer. Working quickly to prevent excessive melting, dip the top edge of each taco into the chocolate-peanut mixture. You can dip just the rim for a delicate look, or go deeper for more chocolate coverage—it’s entirely up to your preference.
Hold the dipped taco over the bowl for a moment, allowing excess chocolate to drip back. Then immediately sprinkle the wet chocolate with the reserved chopped peanuts. The nuts will stick to the still-wet chocolate, creating that gorgeous, crunchy finish that makes these look professionally made.
Place each coated taco back on the parchment-lined baking sheet. If desired, this is also the perfect time to add any additional toppings like sea salt flakes, colored sprinkles, or a drizzle of caramel sauce.
Final Freeze
Return the completed tacos to the freezer for a final 10-15 minute chill. This allows the chocolate coating to set completely, creating a firm shell that won’t melt onto your fingers when you bite into it.
Once the chocolate has fully hardened, your stroopwafel choco tacos are ready to enjoy! These treats are best eaten straight from the freezer when everything is perfectly frozen and the textures are at their optimal contrast.
Serving Suggestions
Classic Presentation: Serve on small dessert plates with a fork for those who want to savor every bite slowly. The contrast of cold ice cream with the crunchy shell makes each mouthful special.
Party Platter Display: Arrange the choco tacos upright in a decorative box or basket lined with parchment paper. They make stunning individual desserts at summer barbecues or birthday parties.
Ice Cream Social: Set up a DIY station where guests can choose their ice cream flavors, chocolate types, and toppings. Let everyone customize their own taco for an interactive dessert experience.
Elegant Dessert Course: Plate a single taco with a drizzle of caramel sauce and a small scoop of whipped cream on the side for a restaurant-worthy finish to a special dinner.
Poolside Treats: Keep a batch in a cooler filled with ice packs for the perfect refreshing treat on hot summer days. They’re easier to eat than traditional ice cream cones and won’t drip as much.
Recipe Variations
S’mores Version
Use graham cracker crumbs mixed with melted butter to create a coating around the chocolate layer. Top with mini marshmallows and a sprinkle of crushed graham crackers for that campfire favorite transformed into a frozen treat.
Salted Caramel Delight
Fill the tacos with salted caramel ice cream and drizzle extra caramel sauce inside before adding the ice cream. Use white chocolate for the coating and finish with flaky sea salt for an elegant sweet-and-salty combination.
Triple Chocolate Indulgence
Fill with chocolate ice cream, use dark chocolate for the coating, and mix in mini chocolate chips instead of peanuts. For serious chocolate lovers, this version delivers maximum cocoa intensity.
Tropical Paradise
Fill with coconut ice cream and use white chocolate mixed with toasted coconut flakes for the coating. Add a sprinkle of macadamia nuts on top for a vacation-worthy dessert.
Peanut Butter Lover’s Dream
Mix peanut butter chips into the chocolate coating and use peanut butter ice cream for the filling. Finish with crushed peanut butter cups on top for the ultimate peanut butter experience.
Make-Ahead Tips
These stroopwafel choco tacos are a freezer-friendly dream! Prepare them completely up to 1 month in advance and store them properly for grab-and-go desserts anytime you need them.
Once the chocolate coating is fully set, wrap each taco individually in plastic wrap or parchment paper. This prevents them from sticking together and protects them from freezer burn. Place the wrapped tacos in a freezer-safe container or heavy-duty freezer bag, separating layers with parchment paper if stacking.
Label the container with the date so you can track freshness. While they’ll remain safe to eat for several months, they taste best within the first month when the textures are at their peak.
When ready to serve, remove tacos from the freezer and let them sit at room temperature for just 2-3 minutes to take the edge off. You want them frozen but not rock-hard. However, eating them straight from the freezer works perfectly fine if you prefer that ultra-cold experience.
For the best results, assemble and freeze the tacos before a party or event rather than trying to serve them immediately after making them. The full freeze helps all the components meld together, and the ice cream stays perfectly scoopable rather than melty.
Notes
Stroopwafel softening is crucial. If you try to fold a cold, stiff stroopwafel, it will crack and break. Take the time to warm each one properly—those few extra seconds make all the difference between success and frustration.
Work quickly but carefully. Once warmed, stroopwafels cool and harden within 30-60 seconds. Have your molds or muffin tin ready before you start heating so you can shape each cookie immediately while it’s still pliable.
Ice cream consistency matters. Slightly softened ice cream spreads and fills the taco shells much more easily than rock-hard ice cream. Let it sit on the counter for a few minutes before scooping for the smoothest filling experience.
Chocolate temperature is key. If your chocolate is too hot, it will melt the ice cream on contact. Let it cool for a minute or two after melting but work before it starts to thicken and harden again.
Peanut alternatives work great. If you have nut allergies, substitute the peanuts with crushed pretzels, toffee bits, or cookie crumbles. You’ll still get that satisfying crunch without the allergen concerns.
Storage prevents freezer burn. Always wrap individual tacos before freezing to maintain quality. Unwrapped frozen desserts can develop ice crystals and absorb freezer odors, affecting both texture and taste.
Frequently Asked Questions
Where can I find stroopwafels?
Most grocery stores carry them in the cookie aisle or international foods section. Look for brands like Daelmans or store brands. You can also order them online. The standard size (around 3-4 inches) works perfectly for this recipe.
Can I use homemade ice cream?
Absolutely! Homemade ice cream works beautifully. Just make sure it’s frozen to a scoopable consistency before filling the tacos. Very soft homemade ice cream may need extra freezing time to firm up properly.
What if my stroopwafel cracks when folding?
Don’t worry—it happens! If a cookie cracks, you can still use it. The chocolate coating and ice cream will help hold everything together. Alternatively, try warming it a few seconds longer next time for more flexibility.
How do I prevent the chocolate from being too thick?
If your melted chocolate seems too thick to dip easily, stir in a teaspoon of coconut oil or vegetable shortening. This thins the consistency without affecting the flavor, making coating much easier.
Can I make these nut-free?
Definitely! Skip the peanuts entirely or replace them with seeds like sunflower or pumpkin seeds for crunch. You can also use crushed cookies, toffee bits, or simply leave them as plain chocolate-dipped tacos.
Why is my ice cream melting so quickly?
Warm kitchens are the enemy of frozen desserts! Work in batches, keeping filled tacos in the freezer while you coat the next batch. You can also work near the freezer with the door open to minimize melting time.
Can I use other types of cookies?
While stroopwafels provide that unique caramelized flavor, you could experiment with thin pizzelle cookies or even large waffle cookies. Just make sure they’re thin enough to fold without breaking when warmed.
Prep Time: 20 minutes
Freezing Time: 40 minutes
Total Time: 1 hour
Course: Dessert
Cuisine: Fusion (Dutch-American)
Servings: 8 choco tacos
Keywords: stroopwafel dessert, choco tacos, ice cream tacos, frozen treats, homemade choco tacos, stroopwafel recipe
Nutrition (per taco):
- Calories: 385 kcal
- Carbohydrates: 48g
- Protein: 6g
- Fat: 20g
- Saturated Fat: 9g
- Cholesterol: 25mg
- Sodium: 115mg
- Potassium: 220mg
- Fiber: 2g
- Sugar: 36g
- Vitamin A: 250 IU
- Calcium: 80mg
- Iron: 2mg