Prep Time: 40 minutes
Cook Time: 45 minutes
Total Time: 1 hour, 25 minutes
Yield: 18 cookies
A Tuscan Tradition Meets Vanilla Perfection
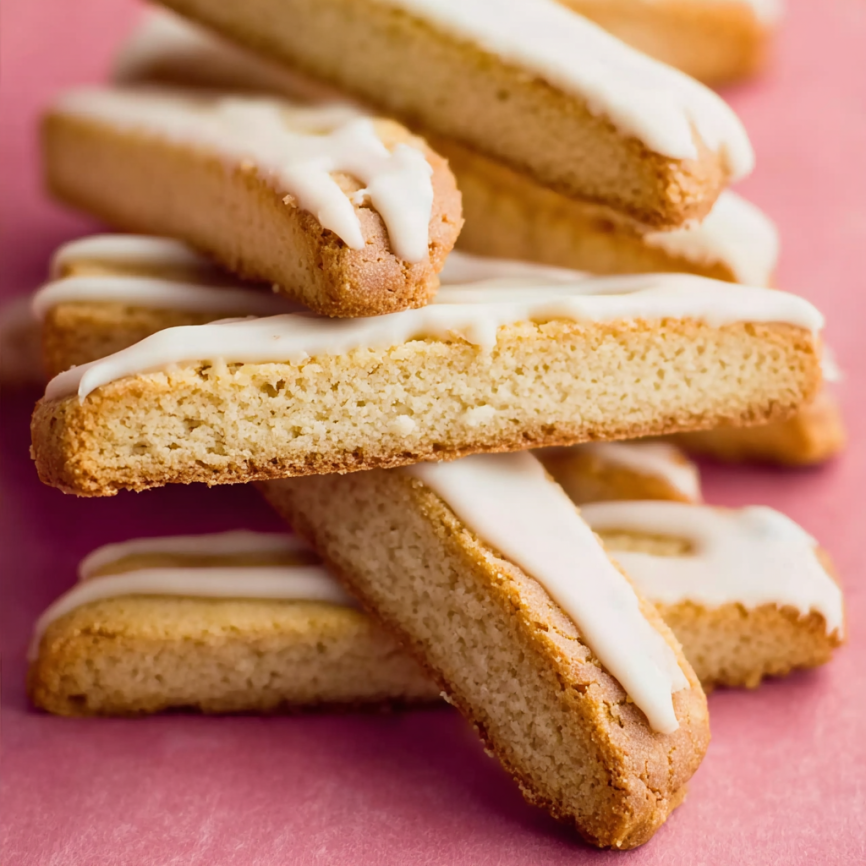
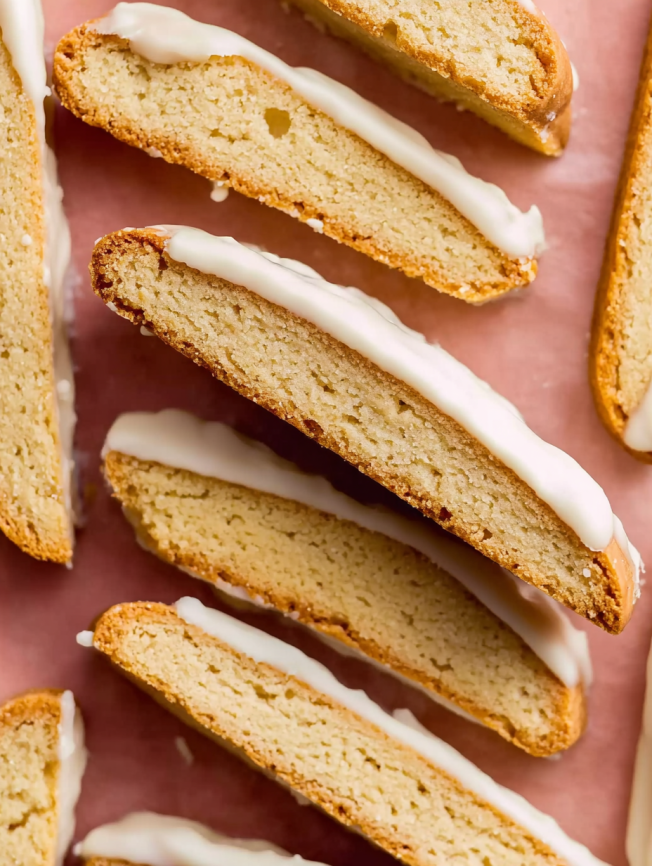
My first encounter with authentic biscotti happened during a magical morning in a small Tuscan café, where the elderly owner served these twice-baked treasures alongside rich espresso with practiced pride. The satisfying crunch, the way they held their shape when dunked into coffee, and that distinctive texture that could only come from the traditional double-baking process captivated me completely. Years later, I’ve recreated that same authentic experience in my own kitchen with these vanilla bean biscotti that honor the traditional technique while celebrating the pure, sweet essence of vanilla.
Unlike soft cookies that disappear in a few bites, biscotti demand to be savored slowly. The deliberate crunch invites you to pause, to dunk thoughtfully in your favorite hot beverage, and to appreciate the subtle complexity that develops during the unique baking process. These vanilla biscotti deliver exceptionally clean, sweet flavor that becomes absolutely indulgent when paired with a coating of premium white chocolate.
Why These Biscotti Will Win Your Heart
Authentic Italian Technique
This recipe follows the traditional twice-baking method that Italian bakers have perfected over centuries. The first bake creates structure, while the second develops that characteristic satisfying crunch that makes biscotti so distinctive and beloved.
Perfect Coffee Companion
These cookies are specifically designed for dunking, with a texture sturdy enough to withstand hot liquids without falling apart. Moreover, the vanilla flavor complements rather than competes with coffee, tea, or hot chocolate.
Impressive Yet Achievable
While biscotti may seem intimidating to novice bakers, this recipe breaks down the process into manageable steps. Furthermore, the rustic, hand-shaped appearance means perfection isn’t required – authentic Italian charm lies in the homemade look.
Extended Freshness
Unlike many homemade cookies that stale quickly, properly made biscotti actually improve with time, staying fresh for weeks when stored correctly. This makes them perfect for gift-giving or preparing ahead for special occasions.
Essential Ingredients
For the Classic Biscotti Base
- 2¼ cups (281g) all-purpose flour (spooned & leveled), plus extra for dusting
- 1 cup (200g) vanilla sugar or granulated sugar (see notes for vanilla sugar instructions)
- 1 teaspoon baking powder
- ½ teaspoon salt
- ¼ cup (4 tablespoons; 56g) unsalted butter, cold and cubed
- 3 large eggs
- 1 tablespoon (15ml) vegetable oil or melted coconut oil
- 2 teaspoons pure vanilla extract
For the Finishing Touches
- Egg wash: 1 large egg beaten with 1 tablespoon (15ml) milk
- Optional: Two 4-ounce (226g) white chocolate bars, coarsely chopped
Serving Suggestions
These biscotti shine brightest alongside freshly brewed espresso, cappuccino, or rich Italian roast coffee. They also pair beautifully with dessert wines like Vin Santo, or enjoy them with afternoon tea for an elegant treat.
Step-by-Step Instructions
Preparation and Mixing
Step 1: Preheat your oven to 350°F (177°C) and line two large baking sheets with parchment paper or silicone baking mats. Having everything ready before you start mixing ensures smooth workflow throughout the process.
Step 2: In a large bowl, whisk together flour, sugar, baking powder, and salt until evenly combined. Using a pastry cutter or fork, cut in the cold butter until the mixture resembles coarse crumbs with no large butter pieces remaining.
Step 3: In a separate medium bowl, whisk the 3 eggs, oil, and vanilla extract until well blended. Pour this wet mixture into the flour-butter combination and gently mix with a wooden spoon or silicone spatula until everything is just barely moistened. The dough will appear very crumbly at this stage – this is perfectly normal and expected.
Shaping the Dough
Step 4: Turn the crumbly dough onto a lightly floured surface. With floured hands, knead the mixture lightly 8-10 times until it becomes soft and slightly sticky. If the dough clings excessively to your hands, knead in 1-2 additional tablespoons of flour gradually.
Step 5: Divide the dough into two equal portions and place each half on a prepared baking sheet. Shape each portion into an 8-9 inch long slab, patting down until each measures approximately ½ inch thick. The slabs don’t need to be perfectly rectangular – rustic charm is part of biscotti’s appeal.
Step 6: Using a pastry brush, lightly coat the top and sides of each slab with egg wash. This creates the beautiful golden color that makes biscotti so visually appealing.
First Baking Phase
Step 7: Bake the slabs for 25-26 minutes, or until the tops and sides develop a light golden-brown color. During this first bake, the dough transforms from soft and pliable to firm and sliceable.
Step 8: Remove from the oven but leave the heat on. Allow the slabs to cool for exactly 10 minutes – this cooling period is crucial for achieving clean cuts without crumbling.
Slicing and Second Baking
Step 9: Once cool enough to handle safely, use a sharp knife to cut each slab into 1-inch wide slices. Work with confident, decisive cuts to prevent cracking or crumbling.
Step 10: Arrange the slices cut-side up, spacing them ¼ inch apart on the baking sheets. The end pieces can be tricky to stand upright, so simply lay them on their sides.
Step 11: Return to the oven for 8 minutes, then carefully flip each biscotti and bake the other side for another 8 minutes. This second baking creates the signature crunch while leaving centers slightly tender.
Cooling and Optional Chocolate Coating
Step 12: Remove from the oven and cool on the baking sheets for 5 minutes before transferring to wire racks. The biscotti will continue becoming crunchier as they cool completely.
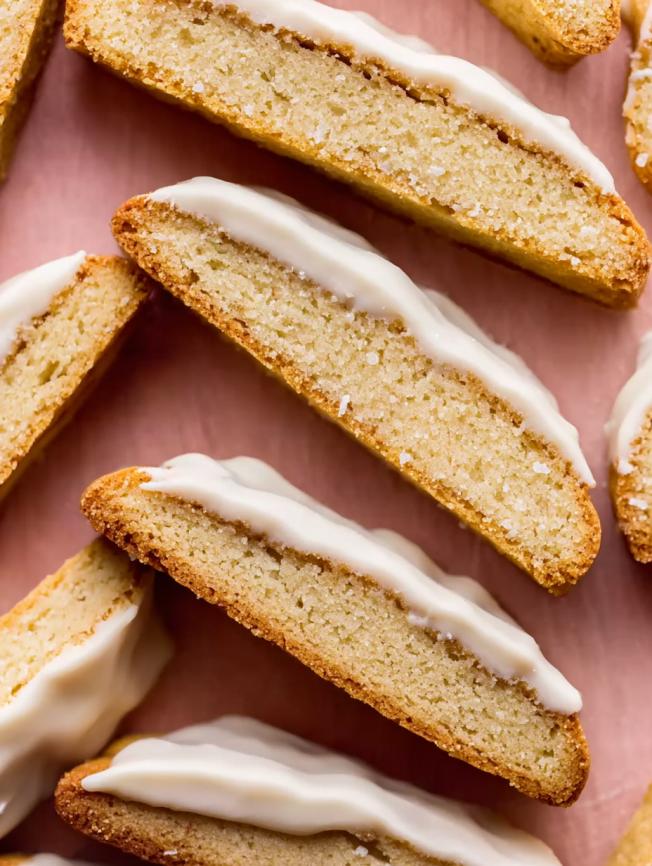
Step 13: For chocolate-dipped biscotti, melt chopped white chocolate using a double boiler or microwave (in 15-second increments, stirring between each). Dip each cooled biscotti halfway into the melted chocolate, then place on baking sheets to set.
Irresistible Serving Ideas
Traditional Italian Style
Serve alongside small glasses of espresso or cappuccino for dunking, just as they do in Italian cafés. The contrast between the bitter coffee and sweet vanilla creates the perfect flavor balance that has satisfied generations.
Elegant Afternoon Tea
Present these biscotti on a tiered serving stand with fine china and premium loose-leaf tea. Their sophisticated appearance and refined flavor make them ideal for special occasions or entertaining guests.
Dessert Wine Pairing
Follow Italian tradition by serving biscotti with a glass of Vin Santo or other dessert wine. The wine’s sweetness complements the vanilla beautifully while the biscotti’s texture provides delightful contrast.
Gift Presentation
Layer chocolate-dipped biscotti in decorative tins or clear cellophane bags tied with ribbon. Their long shelf life and elegant appearance make them perfect homemade gifts for holidays or special occasions.
Creative Recipe Variations
Citrus-Infused Version
Add the zest of one lemon or orange to the wet ingredients for a bright, aromatic twist. The citrus oils enhance the vanilla rather than overwhelming it, creating a more complex flavor profile.
Almond Lovers’ Adaptation
Replace half the vanilla extract with almond extract and fold in ¾ cup sliced almonds after mixing the dough. This creates a more traditional Italian-style biscotti with nutty richness.
Spiced Holiday Version
During winter months, add ½ teaspoon cinnamon, ¼ teaspoon nutmeg, and a pinch of cardamom to the dry ingredients. These warming spices transform the biscotti into festive holiday treats.
Chocolate Chip Variation
Fold 1 cup of mini chocolate chips into the finished dough before shaping. The chips provide bursts of chocolate flavor throughout each bite while maintaining the classic biscotti texture.
Dried Fruit Addition
Incorporate ¾ cup of chopped dried cranberries, cherries, or apricots for chewy texture contrast. The dried fruit adds natural sweetness and beautiful color speckles throughout the finished cookies.
Smart Make-Ahead Strategies
Dough Preparation
The shaped slabs can be prepared and frozen before the first baking for up to three months. Wrap tightly in plastic wrap or aluminum foil, then thaw completely before brushing with egg wash and proceeding with baking.
Batch Baking Benefits
Since biscotti keep exceptionally well, consider making double batches during busy seasons. The time investment remains nearly the same, but you’ll have treats ready for unexpected guests or gift-giving opportunities.
Storage for Optimal Freshness
Store completely cooled biscotti in airtight containers at room temperature for up to two weeks. For longer storage, refrigerate for up to one month or freeze for up to three months.
Chocolate Coating Timing
If planning to add chocolate coating, complete the biscotti base entirely and store uncoated. Add chocolate just before serving or gifting for the freshest appearance and best texture.
Important Recipe Notes
Vanilla Sugar Magic
Using homemade vanilla sugar instead of regular granulated sugar elevates these biscotti dramatically. The infused vanilla flavor permeates every bite, creating depth that extract alone cannot achieve. If unavailable, scrape seeds from half a vanilla bean into the wet ingredients.
Sweetness Customization
These biscotti lean toward the sweeter side, perfect for dessert applications. However, you can reduce sugar to ½ cup if preferred, though adding 2 tablespoons extra flour helps maintain proper texture.
Butter Temperature Importance
Cold butter creates the proper crumbly texture essential for authentic biscotti. Room temperature butter would create a different texture entirely, so ensure yours is properly chilled before beginning.
White Chocolate Selection
Choose high-quality white chocolate bars rather than chips for coating. Bars melt more smoothly and create a more professional-looking finish. Look for brands like Baker’s or Ghirardelli in the baking aisle.
Texture Development
The twice-baking process is non-negotiable for authentic results. The first bake sets the structure, while the second creates the characteristic crunch that defines proper biscotti.
Add-In Opportunities
Feel free to customize with 1 cup of additions like chopped nuts, dried fruit, or chocolate chips. Fold these into the finished dough just before shaping for even distribution.
Frequently Asked Questions
Q: Why are my biscotti too crumbly to slice cleanly? A: This usually indicates insufficient cooling time between bakes. Allow the slabs to cool for the full 10 minutes – they should be firm but not hot to the touch before slicing. Sharp knives also help create cleaner cuts.
Q: Can I make biscotti without the second baking step? A: The double-baking process is essential for authentic biscotti texture. Skipping the second bake results in soft cookies rather than the characteristic crunchy texture that makes biscotti perfect for dunking.
Q: How do I know when the biscotti are properly baked? A: After the second baking, they should feel firm around the edges but may still seem slightly soft in the centers. They continue hardening as they cool, achieving the perfect crunch within an hour.
Q: Can I use different types of chocolate for coating? A: Absolutely! While white chocolate complements the vanilla beautifully, dark chocolate or milk chocolate work wonderfully too. Semi-sweet chocolate provides nice contrast to the sweet vanilla flavor.
Q: Why did my white chocolate seize while melting? A: White chocolate is more temperamental than regular chocolate and can seize if overheated or exposed to moisture. Use gentle heat, stir frequently, and ensure all utensils are completely dry before melting.
Q: How long do these biscotti actually stay fresh? A: Properly stored biscotti remain fresh for 1-2 weeks at room temperature, up to one month refrigerated, or up to three months frozen. Their low moisture content makes them naturally long-lasting.
Q: Can I make these gluten-free? A: Yes, substitute the all-purpose flour with a 1:1 gluten-free flour blend. The texture may be slightly different, but the results should still be delicious and properly crunchy.
Q: What’s the best way to package these as gifts? A: Layer them in decorative tins with parchment paper between layers, or arrange in clear cellophane bags tied with ribbon. Include storage instructions to help recipients maintain optimal freshness.