Growing up in my grandmother’s kitchen, Sunday afternoons meant the unmistakable sound of chicken sizzling in hot oil and the incredible aroma that could draw family members from three rooms away. Her buttermilk fried chicken wasn’t just food—it was pure love served on a platter, crispy and golden on the outside, impossibly tender within.
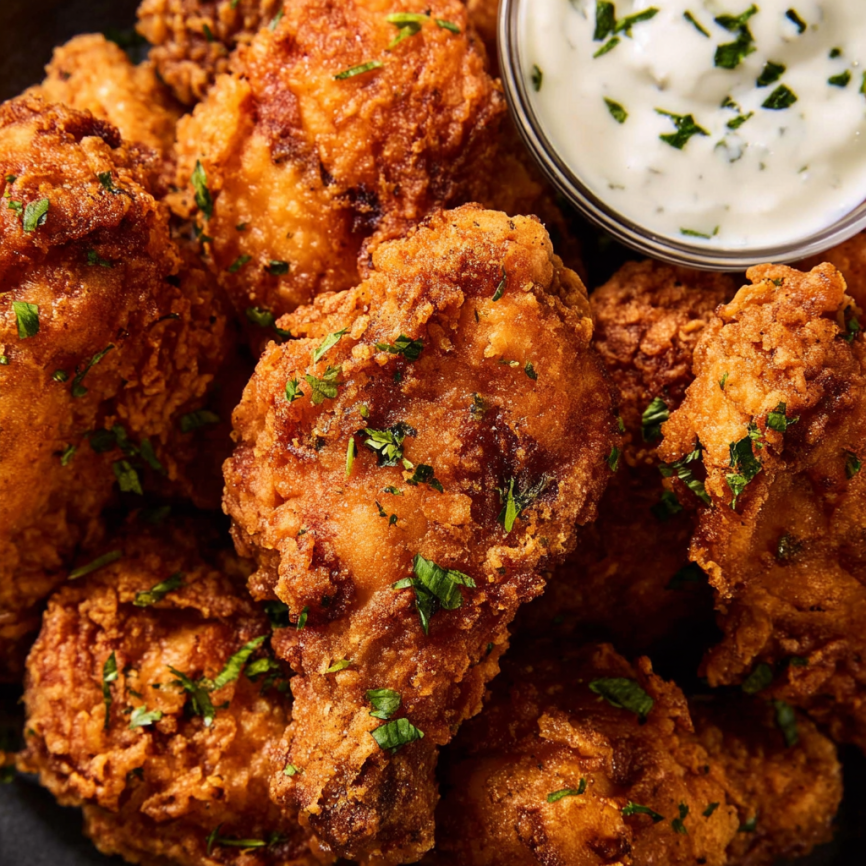
After years of attempting to recreate that magic, I’ve finally cracked the code to achieving restaurant-quality fried chicken at home. This recipe delivers everything you want: an incredibly crispy exterior that shatters at first bite, revealing succulent, perfectly seasoned meat that practically falls off the bone.
Why This Buttermilk Fried Chicken Recipe Stands Above the Rest
The Science Behind Buttermilk Magic
Buttermilk isn’t just a trendy ingredient—it’s the secret weapon that transforms ordinary chicken into extraordinary comfort food. The natural acidity breaks down tough protein fibers, resulting in incredibly tender meat. Meanwhile, the tangy flavor penetrates deep into every bite, creating complexity that regular milk simply cannot achieve.
Extended Marinating for Maximum Impact
While many recipes call for quick marinades, this version requires patience that pays dividends. The minimum four-hour soak allows the buttermilk to work its tenderizing magic thoroughly, ensuring every piece emerges juicy and flavorful from the inside out.
The Perfect Spice Balance
Rather than overwhelming heat, this blend creates warmth and depth. Paprika adds color and mild smokiness, while cayenne provides just enough kick to keep things interesting without alienating sensitive palates. Garlic and onion powders contribute savory depth that complements the chicken’s natural flavor beautifully.
Essential Ingredients and Their Roles
The Chicken Foundation
- 4 pounds chicken, cut into 8 pieces (backbone discarded)
- Choose a whole chicken for the best value and variety of pieces, or select your family’s favorite cuts
The Buttermilk Marinade
- 2 cups buttermilk (provides tenderness and tangy flavor)
- 1 tablespoon kosher salt (enhances flavor and helps with moisture retention)
- 2 teaspoons coarse ground black pepper (adds aromatic spice)
The Seasoned Flour Coating
- 2 cups all-purpose flour (creates the crispy shell)
- 1 teaspoon onion powder (adds savory depth)
- 1 teaspoon garlic powder (contributes aromatic complexity)
- 1 teaspoon paprika (provides color and mild smokiness)
- ½ teaspoon cayenne pepper (brings gentle heat)
- Vegetable oil for frying (maintains neutral flavor and high smoke point)
Ingredient Selection Tips
Quality ingredients make a noticeable difference in the final result. Fresh spices provide more vibrant flavors than older ones, so check your spice rack dates before beginning. Additionally, using kosher salt rather than table salt gives you better control over seasoning levels.
Step-by-Step Preparation Guide
The Marinating Process
Begin by combining chicken pieces with buttermilk, kosher salt, and black pepper in a large bowl. Ensure every piece is completely submerged in the mixture—add more buttermilk if necessary. Cover tightly and refrigerate for at least four hours, though overnight marinating produces even better results.
During this extended rest, the buttermilk’s acidity gently breaks down the chicken’s proteins while the salt penetrates the meat, creating a brine effect that locks in moisture during cooking.
Creating the Perfect Coating Station
Set up your breading station efficiently to streamline the coating process. In a medium bowl, whisk together flour and all spices until evenly distributed. Place a large baking sheet nearby for holding the coated pieces—this organization prevents mess and ensures smooth workflow.
The Coating Technique
Remove chicken pieces from the buttermilk marinade one at a time, allowing excess to drip off briefly. Roll each piece thoroughly in the seasoned flour mixture, pressing gently to help the coating adhere. The goal is complete, even coverage that will transform into that coveted crispy shell.
Place coated pieces on the prepared baking sheet without touching each other. Allow them to rest for at least 30 minutes—this crucial step lets the flour absorb remaining moisture from the chicken, creating a paste-like coating that produces superior crispiness.
Mastering the Frying Process
Oil Temperature and Equipment
Heat vegetable oil in a large Dutch oven until it reaches exactly 365°F. A candy thermometer or instant-read thermometer ensures accuracy—too cool and the coating becomes greasy, too hot and it burns before the chicken cooks through.
The Dutch oven’s heavy bottom distributes heat evenly and maintains temperature better than thinner pans. Fill it only halfway with oil to prevent dangerous overflow when adding chicken pieces.
Frying in Batches
Never crowd the pan—frying only four pieces at a time ensures proper oil circulation and temperature maintenance. Overcrowding drops the oil temperature dramatically, resulting in soggy, greasy chicken instead of crispy perfection.
Cook each batch for 10-12 minutes, monitoring both time and internal temperature. Chicken is safely cooked when it reaches 165°F at the thickest part, but appearance also matters—properly fried chicken displays deep golden-brown color and crispy texture.
Serving Suggestions and Perfect Pairings
Classic Southern Combinations
Traditional accompaniments enhance fried chicken’s rich flavors beautifully. Creamy mashed potatoes provide comforting contrast, while fresh coleslaw adds crisp freshness that cuts through the richness. Warm biscuits with honey butter complete the quintessential Southern experience.
Modern Serving Ideas
Consider serving over mixed greens with buttermilk ranch dressing for a lighter approach, or create elevated chicken and waffles by pairing with fluffy Belgian waffles and pure maple syrup. Hot sauce varieties allow guests to customize heat levels according to their preferences.
Recipe Variations to Explore
Spicy Nashville-Style
Double the cayenne pepper and add hot sauce to the buttermilk marinade for authentic Nashville heat. Brush finished chicken with a spicy oil mixture made from cayenne, paprika, and brown sugar for that signature fiery coating.
Herb-Crusted Version
Add dried herbs like thyme, rosemary, and sage to the flour mixture for an aromatic twist. Fresh herbs work too—just chop them finely and pat the chicken dry after coating to prevent burning.
Buttermilk Ranch Coating
Mix ranch seasoning powder into the flour for a tangy, herby variation that appeals especially to younger diners. This version pairs excellently with fresh vegetables and creamy dipping sauces.
Make-Ahead Tips for Stress-Free Cooking
Advanced Preparation
The entire marinating process can be completed up to 24 hours ahead, actually improving the final result. Longer marinating times allow flavors to penetrate more deeply while further tenderizing the meat.
Coating Strategy
Chicken pieces can be coated and rested on the baking sheet for up to 2 hours before frying. Cover lightly with plastic wrap if holding longer than 30 minutes to prevent the coating from drying out completely.
Reheating Methods
Leftover fried chicken reheats beautifully in a 350°F oven for 10-15 minutes, restoring much of its original crispiness. Avoid microwaving, which creates soggy coating and unevenly heated meat.
Essential Notes for Success
Temperature control remains absolutely critical throughout the process. Invest in a reliable thermometer for both oil temperature and chicken doneness—guessing leads to inconsistent results and potential food safety issues.
The resting period after coating isn’t optional—it’s what transforms good fried chicken into exceptional fried chicken. During this time, the flour mixture absorbs moisture and begins forming the foundation for that perfect crispy shell.
Fresh oil produces the best results, but properly filtered oil can be reused once or twice. Strain cooled oil through fine mesh or coffee filters, then store covered in the refrigerator for future frying sessions.
Frequently Asked Questions
Can I use regular milk instead of buttermilk? While regular milk can work in a pinch, buttermilk’s acidity is crucial for both tenderizing the chicken and creating the signature tangy flavor. If you must substitute, add 1 tablespoon of white vinegar or lemon juice to regular milk and let it sit for 5 minutes before using.
What if I don’t have a thermometer for oil temperature? Drop a small piece of bread into the oil—if it browns in about 60 seconds, the temperature is approximately right. However, investing in an inexpensive candy thermometer provides much more reliable results and better consistency.
Can this recipe be baked instead of fried? While baking won’t produce the same crispy texture, you can bake coated chicken at 425°F for 35-45 minutes, flipping once halfway through. The result will be healthier but different in texture and flavor.
How do I know when the chicken is properly cooked? Internal temperature should reach 165°F at the thickest part of each piece. Visually, properly cooked chicken displays deep golden-brown color and clear juices when pierced with a knife.
What’s the best oil for frying? Vegetable oil, canola oil, or peanut oil all work excellently due to their high smoke points and neutral flavors. Avoid olive oil, which has a lower smoke point and can impart unwanted flavors.
Can I prepare this recipe for a crowd? Absolutely! Simply multiply ingredients proportionally and fry in batches. Keep finished pieces warm in a 200°F oven while completing remaining batches. The recipe scales up beautifully for larger gatherings.
Why does my coating sometimes fall off during frying? This usually happens when the resting period is skipped or when oil temperature is incorrect. Ensure coated chicken rests for the full 30 minutes and maintain proper oil temperature throughout cooking.
Yields: 8 servings
Prep Time: 40 minutes
Cook Time: 20 minutes
Total Time: 5 hours (including marinating time)
Course: Dinner
Cuisine: American


