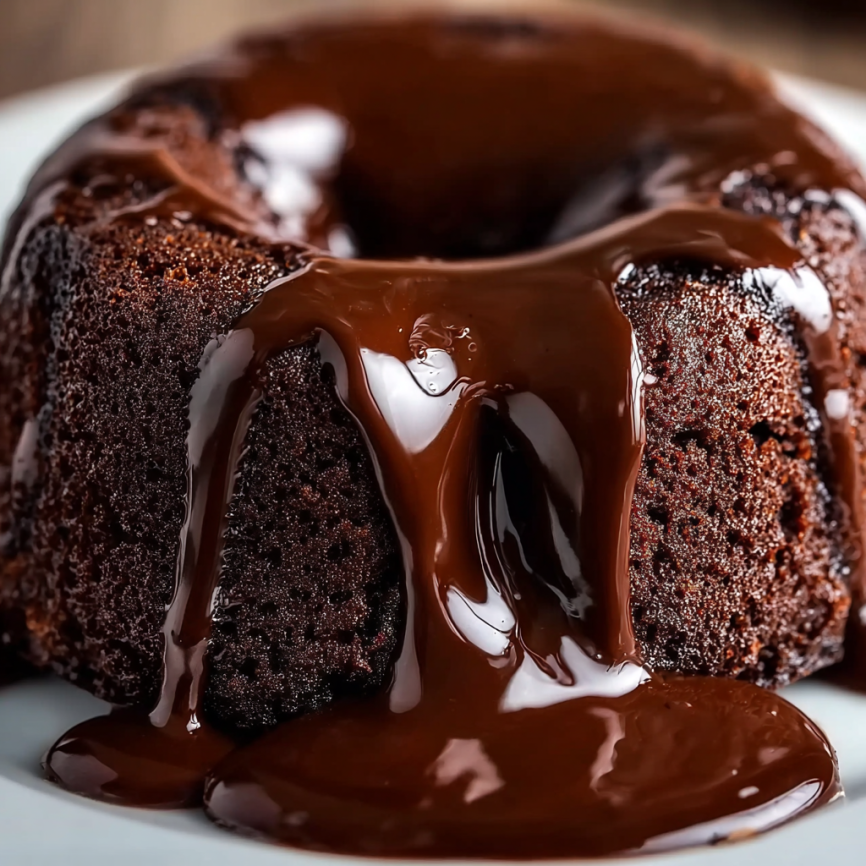
There’s something absolutely magical about cutting into a seemingly innocent chocolate cake and watching rivers of molten chocolate flow onto your plate. My first encounter with chocolate lava cake happened during a romantic dinner at a small French bistro, where the server warned us to “eat it quickly before the magic disappears.” That moment of pure chocolate bliss has stayed with me for years, inspiring countless attempts to recreate that perfect balance of firm exterior and liquid gold center.
Now, after numerous kitchen experiments and a few delicious disasters, I’ve mastered the art of this showstopping dessert. This recipe delivers that restaurant-quality experience right in your own kitchen, transforming simple ingredients into an unforgettable culinary experience.
Why You’ll Fall Head Over Heels for This Recipe
Restaurant-Quality Results at Home: This recipe consistently delivers that coveted molten center that makes chocolate lava cake legendary. Meanwhile, the exterior develops a beautiful, cake-like texture that provides the perfect contrast.
Surprisingly Simple Technique: Despite its impressive appearance, this dessert requires only basic baking skills and common kitchen tools. Furthermore, the entire process takes less than 30 minutes from start to finish.
Perfect Timing Flexibility: These individual cakes can be prepared hours ahead and baked just before serving. Additionally, they’re forgiving enough that even novice bakers can achieve professional results.
Guaranteed Crowd-Pleaser: Whether you’re hosting a dinner party or celebrating a special occasion, these cakes never fail to impress. Moreover, they’re vegetarian-friendly, making them suitable for most dietary preferences.
Essential Ingredients for Molten Perfection
Main Components:
- 200g dark chocolate (70% cocoa for best results)
- 100g unsalted butter (European-style preferred)
- 150g granulated sugar
- 3 large eggs (room temperature)
- 50g all-purpose flour
- 1 teaspoon vanilla extract
- Pinch of fine salt
Perfect Serving Companions:
- Vanilla ice cream or gelato
- Freshly whipped cream
- Fresh berries (strawberries, raspberries, or blackberries)
- Powdered sugar for dusting
- Mint leaves for garnish
Step-by-Step Instructions to Chocolate Heaven
Preparation Phase
Step 1: Preheat your oven to 200°C (400°F). Generously butter four 6-ounce ramekins, then dust with cocoa powder or sugar, tapping out any excess. This prevents sticking and ensures easy removal.
Step 2: Place the ramekins on a baking sheet for easy handling. Set aside while you prepare the batter.
Creating the Molten Base
Step 3: Break the chocolate into small pieces and combine with butter in a heatproof bowl. Melt using a double boiler or microwave in 30-second intervals, stirring between each interval until smooth. Allow the mixture to cool slightly.
Step 4: In a separate bowl, vigorously whisk eggs and sugar together for 2-3 minutes until the mixture becomes pale and slightly thickened. This aerates the batter and creates a lighter texture.
Bringing It All Together
Step 5: Add vanilla extract and salt to the egg mixture, then gradually pour in the cooled chocolate mixture while whisking continuously. This prevents the eggs from scrambling.
Step 6: Sift the flour directly into the bowl and fold gently with a rubber spatula until just combined. Overmixing can result in tough cakes, so stop as soon as you don’t see flour streaks.
The Final Bake
Step 7: Divide the batter evenly among prepared ramekins, filling each about 2/3 full. Gently tap the ramekins on the counter to release air bubbles.
Step 8: Bake for 12-14 minutes until the edges are firm and set, but the centers still jiggle slightly when shaken. The tops should look dry but the centers should feel soft when lightly pressed.
Step 9: Remove from oven and let stand for exactly 1-2 minutes. Working quickly, run a knife around the edges and invert each ramekin onto a serving plate. Gently lift the ramekin away – the cake should release easily.
Serving Suggestions That Elevate the Experience
Classic Presentation
Serve immediately while the chocolate center is still flowing. A scoop of vanilla ice cream alongside creates a delightful temperature contrast that enhances both the warm cake and cold cream.
Elegant Plating
Dust the plate with powdered sugar before inverting the cake. Then, arrange fresh berries around the base and add a sprig of mint for color contrast.
Indulgent Variations
Drizzle plates with raspberry coulis or caramel sauce before plating. Alternatively, serve with a dollop of crème anglaise for an ultra-luxurious experience.
Creative Recipe Variations
Orange Chocolate Lava Cake
Add 1 tablespoon of fresh orange zest to the chocolate mixture and replace vanilla with orange extract. This citrus twist brightens the rich chocolate flavors beautifully.
Espresso Enhancement
Incorporate 1 tablespoon of instant espresso powder into the melted chocolate for a sophisticated mocha flavor that appeals to coffee lovers.
Nutty Indulgence
Fold 2 tablespoons of chopped toasted hazelnuts or almonds into the batter just before baking. This adds delightful texture and complementary flavors.
Salted Caramel Surprise
Place a small piece of salted caramel in the center of each ramekin before adding the batter. This creates an extra layer of molten surprise.
Make-Ahead Tips for Stress-Free Entertaining
Advance Preparation Options
These cakes can be assembled up to 6 hours ahead and refrigerated. When ready to serve, simply add 1-2 extra minutes to the baking time to account for the chilled batter.
Freezer-Friendly Method
Assembled cakes freeze beautifully for up to one month. Bake directly from frozen, adding 3-4 minutes to the cooking time. This makes them perfect for spontaneous dessert emergencies.
Batter Storage
The prepared batter can be stored in the refrigerator for up to 24 hours. However, bring it to room temperature for 15 minutes before baking for best results.
Essential Notes for Perfect Results
Chocolate Quality Matters: Invest in good-quality dark chocolate with at least 60-70% cocoa content. The chocolate is the star of this dessert, so don’t compromise on quality.
Temperature Control: Ensure butter and eggs are at room temperature before starting. Cold ingredients don’t incorporate as smoothly and can affect the final texture.
Timing Is Everything: Don’t overbake these cakes. The magic happens when the center remains gloriously molten, which requires precise timing and attention.
Serving Temperature: These cakes are best served immediately while the center is flowing. However, they’re still delicious even if the center sets completely.
Frequently Asked Questions
Q: How do I know when the cakes are perfectly done? A: The edges should be firm and pulling slightly away from the sides, while the center should jiggle just slightly when gently shaken. The tops should look set but feel soft when lightly touched.
Q: Can I use milk chocolate instead of dark chocolate? A: While possible, milk chocolate will result in a sweeter, less intense flavor. For best results, stick with dark chocolate containing 60-70% cocoa. If you prefer milder chocolate, try using 60% instead of 70%.
Q: What if my cakes don’t have molten centers? A: This usually means they were baked too long. Each oven varies, so start checking at 10 minutes and adjust accordingly. Remember, slightly underbaked is better than overbaked for this recipe.
Q: Can I make larger or smaller portions? A: Absolutely! For larger cakes, use 8-ounce ramekins and increase baking time by 2-3 minutes. For smaller portions, use 4-ounce ramekins and reduce baking time by 1-2 minutes.
Q: Why did my cakes stick to the ramekins? A: Proper preparation is crucial. Make sure to butter the ramekins thoroughly and dust with cocoa powder or sugar. Also, let the cakes rest for 1-2 minutes before inverting to allow them to release naturally.
Q: Can I reheat leftover lava cakes? A: While they won’t have the same molten center, you can reheat them in the microwave for 20-30 seconds. Alternatively, warm them in a 300°F oven for 5-7 minutes.
Recipe Details:
- Total Time: 29 minutes
- Prep Time: 15 minutes
- Cook Time: 14 minutes
- Yield: 4 servings
- Diet: Vegetarian
- Cuisine: French
- Method: Baking
Nutrition per serving:
- Calories: 350
- Fat: 20g (Saturated: 12g)
- Carbohydrates: 40g
- Protein: 6g
- Sugar: 25g
- Fiber: 2g
- Cholesterol: 150mg
- Sodium: 150mg


