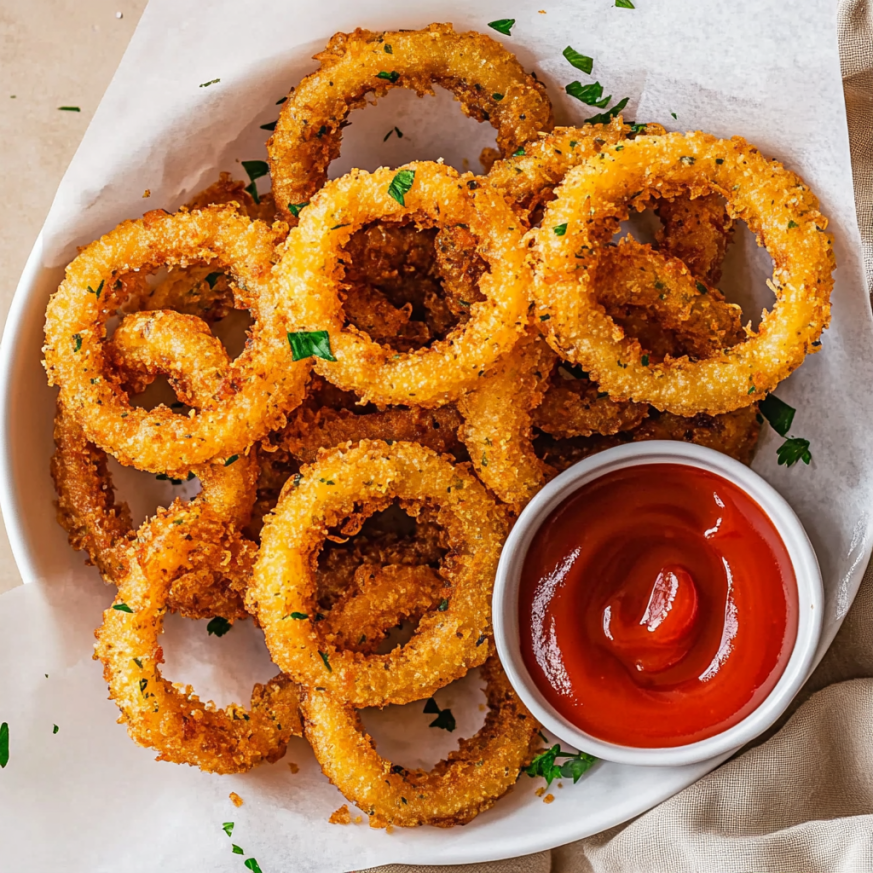
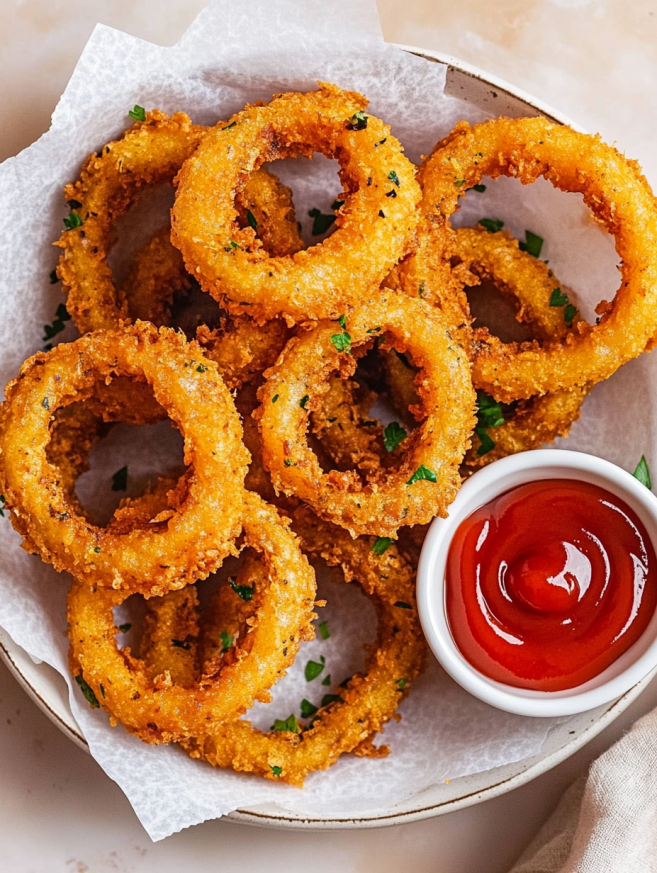
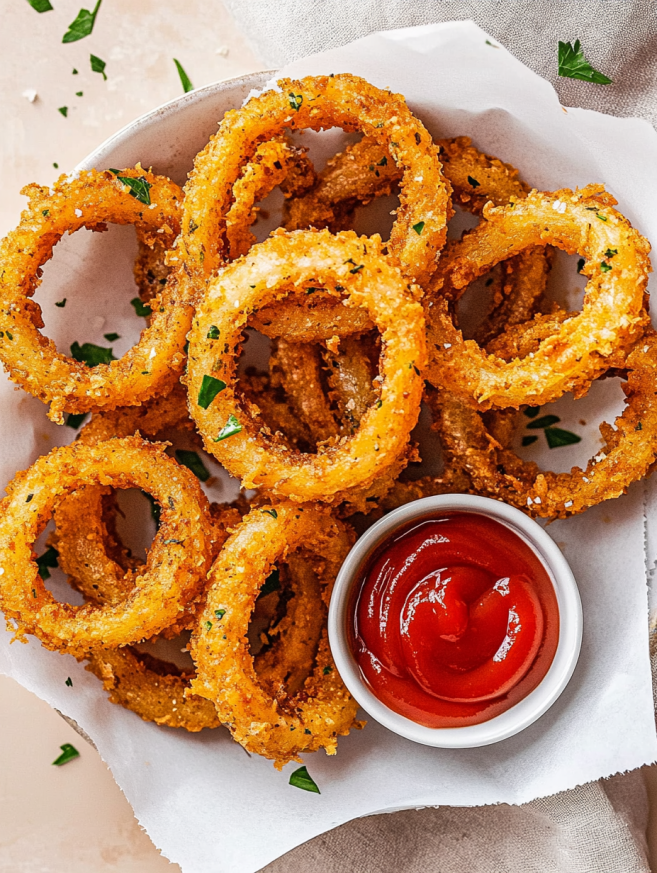
There’s something magical about the perfect onion ring – that satisfying crunch followed by sweet, tender onion that practically melts in your mouth. Growing up, my family would always order onion rings at our favorite diner, and I spent years trying to recreate that exact crispy perfection at home. After countless attempts and kitchen experiments, I finally cracked the code to achieving restaurant-quality onion rings in my own kitchen.
These aren’t your typical frozen onion rings from the grocery store. Instead, we’re talking about thick-cut yellow onions soaked in tangy buttermilk, then coated in a seasoned flour and breadcrumb mixture that creates the most incredible golden crust when fried to perfection.
Why You’ll Fall in Love with This Recipe
Perfect Texture Every Time
The secret lies in the buttermilk soak, which tenderizes the onions while creating the perfect base for our coating to adhere. Meanwhile, the combination of flour and breadcrumbs delivers that coveted double-crunch texture that makes these onion rings absolutely irresistible.
Simple Ingredients, Extraordinary Results
You probably have most of these ingredients in your pantry right now. Furthermore, the technique is straightforward enough for beginners, yet produces professional-quality results that will impress even the pickiest eaters.
Customizable Seasoning
This base recipe serves as your canvas for creativity. Additionally, you can easily adjust the spice level or add your favorite seasonings to make these onion rings uniquely yours.
Essential Ingredients
Main Components
- 1 large yellow onion – peeled and sliced into ¼-inch thick rings
- 1 cup buttermilk – for tenderizing and coating adhesion
- Vegetable oil for frying – enough for 3 inches depth
- 1¼ cups all-purpose flour – divided for coating
- 1 cup fine breadcrumbs – creates the signature crunch
- ¼ teaspoon kosher salt – enhances all flavors
- ⅛ teaspoon black pepper – adds subtle warmth
- ¼ teaspoon garlic powder – for aromatic depth
Perfect Serving Companions
These golden beauties pair wonderfully with classic burger and fries combinations. Alternatively, serve them alongside grilled chicken, barbecue ribs, or even as a standalone appetizer with your favorite dipping sauces.
Step-by-Step Instructions
Preparation Phase
Begin by peeling your onion and slicing it into ¼-inch thick rounds. Carefully separate the rings, keeping only the larger outer rings for the best results. Next, place the onion rings in a large bowl with the buttermilk, ensuring they’re completely submerged. Let them soak for exactly ten minutes – this timing is crucial for optimal tenderness.
Creating the Perfect Coating
While your onions are soaking, combine the flour, breadcrumbs, salt, black pepper, and garlic powder in a second large bowl. Whisk these dry ingredients together thoroughly to ensure even distribution of seasonings throughout the mixture.
Heating the Oil
Pour vegetable oil into a heavy-bottomed Dutch oven until it reaches approximately 3 inches deep. Heat the oil over medium-high heat until it reaches exactly 350°F on a candy thermometer. Maintaining this temperature is essential for achieving perfectly crispy onion rings without excess oil absorption.
The Coating Process
Using tongs, carefully remove each onion ring from the buttermilk, allowing excess liquid to drip off. Then, dredge each ring thoroughly in the flour mixture, pressing gently to ensure the coating adheres completely to both sides.
Frying to Golden Perfection
Working in small batches to avoid overcrowding, carefully lower the coated onion rings into the hot oil using a fork to cradle them. Fry for 2-3 minutes, or until they achieve a beautiful golden-brown color. The oil should bubble actively around the rings, indicating proper temperature.
Final Cooling Step
Transfer the finished onion rings to a wire cooling rack set over a baking sheet. Avoid placing them on paper towels, as this can make the coating soggy by trapping steam underneath.
Serving Suggestions
Classic Combinations
Serve these crispy delights immediately while they’re still hot and crunchy. They make an excellent side dish for burgers, sandwiches, or grilled meats. Moreover, they’re perfect for sharing as an appetizer at parties or game-day gatherings.
Dipping Sauce Ideas
Ranch dressing remains the classic choice, but don’t limit yourself there. Try them with spicy mayo, honey mustard, barbecue sauce, or even a tangy aioli for elevated flavor experiences.
tive Recipe Variations
Spicy Heat Version
Add ½ teaspoon of cayenne pepper and ½ teaspoon of paprika to your flour mixture for onion rings with a kick. This variation pairs beautifully with cooling ranch or blue cheese dipping sauces.
Herb-Crusted Style
Incorporate 1 teaspoon of dried herbs such as oregano, thyme, or Italian seasoning into your coating mixture. This creates a more sophisticated flavor profile that complements Mediterranean-inspired meals.
Beer Batter Alternative
Replace the buttermilk with ¾ cup of your favorite beer for a lighter, airier coating. The carbonation in the beer creates extra lift and crispiness in the final product.
Panko Power-Up
Substitute regular breadcrumbs with panko breadcrumbs for an even crunchier texture. The larger flakes create more surface area for maximum crispiness.
Make-Ahead Tips
Prep Work Shortcuts
You can slice your onions and prepare the coating mixture up to 24 hours in advance. Store the sliced onions in the refrigerator, and keep the dry coating mixture in an airtight container at room temperature.
Freezing Strategy
For ultimate convenience, you can bread the onion rings completely, then freeze them on a baking sheet. Once frozen solid, transfer them to freezer bags for up to 3 months. Fry directly from frozen, adding an extra minute to the cooking time.
Reheating Methods
Leftover onion rings can be reheated in a 400°F oven for 5-7 minutes to restore some of their original crispiness. Avoid microwaving, as this will make them soggy.
Important Notes
Oil Temperature Matters
Maintaining the correct oil temperature is crucial for success. If the oil is too hot, the coating will burn before the onion cooks through. Conversely, oil that’s too cool will result in greasy, soggy rings that absorb too much oil.
Safety First
Always use extreme caution when working with hot oil. Keep a lid nearby to smother any potential flare-ups, and never leave hot oil unattended on the stove.
Quality Ingredients Count
Using fresh onions and high-quality oil makes a noticeable difference in the final product. Sweet yellow onions work best, as they become tender and sweet when cooked.
Frequently Asked Questions
Can I use a different type of onion? While yellow onions work best due to their perfect balance of sweetness and mild flavor, you can substitute with sweet onions like Vidalia. However, avoid red onions as they can be too sharp, and white onions may become too pungent when fried.
What if I don’t have buttermilk? You can make a buttermilk substitute by adding 1 tablespoon of white vinegar or lemon juice to 1 cup of regular milk. Let it sit for 5 minutes before using. The acidity will help tenderize the onions similarly to real buttermilk.
How do I know when the oil is hot enough? The most accurate method is using a candy thermometer to ensure the oil reaches 350°F. Alternatively, drop a small piece of bread into the oil – it should sizzle immediately and turn golden brown within 60 seconds if the temperature is correct.
Why shouldn’t I put them on paper towels? Paper towels trap steam underneath the onion rings, which softens the crispy coating you worked so hard to achieve. A wire rack allows air circulation, keeping the bottom as crispy as the top.
Can I make these in an air fryer? Yes! Preheat your air fryer to 400°F and cook the breaded onion rings for 8-10 minutes, flipping halfway through. Spray lightly with cooking oil for best results, though they won’t be quite as crispy as the traditional fried version.
How long do leftover onion rings stay fresh? Leftover onion rings are best consumed within 24 hours when stored in the refrigerator. For optimal texture, reheat them in the oven rather than the microwave to restore some crispiness.
Recipe Summary:
- Yield: 4 servings
- Prep Time: 15 minutes
- Cook Time: 15 minutes
- Total Time: 30 minutes
- Course: Side Dish
- Cuisine: American
Nutrition per serving: 432 calories, 31g carbohydrates, 7g protein, 32g fat


