Prep Time: 45 minutes | Cook Time: 13 minutes | Total Time: 1 hour | Yield: 26-30 cookies
A Childhood Classic Made Perfect
Growing up, the aroma of oatmeal raisin cookies baking in my grandmother’s kitchen meant pure comfort and love. However, countless attempts at recreating that perfect balance of chewy texture and homemade flavor often left me disappointed with cookies that were either too hard or lacking that signature taste I remembered so fondly.
After years of tweaking and testing, I’ve finally perfected the recipe that captures everything I loved about those childhood treats. These cookies achieve that ideal soft-yet-chewy texture while delivering the warm, spiced flavor that makes oatmeal raisin cookies so irresistible. Moreover, they stay wonderfully soft for days, making them perfect for sharing or enjoying throughout the week.
Why These Will Become Your Go-To Cookie Recipe
Perfect Texture Every Time
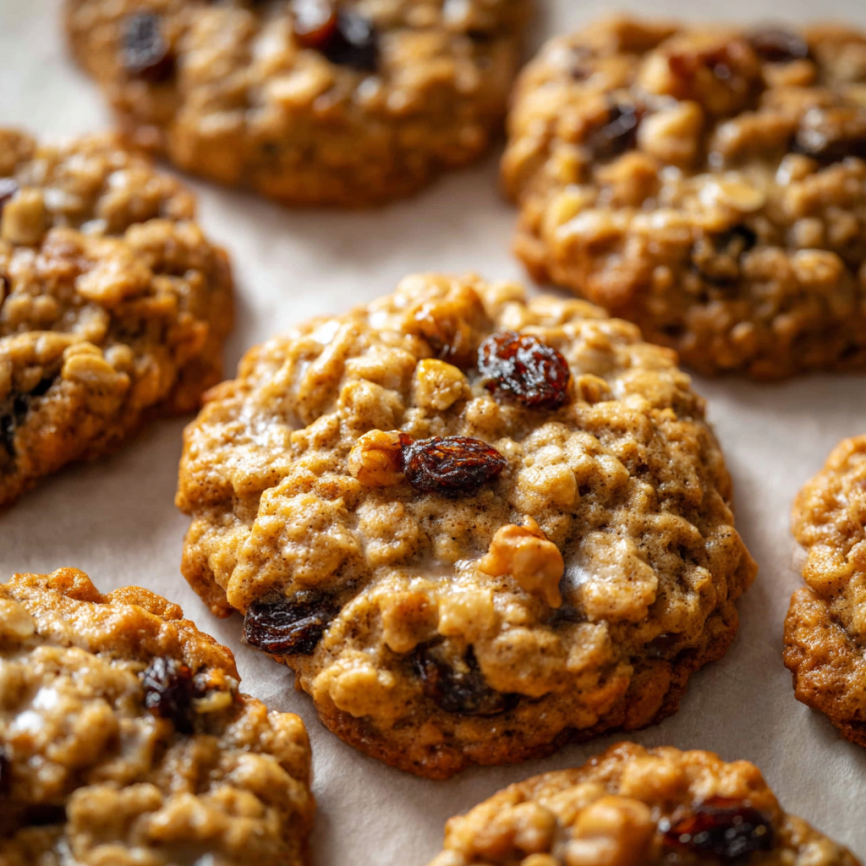
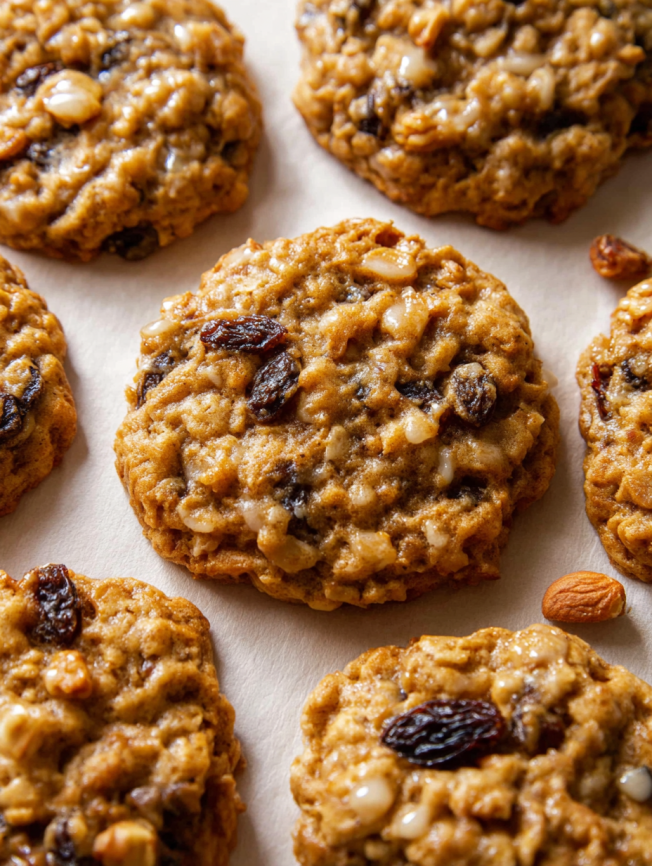
The secret lies in the precise balance of ingredients and the crucial chilling step. These cookies emerge from the oven with slightly crispy edges and incredibly soft centers that maintain their chewiness even after cooling. Furthermore, the addition of molasses adds depth without overwhelming sweetness.
Foolproof Results
Unlike many cookie recipes that require perfect timing, these are remarkably forgiving. The visual cues provided ensure you’ll know exactly when they’re done, regardless of your oven’s quirks. Additionally, the dough can be prepared ahead and baked fresh whenever cravings strike.
Customizable Base
While delicious as written, this recipe serves as an excellent foundation for variations. Whether you prefer extra cinnamon, different dried fruits, or various nuts, the base accommodates changes beautifully without compromising the texture.
Essential Ingredients
Wet Ingredients
- 1 cup (226g) unsalted butter, softened to room temperature
- 1 cup (200g) packed brown sugar (light or dark)
- ¼ cup (50g) granulated sugar
- 2 large eggs, preferably room temperature
- 2 teaspoons pure vanilla extract
- 1 tablespoon (15ml) molasses (unsulphured or dark, not blackstrap)
Dry Components
- 1⅔ cups (209g) all-purpose flour, spooned and leveled
- 1 teaspoon baking soda
- 1½ teaspoons ground cinnamon
- ½ teaspoon salt
- 3 cups (255g) old-fashioned whole rolled oats
- 1 cup (140g) raisins
- Optional: ½ cup (64g) chopped toasted walnuts
The quality of your oats makes a significant difference – choose old-fashioned whole oats rather than quick-cooking varieties for optimal texture.
Step-by-Step Instructions
Creating the Base
Step 1: Using either a hand mixer or stand mixer with paddle attachment, cream the softened butter with both sugars on medium speed until the mixture becomes smooth and well-combined, approximately 2 minutes.
Step 2: Add the eggs one at a time, mixing on high speed until fully incorporated, about 1 minute total. Scrape down the bowl sides and bottom as needed to ensure even mixing.
Step 3: Pour in the vanilla extract and molasses, then mix on high speed until completely combined. The mixture should be smooth and fragrant.
Building the Dough
Step 4: In a separate bowl, whisk together the flour, baking soda, cinnamon, and salt until evenly distributed. This ensures the leavening and spices are properly incorporated throughout.
Step 5: Add the dry ingredients to the wet mixture and mix on low speed just until combined. Avoid overmixing, which can lead to tough cookies.
Step 6: Beat in the oats, raisins, and walnuts (if using) on low speed until evenly distributed. The dough will be thick and quite sticky – this is exactly right.
Chilling and Preparation
Step 7: Chill the dough in the refrigerator for 30-60 minutes. For cookies that spread less, opt for the full hour. If chilling longer than 2 hours, let the dough sit at room temperature for at least 30 minutes before baking.
Step 8: While the dough chills, preheat your oven to 350°F (177°C) and line two large baking sheets with parchment paper or silicone baking mats.
Baking Process
Step 9: Using a cookie scoop or spoon, portion the dough into balls using approximately 2 tablespoons per cookie. Place them 2 inches apart on the prepared baking sheets to allow for spreading.
Step 10: Bake for 12-14 minutes until the edges are lightly browned while centers still appear soft and slightly under-baked. This ensures the perfect chewy texture.
Step 11: Allow cookies to cool on the baking sheet for 5 minutes before transferring to a wire rack. This resting period lets them finish setting while maintaining their soft centers.

Serving Suggestions
These cookies are absolutely perfect on their own, but they become even more special when thoughtfully presented. Serve them warm with a tall glass of cold milk for the classic experience, or pair them with hot coffee or tea for an afternoon treat.
For special occasions, create a cookie platter alongside other homemade favorites. They also make wonderful additions to lunch boxes or picnic baskets since they travel well and stay fresh. During holidays, wrap them in cellophane bags with festive ribbons for thoughtful homemade gifts.
Creative Recipe Variations
Tropical Twist
Replace the raisins with dried pineapple and coconut flakes for a tropical flavor profile. Add a pinch of lime zest to brighten the overall taste and create something unexpectedly delightful.
Autumn Spice
Enhance the warm spice profile by adding ¼ teaspoon each of nutmeg and ginger alongside the cinnamon. Consider substituting dried cranberries for raisins to complement the seasonal flavors.
Chocolate Lover’s Version
Fold in ¾ cup of mini chocolate chips along with or instead of the raisins. The chocolate adds richness while maintaining the cookie’s signature texture and oat flavor.
Nutty Variations
Experiment with different nuts like chopped pecans, almonds, or even toasted coconut. Each brings its own unique flavor and texture to complement the oats beautifully.
Make-Ahead Strategies
Dough Preparation
The cookie dough can be prepared up to 2 days in advance and stored covered in the refrigerator. Simply let it come to room temperature for easier scooping before baking.
Freezing Options
Both baked cookies and unbaked dough balls freeze exceptionally well for up to 3 months. For dough balls, freeze them on baking sheets first, then transfer to freezer bags. Bake directly from frozen, adding just one extra minute to the cooking time.
Storage Solutions
Properly stored cookies remain soft and delicious at room temperature for up to one week when kept in an airtight container. Layer them with parchment paper to prevent sticking.
Professional Baking Tips
Temperature Matters
Room temperature ingredients blend more easily and create better texture. If you forget to soften your butter, cut it into small pieces and let it sit for 15-20 minutes, or briefly microwave at 50% power.
Measuring Accuracy
Spoon flour into your measuring cup and level with a knife rather than scooping directly. This prevents dense, heavy cookies that result from too much flour.
Raisin Enhancement
Soak raisins in warm water for 10 minutes before using, then pat them completely dry. This simple step creates plumper, more flavorful raisins that won’t draw moisture from the dough.
Oven Considerations
Every oven bakes differently, so start checking at 12 minutes. The cookies should look slightly under-baked in the center when you remove them – they’ll continue cooking on the hot pan.
Troubleshooting Common Issues
Problem: Cookies spread too much during baking Solution: Ensure the dough is properly chilled and your baking sheets are cool between batches. Also, check that your butter wasn’t too warm when mixing.
Problem: Cookies are too hard or dry Solution: This usually indicates overbaking. Remove them when centers still look soft, and ensure you’re measuring flour correctly.
Problem: Cookies don’t hold together well Solution: Make sure eggs are fresh and at room temperature. Also, avoid overmixing once flour is added, which can break down the dough structure.
Frequently Asked Questions
Q: Can I use quick-cooking oats instead of old-fashioned? A: While possible, old-fashioned oats provide superior texture and appearance. Quick oats will break down more during baking and won’t give you those characteristic chewy oat pieces.
Q: Why do my cookies look under-baked when I remove them? A: This is intentional! The centers should appear soft and slightly under-baked when you remove them. They’ll continue cooking on the hot pan and set up perfectly as they cool.
Q: Can I substitute the molasses? A: Molasses adds important flavor and moisture, but you can substitute with an equal amount of honey or maple syrup if necessary. The flavor will be slightly different but still delicious.
Q: How do I know when the butter is properly softened? A: Properly softened butter should give slightly when pressed but still hold its shape. It shouldn’t be melted or too soft, as this affects the cookie’s texture.
Q: Can I make these gluten-free? A: You can substitute with a 1:1 gluten-free flour blend, though the texture may be slightly different. Make sure the blend contains xanthan gum for best results.
Q: Why do I need to chill the dough? A: Chilling firms up the butter, which prevents excessive spreading during baking. It also allows the flour to fully hydrate, resulting in better texture and flavor.
Q: How should I store leftover cookies? A: Keep them in an airtight container at room temperature for up to one week. Place a slice of bread in the container to help maintain softness, replacing it every few days.


