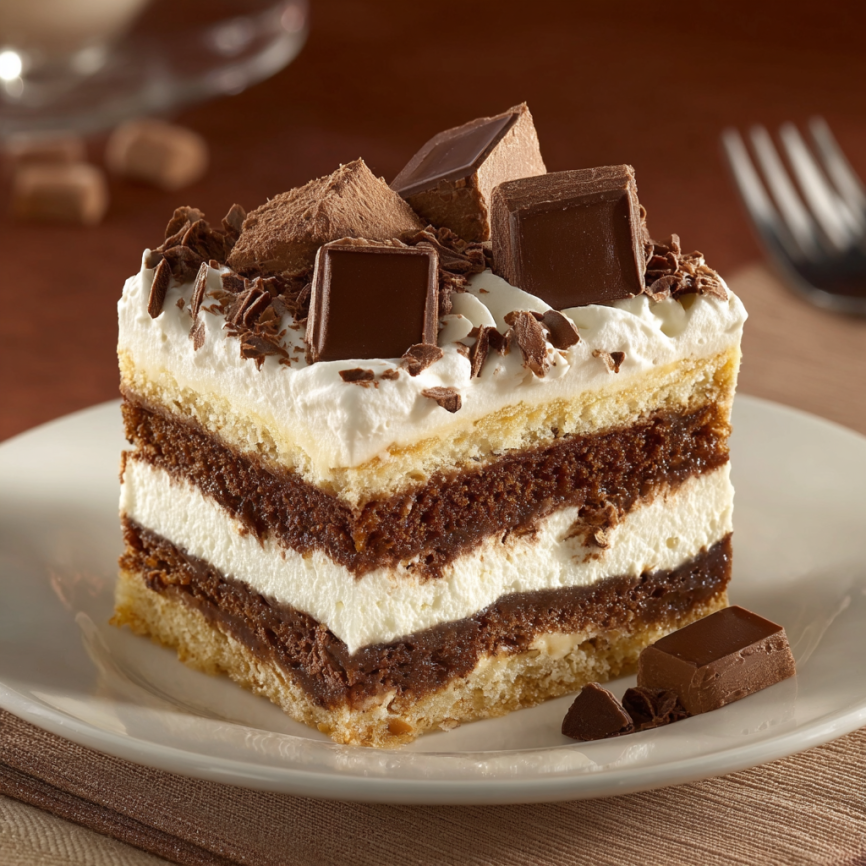
Last winter, during a cozy dinner party at my home, I decided to experiment with my traditional tiramisu recipe. The result was this incredible Tiramisu Toffee Dessert that had my guests asking for the recipe before they’d even finished their first bite. What started as a curious culinary adventure became my signature dessert, combining the beloved Italian classic with the irresistible crunch and sweetness of toffee.
This dessert captures all the sophisticated flavors of traditional tiramisu while adding an unexpected twist that makes it truly unforgettable. The marriage of coffee-soaked pound cake, velvety cream cheese layers, and crunchy toffee pieces creates a symphony of textures that dance on your palate.
Why This Recipe Will Become Your New Favorite
Simplified Elegance: Unlike traditional tiramisu that requires ladyfingers and mascarpone, this version uses accessible ingredients while maintaining that luxurious taste. Moreover, the pound cake provides a sturdier base that’s easier to work with.
Toffee Magic: The addition of chocolate-covered toffee bars transforms this from ordinary to extraordinary. Each bite delivers delightful bursts of caramel sweetness and satisfying crunch that complement the smooth coffee flavors perfectly.
Foolproof Success: This no-bake dessert eliminates the guesswork often associated with traditional tiramisu. Additionally, the simple layering technique ensures beautiful results every time, making it perfect for both novice and experienced bakers.
Make-Ahead Marvel: The dessert actually improves as it chills, allowing flavors to meld and develop complexity. Consequently, you can prepare it the day before your event without any stress.
Essential Ingredients
Core Components
- 1 package (300g) frozen pound cake, thawed – Serves as the sturdy foundation, replacing traditional ladyfingers
- 180 ml strong brewed coffee – Provides that essential tiramisu flavor profile
- 1 package (225g) cream cheese – Creates the rich, tangy base for our cream layer
- 200g white sugar – Balances the coffee’s bitterness and cream cheese’s tang
- 120 ml chocolate syrup – Adds visual appeal and chocolate depth
- 480 ml whipping cream – Essential for achieving that light, airy texture
Special Touch
- 2 chocolate-covered toffee bars (40g each), chopped – The star ingredient that sets this dessert apart
Serving Accompaniments
Consider serving with delicate almond biscotti for authentic Italian flair. Alternatively, fresh berries provide a lovely contrast to the rich flavors. A small cup of espresso alongside each portion creates the perfect ending to any meal.
Detailed Step-by-Step Instructions
Coffee Preparation
Step 1: Brew your coffee extra strong using your preferred method. Dark roast varieties work exceptionally well, providing robust flavor that won’t get lost among the other ingredients. Allow the coffee to cool completely before proceeding.
Cream Mixture Creation
Step 2: In a spacious mixing bowl, combine cream cheese and white sugar. Beat the mixture vigorously until completely smooth and no lumps remain. This process typically requires 3-4 minutes with an electric mixer.
Step 3: Using a separate clean bowl, whip the cream until stiff peaks form. Be careful not to over-whip, as this can lead to a grainy texture in your final dessert.
Step 4: Gently fold the whipped cream into the cream cheese mixture using a rubber spatula. Use folding motions rather than stirring to preserve the airy texture that makes this dessert so special.
Assembly Process
Step 5: Arrange the first layer of pound cake slices in your serving dish, covering the bottom completely. Drizzle half of the cooled coffee evenly over the cake, ensuring each piece absorbs the liquid.
Step 6: Spread half of your prepared cream mixture over the coffee-soaked cake layer. Use an offset spatula to create an even, smooth surface.
Final Layers
Step 7: Position the remaining pound cake slices over the cream layer, then drizzle with the remaining coffee. Top with the rest of the cream mixture, spreading it evenly to the edges.
Step 8: Create an artistic finish by drizzling chocolate syrup over the top layer. Finally, sprinkle the chopped toffee pieces generously across the surface for that signature crunch.
Chilling Phase
Step 9: Cover the dessert carefully with plastic wrap and refrigerate for at least 4 hours. However, overnight chilling produces the best flavor development and texture.
Step 10: When ready to serve, use a sharp knife to cut clean portions. Wipe the knife between cuts for professional-looking slices.
Creative Serving Ideas
Present this dessert on chilled plates for an elegant touch. Garnish each portion with a light dusting of cocoa powder or a few extra toffee pieces for visual appeal. During special occasions, consider adding a small dollop of freshly whipped cream and a chocolate-covered coffee bean on top.
For dinner parties, serve alongside a selection of Italian liqueurs such as Amaretto or Sambuca. The dessert pairs beautifully with a robust espresso or cappuccino, creating an authentic Italian dining experience.
Exciting Recipe Variations
Flavor Modifications
Mocha Madness: Replace half the coffee with strong hot chocolate for a mocha twist. Add cocoa powder to the cream mixture for deeper chocolate flavor.
Caramel Dreams: Use caramel sauce instead of chocolate syrup and incorporate caramel candies along with the toffee pieces. This variation appeals to caramel lovers everywhere.
Nutty Delight: Add chopped toasted hazelnuts or almonds between layers. Consider using amaretto-flavored coffee for an extra layer of sophistication.
Dietary Adaptations
Lighter Version: Substitute light cream cheese and use sugar-free alternatives. Replace heavy cream with whipped topping for a reduced-calorie option.
Gluten-Free Alternative: Use gluten-free pound cake or substitute with gluten-free ladyfingers for those with dietary restrictions.
Make-Ahead Strategies
This dessert is ideal for advance preparation, actually improving in flavor after overnight chilling. Prepare the entire dessert up to 24 hours before serving, allowing ample time for the coffee to infuse the cake and flavors to meld beautifully.
For busy schedules, prepare individual components separately. Mix the cream filling and store it covered in the refrigerator. Brew the coffee and let it cool. Then, assemble the dessert on the day of serving for maximum freshness.
When entertaining large groups, consider doubling the recipe and using a larger dish. The layering technique remains the same, simply requiring more ingredients and a bigger serving vessel.
Important Notes (Notas)
Coffee Quality Matters: Use high-quality coffee beans for the best flavor impact. Freshly brewed coffee always trumps instant varieties in both taste and aroma.
Temperature Control: Ensure all ingredients reach room temperature before assembly. Cold cream cheese doesn’t mix properly, while warm coffee can melt the whipped cream.
Chilling Importance: Never skip the chilling time, as it’s crucial for achieving the perfect consistency and flavor development that makes this dessert exceptional.
Storage Guidelines: The dessert maintains optimal quality for 2-3 days when stored covered in the refrigerator. However, it tastes best within the first 24-48 hours after preparation.
Customization Options: Feel free to experiment with different toffee varieties or add complementary flavors like vanilla extract or rum for personalized touches.
Frequently Asked Questions
Q: Can I use fresh pound cake instead of frozen? A: Absolutely! Fresh pound cake works perfectly well. However, day-old cake often absorbs the coffee better than very fresh cake, which can sometimes become too soggy.
Q: What if I don’t have chocolate-covered toffee bars? A: Plain toffee bits work wonderfully, or you can chop up butterscotch candies. Heath bars or Skor bars are excellent alternatives that provide similar flavor and texture.
Q: My whipped cream isn’t holding its shape. What went wrong? A: This usually happens when the cream is too warm or over-whipped. Make sure your cream is very cold, and stop whipping as soon as stiff peaks form. Over-whipped cream can turn grainy and eventually become butter.
Q: Can I make individual portions instead of one large dessert? A: Definitely! Use clear glasses or mason jars to create beautiful individual servings. Layer the ingredients in the same order, adjusting quantities accordingly. This presentation is perfect for dinner parties.
Q: How strong should the coffee be? A: Aim for double-strength coffee compared to your regular brewing ratio. The coffee needs to be robust enough to flavor the cake without being overpowering. Espresso or French press coffee works exceptionally well.
Q: Can I substitute the cream cheese with mascarpone? A: Yes, mascarpone creates a more traditional tiramisu flavor and texture. However, it’s often more expensive and less readily available than cream cheese, which is why this recipe uses the more accessible option.
Q: What’s the best way to chop the toffee bars? A: Place the toffee bars in the freezer for 10-15 minutes to firm them up, then use a sharp knife to chop them into small pieces. This prevents them from becoming sticky and difficult to work with.
Recipe Summary:
- Total Time: 4 hours 30 minutes (including chilling)
- Active Preparation: 30 minutes
- Servings: 9 generous portions
- Cuisine: Italian-inspired fusion
- Method: No-bake layering
Nutritional Information (per serving):
- Calories: 350
- Carbohydrates: 40g
- Protein: 5g
- Fat: 20g (10g saturated)
- Fiber: 1g
- Sugar: 30g
- Sodium: 100mg


