Growing up, some of my fondest memories revolve around helping my grandmother create magical desserts that somehow transformed simple ingredients into showstopping treats. This Twinkie Strawberry Delight reminds me of those precious moments – taking something as wonderfully nostalgic as golden Twinkies and elevating them into an elegant layered dessert that never fails to impress guests. The first time I served this at a family barbecue, my skeptical teenage nephew declared it “surprisingly amazing,” which is basically the highest praise you can get from a 16-year-old.
Why This Dessert Will Become Your Go-To Recipe
Effortless Elegance Meets Nostalgic Comfort
This dessert brilliantly bridges the gap between sophisticated presentation and comforting familiarity. While the combination might seem unconventional at first, the fluffy sweetness of Twinkies pairs beautifully with fresh strawberries and creates layers of texture that feel both indulgent and refreshing. Moreover, the no-bake nature means you can create an impressive dessert without turning on your oven – perfect for hot summer days or when you need to save oven space for other dishes.
Perfect for Any Occasion
Whether you’re hosting a casual backyard gathering, bringing dessert to a potluck, or celebrating a special occasion, this versatile treat adapts beautifully to any setting. The vibrant red strawberries against the golden Twinkies create a visually stunning presentation that photographs beautifully and tastes even better.
Budget-Friendly with Pantry Staples
Unlike elaborate desserts requiring specialty ingredients, this recipe uses accessible items you can find at any grocery store. Furthermore, it serves eight generous portions at a fraction of the cost of bakery desserts, making it an economical choice for feeding a crowd.
Essential Ingredients and Quality Tips
Main Components
For the Base Layer:
- 8 Twinkies (room temperature works best)
- 4 cups fresh strawberries, sliced
- 1 can (approximately 525g) ready-made strawberry glaze
For the Cream Filling:
- 1 package (225g) cream cheese, softened to room temperature
- 1 can (400g) sweetened condensed milk
- 1 container (340g) frozen whipped cream, completely thawed
Shopping and Preparation Tips
Strawberry Selection: Choose strawberries that are bright red, firm to the touch, and fragrant at the stem end. Avoid berries with white or green areas, as they won’t ripen further after picking.
Cream Cheese Success: Ensure your cream cheese is completely softened before beginning. This prevents lumps and creates a silky smooth filling that spreads beautifully over the Twinkies.
Whipped Cream Handling: Allow frozen whipped cream to thaw completely in the refrigerator overnight. Never thaw at room temperature, as this can cause the texture to become watery.
Step-by-Step Instructions
Foundation Preparation
Step 1: Prepare Your Strawberries Wash the strawberries under cool running water and pat them completely dry with paper towels. Remove the green tops and slice each berry into 1/4-inch thick pieces. This thickness ensures the strawberries maintain their shape while providing the perfect bite-sized pieces throughout the dessert.
Step 2: Create the Base Arrange the Twinkies in a single layer in a 9×13-inch baking dish. You can place them side by side with the flat sides down, or cut them in half lengthwise for easier serving later. The choice depends on your presentation preference and serving style.
Crafting the Cream Layer
Step 3: Master the Cream Cheese Base In a large mixing bowl, beat the softened cream cheese with an electric mixer on medium speed for 2-3 minutes until it’s completely smooth and fluffy. Scrape down the sides of the bowl periodically to ensure even mixing.
Step 4: Incorporate the Sweetened Condensed Milk Gradually pour the sweetened condensed milk into the cream cheese while continuing to beat on low speed. Increase to medium speed and mix for another 2 minutes until the mixture is completely combined and silky smooth.
Step 5: Fold in the Whipped Cream Using a large spoon or rubber spatula, gently fold the thawed whipped cream into the cream cheese mixture. Use a folding motion rather than stirring to maintain the light, airy texture. Continue until no streaks remain and the mixture is uniformly pale and fluffy.
Assembly and Finishing
Step 6: Layer the Cream Filling Spread the cream mixture evenly over the arranged Twinkies, ensuring complete coverage. Use an offset spatula or the back of a spoon to create smooth, even layers that reach all corners of the dish.
Step 7: Add the Strawberry Topping Distribute the sliced strawberries evenly over the cream layer, creating an attractive pattern if desired. Then, drizzle the strawberry glaze over the berries, allowing it to flow naturally between the fruit pieces and create a glossy, professional-looking finish.
Chilling and Setting
Step 8: Refrigerate for Optimal Texture Cover the dessert tightly with plastic wrap or aluminum foil and refrigerate for at least 2 hours. This chilling time allows the Twinkies to soften slightly while the cream sets to the perfect consistency for clean slicing.
Creative Serving Suggestions
Elegant Presentation Ideas
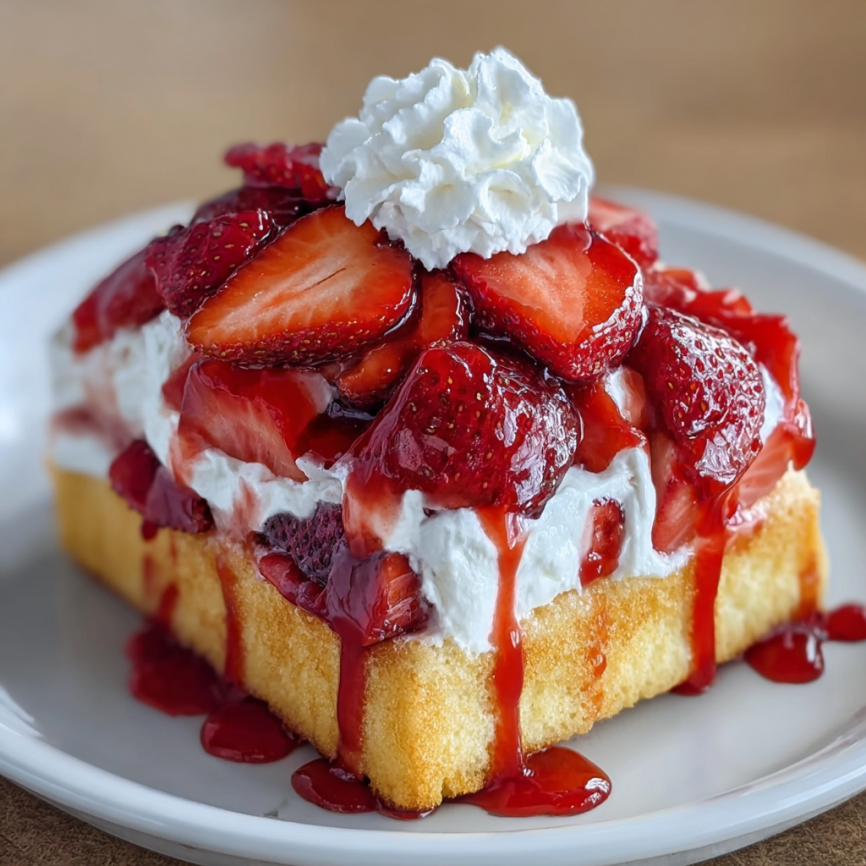
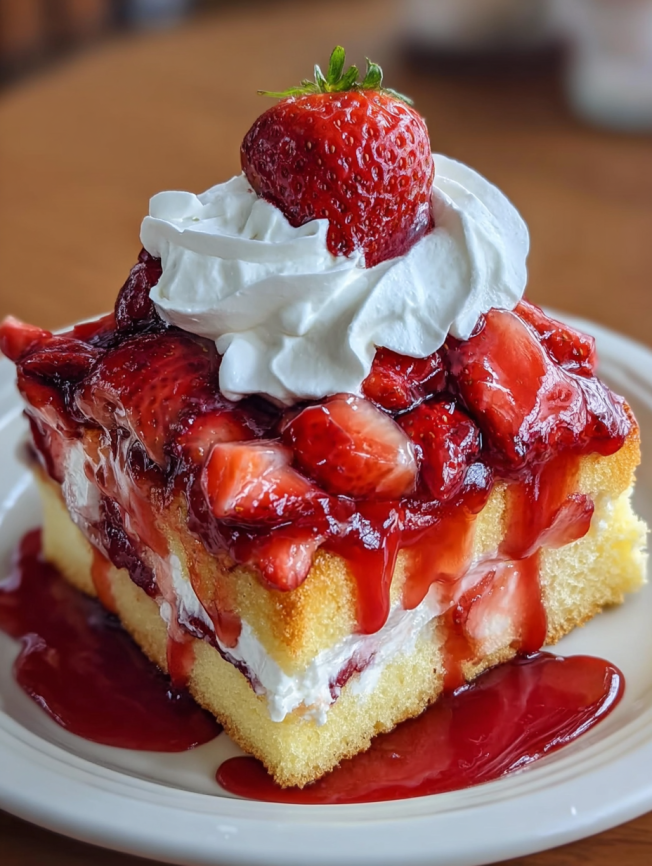
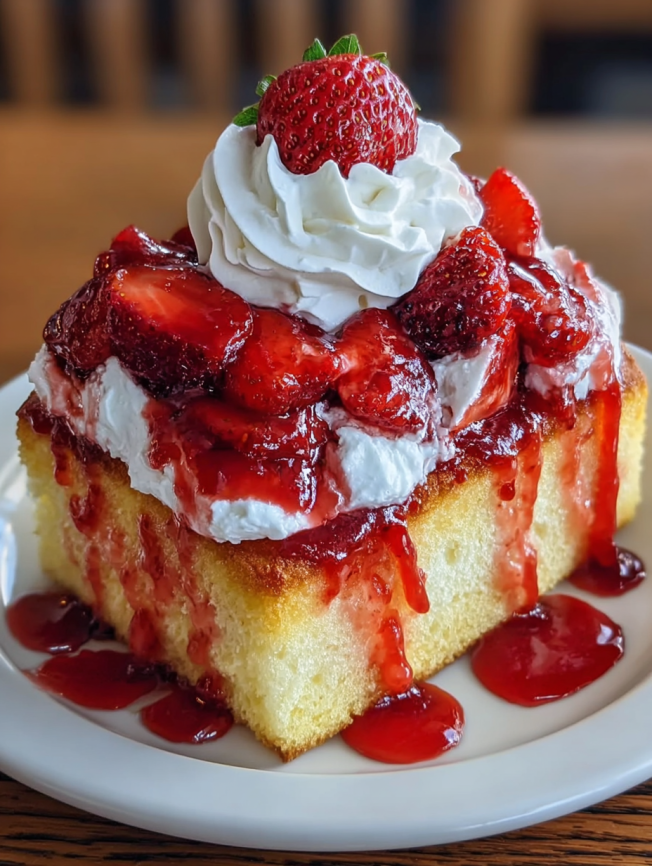
Cut the dessert into neat squares using a sharp knife wiped clean between cuts. Serve on chilled dessert plates with a dollop of additional whipped cream and a fresh strawberry garnish. For special occasions, dust the plates lightly with powdered sugar for an extra touch of elegance.
Casual Serving Options
For more relaxed gatherings, this dessert works beautifully served directly from the baking dish. Provide a large serving spoon and let guests help themselves to generous portions. The rustic, family-style presentation adds to its nostalgic charm.
Individual Portion Control
Consider assembling individual servings in clear glass dessert cups or mason jars. Layer the components in the same order but in smaller portions, creating personal-sized treats that are perfect for parties or portion control.
Delicious Recipe Variations
Fruit Alternatives
Mixed Berry Medley: Replace strawberries with a combination of raspberries, blueberries, and blackberries. Use mixed berry glaze or create your own by warming frozen mixed berries with a tablespoon of sugar.
Tropical Twist: Substitute diced mango and pineapple for strawberries, and use pineapple or apricot preserves thinned with a little water instead of strawberry glaze.
Seasonal Options: During fall, try sliced peaches or pears with peach preserves, or experiment with fresh cherries and cherry preserves in summer.
Twinkie Substitutions
Ladyfinger Elegance: Replace Twinkies with ladyfinger cookies for a more traditional tiramisu-style presentation. The delicate texture creates a completely different but equally delicious experience.
Chocolate Lover’s Version: Use chocolate-filled snack cakes or chocolate ladyfingers for a richer, more decadent flavor profile that pairs beautifully with strawberries.
Pound Cake Alternative: Slice store-bought pound cake into 1/2-inch thick pieces for a more substantial base that holds up well to the cream and fruit layers.
Make-Ahead Tips and Storage Solutions
Advance Preparation Strategies
This dessert actually improves with time, making it perfect for advance preparation. You can assemble it completely up to 24 hours before serving, allowing the flavors to meld and the textures to achieve perfect harmony.
Storage Guidelines
Refrigerator Storage: Properly covered, this dessert maintains its quality for 3-4 days in the refrigerator. Use plastic wrap pressed directly onto the surface to prevent the cream from developing a skin.
Freezing Considerations: While not ideal for freezing due to the fresh strawberries and whipped cream, you can freeze individual portions for up to one month. Thaw overnight in the refrigerator before serving, though the texture may be slightly different.
Serving After Storage
Always serve this dessert chilled for the best taste and texture. If it seems too firm after extended refrigeration, let it sit at room temperature for 10-15 minutes before serving to achieve the perfect consistency.
Professional Tips for Perfect Results
Achieving Smooth Cream Layers
The key to professional-looking layers lies in properly softened cream cheese and gentle folding techniques. Never rush the cream cheese softening process – hard cream cheese will create lumps that are difficult to eliminate.
Strawberry Preparation Secrets
Pat strawberries completely dry after washing to prevent excess moisture from making the dessert watery. Additionally, slice them just before assembly to maintain their fresh appearance and prevent them from releasing too much juice.
Presentation Enhancement
For photo-worthy presentation, reserve a few perfect strawberry slices and arrange them decoratively on top just before serving. This ensures they look fresh and vibrant rather than glazed over from sitting.
Important Notes for Success
Temperature Considerations
All dairy ingredients should be at the proper temperature before beginning. Cold cream cheese won’t incorporate smoothly, while overly warm ingredients can cause the whipped cream to deflate.
Glaze Application Tips
Apply the strawberry glaze while the dessert is cold to prevent it from soaking too deeply into the cream layer. The contrast between the glossy glaze and creamy layers creates visual appeal.
Cutting and Serving
Use a sharp, clean knife for neat cuts, and wipe it clean between slices. This prevents the layers from pulling apart and maintains the dessert’s attractive presentation.
Frequently Asked Questions
Can I use fresh whipped cream instead of frozen? Absolutely! You can substitute 1 1/2 cups of freshly whipped heavy cream for the frozen whipped cream. Just ensure it’s whipped to soft peaks before folding into the cream cheese mixture.
What if my cream cheese has lumps? If you discover lumps in your cream cheese mixture, strain it through a fine-mesh sieve or beat it longer with the electric mixer. Prevention is key – always ensure cream cheese is completely softened before beginning.
Can I make this dessert dairy-free? Yes! Use dairy-free cream cheese, coconut condensed milk, and dairy-free whipped topping. The texture may vary slightly, but the results are still delicious.
How do I prevent the Twinkies from getting soggy? The 2-hour chilling time is perfect – it allows the Twinkies to soften just enough while maintaining their structure. Longer chilling times may result in a softer texture, which some people actually prefer.
Can I use sugar-free ingredients? You can substitute sugar-free strawberry glaze and use sugar-free whipped topping. However, be aware that the texture and sweetness level will be different from the original recipe.
What’s the best way to transport this dessert? Keep it well-chilled and covered during transport. If traveling long distances, consider packing the dish in a cooler with ice packs to maintain the proper temperature.
Can I double the recipe for a larger crowd? Certainly! Double all ingredients and use a larger serving dish or two 9×13-inch pans. The preparation method remains exactly the same.
How far in advance can I slice the strawberries? For best results, slice strawberries no more than 2-3 hours before assembly. Store them covered in the refrigerator to maintain freshness and prevent excessive juice release.
Prep Time: 20 minutes | Chill Time: 2 hours | Total Time: 2 hours 20 minutes
Yield: 8 servings | Diet: Vegetarian | Method: No-Bake | Cuisine: American
Nutrition Information (per serving):
- Calories: 300 | Sugar: 25g | Sodium: 150mg
- Fat: 15g (Saturated: 8g, Unsaturated: 5g, Trans: 0g)
- Carbohydrates: 40g | Fiber: 2g | Protein: 4g | Cholesterol: 30mg


