Last Halloween, I wanted to create something that would make people stop mid-conversation and say “Wow!” when they saw the dessert table. These Vampire Bite Red Velvet Brownies did exactly that. The dramatic deep red color caught everyone’s eye immediately, and when they took that first bite—discovering the fudgy texture and rich chocolate flavor beneath the vibrant exterior—they were absolutely hooked. Several guests asked if I’d ordered them from a fancy bakery, which made me smile knowing how straightforward they actually are to make.
Red velvet and brownies might seem like an unusual pairing, but they’re a match made in dessert heaven. The subtle cocoa flavor of red velvet meets the intense chocolate richness of brownies, creating something entirely unique. Add a cream cheese frosting and chocolate drizzle, and you have a show-stopping treat that’s perfect for Halloween parties, Valentine’s Day, or any time you want to impress.
Total Time: 50 minutes
Yield: 24 brownies
Diet: Vegetarian
Course: Dessert
Why You’ll Love This Recipe
Red velvet brownies combine the best aspects of two beloved desserts. You get the fudgy, dense texture that makes brownies so addictive, plus that distinctive red velvet flavor with its hint of cocoa and touch of tanginess. The result is richer than traditional red velvet cake but lighter than standard brownies—the perfect middle ground.
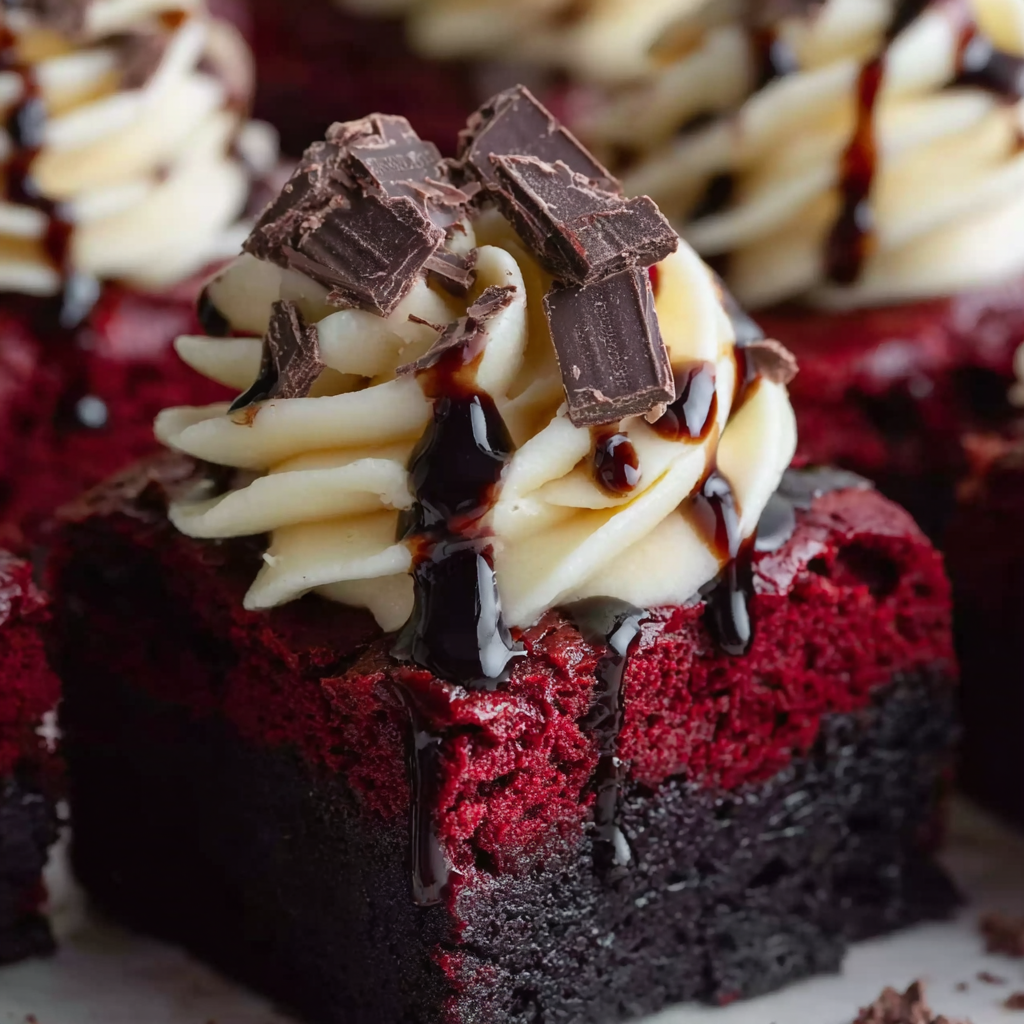
The visual impact cannot be overstated. When you cut into these brownies, that stunning red interior against the white cream cheese frosting and dark chocolate drizzle creates a striking contrast that photographs beautifully. They’re Instagram-worthy without requiring any special decorating skills or artistic talent.
Perfect for Special Occasions
These brownies excel at themed events. The deep red color makes them ideal for Halloween (vampire bites!), Valentine’s Day, Christmas parties, or even Fourth of July celebrations. Change up the frosting decorations to match your theme, and suddenly you have a dessert that looks like it came from a professional bakery.
Despite their impressive appearance, the recipe uses straightforward techniques that even baking beginners can master. There’s no tempering chocolate, no complicated folding techniques, and no stress about whether they’ll turn out. Mix, pour, bake, frost—it’s that simple.
Make-Ahead Friendly
Busy hosts will appreciate that these brownies actually improve after sitting for a few hours. The flavors meld together, and the texture becomes even more fudgy. Make them the day before your event, store them properly, and you’ll have one less thing to worry about on party day.
The cream cheese frosting can also be made ahead and refrigerated, then brought to room temperature before spreading. This flexibility makes these brownies a reliable choice when you’re juggling multiple dishes or preparing for a large gathering.
Equipment You’ll Need
- 9×13-inch (23×33 cm) baking pan
- Parchment paper (optional but recommended)
- 2 large mixing bowls
- Whisk
- Rubber spatula
- Wire cooling rack
- Offset spatula (for frosting)
- Small microwave-safe bowl (for chocolate drizzle)
Ingredients
For the Brownies
- 1 cup (225g) unsalted butter, melted
- 2 cups (400g) granulated sugar
- 4 large eggs
- 1 tablespoon vanilla extract
- 1 tablespoon red food coloring
- 2 cups (250g) all-purpose flour
- 1/2 cup (50g) unsweetened cocoa powder
- 1 teaspoon baking powder
- 1/2 teaspoon salt
- 1 cup (175g) dark chocolate chips
For the Cream Cheese Frosting
- 8 oz (225g) cream cheese, softened
- 1/2 cup (115g) unsalted butter, softened
- 4 cups (480g) powdered sugar
- 1 teaspoon vanilla extract
- 1-2 tablespoons milk (as needed for consistency)
For the Chocolate Drizzle
- 1/2 cup (90g) dark chocolate chips
- 2 tablespoons heavy cream
Step-by-Step Instructions
Preparing Your Pan and Oven
Start by preheating your oven to 350°F (175°C). This gives it plenty of time to reach the proper temperature while you prepare your batter. Consistent oven temperature is crucial for even baking and that perfect fudgy texture.
Prepare your 9×13-inch baking pan by either greasing it thoroughly with butter or nonstick spray, or lining it with parchment paper. Parchment paper is highly recommended—it makes removing and cutting the brownies much easier and cleaner. If using parchment, let it hang over two opposite sides of the pan to create “handles” for lifting out the entire brownie slab later.
Mixing the Dry Ingredients
In a medium bowl, whisk together the flour, unsweetened cocoa powder, baking powder, and salt. Whisk vigorously for at least 30 seconds to break up any lumps in the cocoa powder and ensure everything is evenly distributed. This step prevents pockets of flour or cocoa in your finished brownies and ensures consistent flavor and texture throughout.
Set this bowl aside while you work on the wet ingredients. Having your dry ingredients ready and waiting makes the final mixing step quick and easy, reducing the risk of overmixing.
Creating the Wet Mixture
In a large mixing bowl, combine the melted butter and granulated sugar. Whisk them together for about a minute until well blended and slightly lighter in color. The sugar won’t fully dissolve, but it should be evenly distributed throughout the butter with no dry patches.
Add the eggs one at a time, whisking well after each addition. This gradual incorporation creates a smoother, more emulsified batter. After all four eggs are mixed in, add the vanilla extract and the tablespoon of red food coloring. Whisk until the color is uniform and vibrant throughout the mixture.
The amount of red food coloring can be adjusted based on your preference and the type you’re using. Gel food coloring is more concentrated than liquid, so if using gel, you might need slightly less. The goal is a deep, rich red that will bake into that stunning vampire-bite color.
Combining Wet and Dry Ingredients
Add the dry ingredient mixture to the wet ingredients gradually—about a third at a time works well. After each addition, use a rubber spatula or wooden spoon to gently fold and stir until just combined. You want to see mostly smooth batter with perhaps a few small streaks of flour remaining.
This is the critical moment where overmixing can ruin your brownies. Mixing develops gluten in the flour, and too much gluten creates tough, cake-like brownies instead of fudgy ones. Mix only until you can no longer see distinct pockets of flour, then stop. A few small lumps are perfectly fine—they’ll disappear during baking.
Fold in the dark chocolate chips, distributing them evenly throughout the batter. The chocolate chips will melt slightly during baking, creating pockets of extra chocolate richness throughout your brownies.
Baking the Brownies
Pour the batter into your prepared pan, using a spatula to scrape every last bit from the bowl. Spread the batter evenly across the pan, making sure it reaches all corners and is relatively level. A slightly uneven surface is fine—you’ll be frosting over it anyway.
Place the pan on the center rack of your preheated oven. Bake for 25-30 minutes, but start checking at the 25-minute mark. You’re looking for brownies that are set around the edges with a slight jiggle in the very center. A toothpick inserted about 2 inches from the edge should come out with a few moist crumbs attached, not wet batter.
Don’t overbake these brownies. They’ll continue cooking slightly as they cool, and removing them when they still seem slightly underdone ensures that fudgy texture everyone loves. Overbaked brownies become dry and cake-like, losing that signature brownie richness.
Cooling Completely
Remove the pan from the oven and place it on a wire cooling rack. Let the brownies cool completely in the pan before attempting to frost them—this usually takes about an hour at room temperature. Warm brownies will melt the cream cheese frosting, creating a mess instead of a beautiful finish.
If you’re in a hurry, you can speed up cooling by placing the pan in the refrigerator after it’s cooled for about 15 minutes at room temperature. Cold brownies are actually easier to frost cleanly, though you’ll want to let them come back to room temperature before serving for the best texture and flavor.
Making the Cream Cheese Frosting
While the brownies cool, prepare your frosting. In a large bowl, beat the softened cream cheese and butter together using an electric mixer or a wooden spoon and some elbow grease. Mix for 2-3 minutes until light, fluffy, and completely smooth with no lumps.
Add the powdered sugar about a cup at a time, beating well after each addition. Start with the mixer on low speed to avoid creating a powdered sugar cloud in your kitchen, then increase to medium-high once incorporated. After all the sugar is mixed in, add the vanilla extract and continue beating for another 1-2 minutes.
Check the consistency of your frosting. It should be thick enough to spread without running off the brownies, but not so thick that it pulls up the brownie surface when you spread it. If it’s too thick, add milk one tablespoon at a time, beating well after each addition. If it’s too thin (unlikely, but possible in humid weather), add more powdered sugar a few tablespoons at a time.
Frosting the Brownies
Once your brownies are completely cool, spread the cream cheese frosting evenly over the top using an offset spatula or butter knife. Start with a large dollop in the center and work your way outward, using smooth, sweeping motions. An offset spatula makes this easier, but any flat utensil will work.
Try to create a relatively smooth, even layer of frosting. It doesn’t need to be perfectly smooth—a few swirls and texture marks actually make it look more homemade and appealing. Just avoid creating valleys or bare spots.
Creating the Chocolate Drizzle
For the finishing touch, make your chocolate drizzle. Place the dark chocolate chips and heavy cream in a small microwave-safe bowl. Microwave in 20-second intervals, stirring after each interval, until the chocolate is completely melted and smooth. This usually takes 40-60 seconds total.
Alternatively, you can create a double boiler by placing the bowl over a pot of simmering water. Either method works—just make sure no water gets into the chocolate, as even a drop can cause it to seize and become grainy.
Let the melted chocolate cool for just a minute or two so it’s not piping hot, then drizzle it over the frosted brownies in whatever pattern appeals to you. You can create parallel lines, zigzags, a random drizzle pattern, or even write words. Use a spoon to drizzle, or pour the chocolate into a small plastic bag, snip off a tiny corner, and use it as a piping bag for more control.
Cutting and Serving
For clean cuts, use a sharp knife wiped clean between each slice. You can also use a plastic knife, which creates cleaner cuts through brownies and doesn’t stick as much. Cut the brownies while they’re still slightly chilled if you want the cleanest edges.
For 24 brownies, cut the 9×13-inch pan into 6 rows one way and 4 rows the other way. This creates perfectly portioned brownies that are substantial but not overwhelming.
Serving Suggestions
These Vampire Bite Red Velvet Brownies are rich and satisfying enough to stand alone, but certain accompaniments can enhance the experience even further.
Simple Presentations
Serve these brownies at room temperature for the best flavor and texture. The cream cheese frosting should be soft and creamy, not cold and firm. Arrange them on a white or black platter to make the red color pop dramatically.
For individual plating, place each brownie on a small dessert plate with a dollop of whipped cream on the side. The light, airy whipped cream provides a refreshing contrast to the dense, fudgy brownie. A few fresh raspberries or strawberries add a pop of coordinating color and a tart note that balances the sweetness.
Elevated Presentations
Transform these into a plated dessert by serving a brownie with a scoop of vanilla bean ice cream and a drizzle of chocolate or raspberry sauce. The cold ice cream against the room-temperature brownie creates delightful temperature contrast, while the sauces add extra flavor dimensions.
For a truly decadent presentation, warm the brownie slightly in the microwave (about 10 seconds), then top with cold vanilla ice cream. The ice cream will begin to melt into the warm brownie, creating a sauce-like consistency that’s absolutely divine.
Beverage Pairings
These rich brownies pair beautifully with beverages that can stand up to their intensity. Strong coffee or espresso provides a bitter contrast that highlights the chocolate notes. Hot chocolate creates a chocolate-on-chocolate experience that chocolate lovers will adore, especially during fall and winter.
For adult gatherings, consider serving them with dessert wine like port or cream sherry, which complement the richness beautifully. Red wine, particularly fruity varieties like Zinfandel, also pairs nicely. Even milk—cold, whole milk specifically—makes an excellent pairing that takes you right back to childhood.
Recipe Variations
White Chocolate Version
Replace the dark chocolate chips in the batter with white chocolate chips, and use white chocolate for the drizzle instead of dark. The white chocolate creates a sweeter, milder flavor that some people prefer. White chocolate also looks stunning against the red brownie and white frosting.
For an even more dramatic presentation, leave the dark chocolate drizzle but swirl white and dark chocolate together for a marbled effect.
Cream Cheese Swirl
For a built-in cream cheese component, reserve about a third of your frosting before baking. Drop spoonfuls of this cream cheese mixture over the brownie batter in the pan, then use a knife to swirl it through, creating a marbled pattern. This technique is a bit messier but creates beautiful patterns and pockets of tangy cream cheese throughout.
Bake as directed, then frost the cooled brownies with the remaining frosting. You’ll have cream cheese both inside and on top.
Nutty Addition
Fold ½ to 1 cup of chopped pecans or walnuts into the batter along with the chocolate chips. The nuts add crunch and earthy flavor that complements the chocolate beautifully. Toasted nuts taste even better—spread them on a baking sheet and toast at 350°F for 5-7 minutes before chopping and adding.
You can also sprinkle chopped nuts over the frosting before adding the chocolate drizzle for added texture and visual appeal.
Mint Chocolate Twist
Add ½ teaspoon of peppermint extract to the brownie batter along with the vanilla. The mint creates a refreshing undertone that pairs wonderfully with chocolate. For even more mint flavor, use mint chocolate chips instead of regular dark chocolate chips.
Add another ¼ teaspoon of peppermint extract to the cream cheese frosting for a mint-flavored frosting that makes these taste like fancy chocolate-mint candies.
Raspberry Swirl
Warm ½ cup of raspberry jam until it’s pourable. After spreading the brownie batter in the pan, drizzle the jam over the top in lines. Use a knife to swirl it through the batter, creating a marbled effect. The raspberry flavor pairs beautifully with both chocolate and cream cheese.
Fresh raspberries can also be pressed gently into the top of the unbaked batter. They’ll sink slightly during baking, creating pockets of tart fruit throughout.
Make-Ahead Tips
These brownies are actually one of those magical recipes that improve with time, making them perfect for advance preparation and stress-free entertaining.
Baking Ahead
The brownies can be baked up to two days before you need them. Bake and cool completely, then wrap the unfrosted brownie slab tightly in plastic wrap and store at room temperature. When ready to serve, prepare the frosting and drizzle, then frost and cut the brownies.
Alternatively, you can frost the brownies and store the entire pan, covered, in the refrigerator for up to three days. Bring them to room temperature about 30 minutes before serving for the best texture. The cream cheese frosting actually helps keep the brownies moist during storage.
Freezing Options
Unfrosted brownies freeze beautifully for up to three months. Wrap the cooled brownie slab tightly in plastic wrap, then again in aluminum foil or place in a freezer-safe container. Thaw overnight in the refrigerator, then bring to room temperature before frosting.
You can also freeze individual frosted brownies. Place them on a baking sheet and freeze until solid (about 2 hours), then transfer to a freezer-safe container with parchment paper between layers. Pull out individual brownies as needed—they thaw in about an hour at room temperature.
Frosting Preparation
Make the cream cheese frosting up to three days ahead and store it in an airtight container in the refrigerator. When ready to use, let it sit at room temperature for about an hour, then beat it briefly with a mixer to restore its fluffy texture before spreading on the brownies.
If the frosting seems too firm after refrigeration, add a tablespoon of milk and beat until smooth and spreadable. Conversely, if it’s too soft after sitting out, refrigerate it for 15-20 minutes to firm up.
Storage Tips
Proper storage ensures your brownies stay fresh, moist, and delicious for as long as possible.
Room Temperature Storage
If you’ll be eating the brownies within 2-3 days, room temperature storage works perfectly. Keep them in an airtight container or cover the pan tightly with plastic wrap or aluminum foil. Store in a cool, dry place away from direct sunlight.
Because of the cream cheese frosting, avoid storing them in very warm environments. If your kitchen is hot (above 75°F), refrigeration is safer to prevent the frosting from spoiling.
Refrigerator Storage
For longer storage or in warm weather, keep frosted brownies in the refrigerator for up to 5 days. Cover the pan tightly or transfer brownies to an airtight container. The cold temperature will firm up the frosting and change the brownie texture slightly, making them denser.
Before serving, let refrigerated brownies sit at room temperature for 20-30 minutes. This allows the frosting to soften and the brownies to return to their ideal texture. Some people actually prefer the firmer texture of cold brownies, so experiment to find your preference.
Preventing Drying
To prevent brownies from drying out during storage, place a piece of bread in the container with them. The brownies will absorb moisture from the bread, staying soft and fudgy. Replace the bread slice if it becomes hard or dried out.
You can also press a piece of plastic wrap directly onto the cut edges of the brownies before covering the pan. This prevents air exposure on the cut surfaces, which is where drying typically begins.
Notes
The quality of your cocoa powder significantly affects the final flavor. Use high-quality unsweetened Dutch-process cocoa for the richest, most complex chocolate flavor. Natural cocoa powder works too but will create a slightly different taste—more acidic and less mellow.
Red food coloring is essential for achieving that dramatic vampire-bite appearance. Gel food coloring provides more vibrant color with less liquid, which is ideal for maintaining the proper batter consistency. If using liquid food coloring, you might need up to 2 tablespoons to achieve deep red color.
Don’t substitute oil for the melted butter in the brownies. Butter provides flavor that oil simply can’t replicate, and it also affects the texture, creating that fudgy rather than cakey consistency. The butter in the frosting must also be real butter—margarine will create a different taste and texture.
For the softest cream cheese frosting, make sure both the cream cheese and butter are truly softened to room temperature before mixing. Cold ingredients won’t blend smoothly and will create a lumpy frosting no matter how long you beat it.
The baking time can vary based on your oven and pan. Dark-colored pans absorb more heat and may require slightly less baking time, while glass pans take longer. Altitude also affects baking—if you’re at high elevation, you may need to adjust the baking powder and temperature slightly.
FAQ
Can I make these without food coloring?
Absolutely! Without the red food coloring, you’ll have delicious chocolate brownies with cream cheese frosting. They won’t have that dramatic vampire-bite appearance, but they’ll taste just as good. The subtle cocoa flavor and fudgy texture remain the same regardless of color.
Why are my brownies cakey instead of fudgy?
Several factors can cause this. Overmixing the batter develops too much gluten, creating a cake-like texture. Overbaking is another common culprit—brownies should still seem slightly underdone when you remove them from the oven. Also check your oven temperature with an oven thermometer; if it runs hot, your brownies will bake faster and dry out.
Can I use a different size pan?
The 9×13-inch pan creates brownies of ideal thickness. A larger pan will make thinner brownies that bake faster and may become overly crispy. A smaller, deeper pan will create very thick brownies that take longer to bake and may not cook evenly. If you must use a different size, adjust the baking time accordingly and watch carefully.
My cream cheese frosting is too soft. How do I fix it?
Soft frosting usually means the cream cheese or butter was too warm, or there’s not enough powdered sugar. Refrigerate the frosting for 20-30 minutes to firm it up, then check the consistency. If it’s still too soft, beat in additional powdered sugar ¼ cup at a time until it reaches spreading consistency.
Can I make these gluten-free?
Yes, substitute a gluten-free all-purpose flour blend (with xanthan gum) for the regular flour using a 1:1 ratio. The texture may be slightly different—often a bit denser—but they’ll still be delicious. Make sure your cocoa powder and other ingredients are certified gluten-free if you have celiac disease.
What if I don’t have dark chocolate chips?
Semi-sweet chocolate chips work perfectly as a substitute and are actually more common in home kitchens. Milk chocolate chips will make the brownies sweeter and less intensely chocolatey. You can also omit the chips entirely or replace them with chopped nuts if you prefer.
How do I get clean cuts when slicing?
Use a sharp knife dipped in hot water and wiped dry between each cut. The heat helps the knife glide through cleanly without dragging or creating messy edges. Alternatively, use a plastic knife, which cuts through brownies remarkably well without sticking. Cutting while the brownies are still slightly chilled also helps.
Can I use natural cream cheese frosting without powdered sugar?
Powdered sugar is really essential for the proper consistency and sweetness of cream cheese frosting. Regular granulated sugar won’t dissolve properly and will create a grainy texture. If you want to reduce sweetness, you can decrease the powdered sugar to 3 cups, but the frosting will be tangier and potentially too soft.
Prep Time: 20 minutes
Cook Time: 30 minutes
Total Time: 50 minutes (plus cooling time)
Yield: 24 brownies
Course: Dessert
Method: Baking
Cuisine: American
Diet: Vegetarian
Nutrition (per serving):
- Serving Size: 1 brownie (1/24 of recipe)
- Calories: 250kcal
- Sugar: 20g
- Sodium: 150mg
- Fat: 12g
- Saturated Fat: 7g
- Unsaturated Fat: 3g
- Trans Fat: 0g
- Carbohydrates: 35g
- Fiber: 2g
- Protein: 3g
- Cholesterol: 50mg