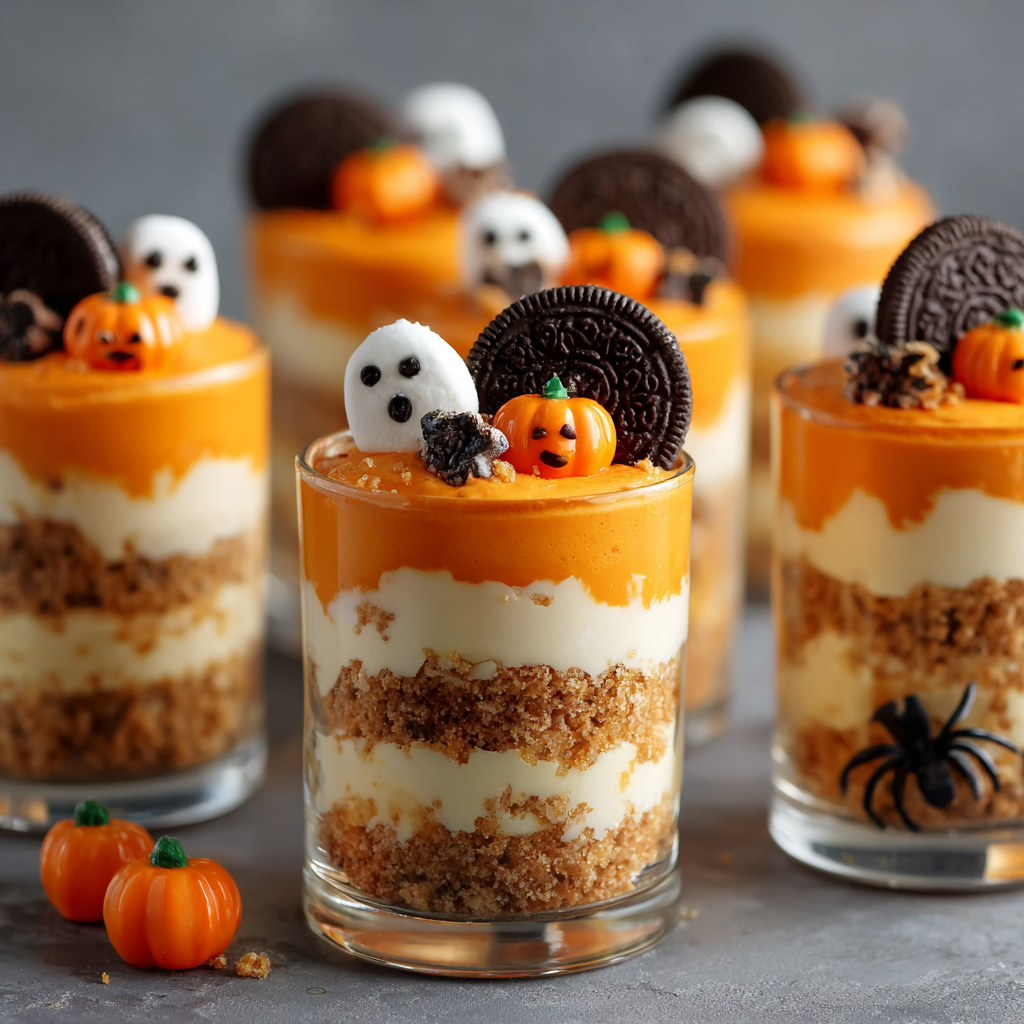
When my sister asked me to bring dessert to her daughter’s Halloween birthday party, I knew I needed something that could feed a crowd without requiring me to spend all day in the kitchen. These cheesecake parfaits came to my rescue! The vibrant orange color immediately caught everyone’s attention, and the individual servings meant no plates or forks were needed. Parents loved the easy grab-and-go format, while kids couldn’t resist the fun layers and colorful sprinkles.
These no-bake parfaits deliver all the creamy richness of traditional cheesecake without the hassle of baking or dealing with finicky water baths. The cheerful orange filling paired with dark cookie crumbs creates a striking visual that screams Halloween festivity.
Why You’ll Love These Halloween Cheesecake Parfaits
Zero Baking Required – Your oven can stay off for this one! Everything comes together with simple mixing and layering, making these perfect for hot autumn days or when your oven is already occupied with other dishes.
Stunning Visual Appeal – The transparent cups showcase beautiful layers of dark and bright orange, creating an eye-catching display that looks professionally crafted. Guests will be impressed by the presentation before they even taste them!
Incredibly Versatile – While the orange color makes these perfect for Halloween, you can easily adapt them for other occasions by changing the food coloring and decorations. Think pink for Valentine’s Day or pastel colors for Easter.
Customizable Portion Sizes – Use small cups for children’s parties or larger glasses for adult gatherings. This flexibility allows you to control portions based on your specific event needs and the number of guests you’re serving.
Crowd-Friendly Format – Individual servings eliminate the need for cutting and plating, which speeds up serving time dramatically. Additionally, clear cups let guests see exactly what they’re getting, which is especially helpful for picky eaters or those with dietary considerations.
Ingredients You’ll Need
Main Components
Oreos (12 cookies) – These create the essential dark base layer that contrasts beautifully with the bright orange filling. You’ll crush them into fine crumbs that resemble dirt or gravel. Regular Oreos work perfectly, though you could use Halloween-themed orange Oreos if you find them.
Cream Cheese (8 oz) – The foundation of your cheesecake filling. Block cream cheese at room temperature is essential—it should be soft enough to blend smoothly without lumps. Avoid using whipped cream cheese, which contains too much air and creates a different texture.
Granulated Sugar (¼ cup) – Provides just the right amount of sweetness without overwhelming the tangy cream cheese flavor. This modest amount creates a perfectly balanced filling that appeals to both adults and children.
Vanilla Extract (½ tsp) – Enhances all the other flavors and adds warmth to the filling. Pure vanilla extract tastes noticeably better than imitation, though either works in a pinch.
Whipped Topping (1 cup) – Cool Whip or similar products fold into the cream cheese mixture to create an airy, mousse-like texture. You can substitute homemade whipped cream if you prefer, though it won’t hold up quite as long.
Orange Food Coloring – Gel food coloring produces the most vibrant hues with just a few drops, while liquid coloring requires more and can thin your mixture slightly. Start with a small amount and gradually add more until you achieve your desired shade.
Halloween Sprinkles – These festive toppers add color, texture, and whimsy. Look for mixes containing orange, black, and purple colors, or choose themed shapes like bats, pumpkins, and ghosts.
Optional Enhancements
- Extra whipped cream for topping
- Chocolate shavings or chips
- Candy corn or candy pumpkins
- Black sanding sugar
- Caramel or chocolate sauce drizzle
- Mini marshmallow ghosts
How to Make No-Bake Halloween Cheesecake Parfaits
Step 1: Prepare the Cream Cheese Base
Place your room-temperature cream cheese in a large mixing bowl. Using an electric mixer on medium speed, beat the cream cheese for about 1-2 minutes until it becomes completely smooth and fluffy with no lumps remaining. Scrape down the sides of the bowl at least once to ensure even mixing.
Add the sugar and vanilla extract to the bowl. Continue beating for another minute until everything is fully incorporated and the mixture appears light and airy. The sugar should be completely dissolved, and the mixture should have a silky texture when you run your spatula through it.
Step 2: Add the Orange Color
Add your orange food coloring to the cream cheese mixture. Start conservatively—just 2-3 drops of gel coloring or 5-6 drops of liquid coloring. Beat briefly to incorporate the color, then assess the shade. The color will lighten slightly when you fold in the whipped topping, so aim for a shade slightly darker than your target color.
Continue adding food coloring drop by drop, mixing between additions, until you achieve your desired Halloween orange. Remember that achieving a vibrant, bright orange may require more coloring than you initially expect, especially if using liquid varieties.
Step 3: Fold in the Whipped Topping
Add the whipped topping to your orange cream cheese mixture. Using a rubber spatula, gently fold it in using a sweeping motion that cuts down through the center and brings the mixture up and over. Continue folding until no white streaks remain and the mixture is uniformly orange and fluffy.
Avoid vigorous stirring or using the electric mixer at this stage, as overmixing will deflate the whipped topping and result in a denser, less mousse-like texture. The final mixture should be light, airy, and hold soft peaks when you lift the spatula.
Step 4: Crush the Oreos
Place your Oreos in a food processor and pulse until they become fine crumbs with a few slightly larger pieces for texture. Alternatively, place them in a sealed ziplock bag and crush them with a rolling pin, working until you achieve a consistency resembling coarse sand.
Transfer the crushed Oreos to a small bowl where they’ll be easy to access during assembly. Having your “dirt” layer ready before you start layering streamlines the process and prevents the cheesecake filling from sitting out too long.
Step 5: Begin Layering the Parfaits
Select your serving cups—clear plastic cups work wonderfully for showcasing the layers, though small mason jars or dessert glasses create a more upscale presentation. Arrange them on a tray or baking sheet for easy transport to the refrigerator.
Spoon approximately 2 tablespoons of crushed Oreos into the bottom of each cup, creating an even base layer. Gently tap each cup on the counter to settle the crumbs and create a level surface for the next layer.
Step 6: Add the Cheesecake Filling
Spoon a generous layer of the orange cheesecake filling over the Oreo crumbs in each cup, filling them about halfway. You can use a spoon for a rustic look or transfer the filling to a piping bag for cleaner, more precise layers. Either method works beautifully!
For a more dramatic presentation, consider repeating the layers. Add another thin layer of crushed Oreos, followed by another layer of orange filling, continuing until the cups are nearly full. Most standard cups accommodate 2-3 complete layers.
Step 7: Add Final Toppings and Chill
Top each parfait with a final sprinkle of Oreo crumbs, a small dollop of whipped cream, or both. Then generously scatter Halloween sprinkles over the top of each one. The sprinkles add festive flair and signal to guests that these are special occasion treats.
Cover the tray of parfaits loosely with plastic wrap, being careful not to let the wrap touch the tops of the parfaits. Refrigerate for at least 1 hour before serving, though 2-3 hours is even better. This chilling time allows the flavors to meld and the filling to firm up slightly.
Serving Suggestions
These vibrant parfaits look spectacular arranged on a Halloween-themed serving platter or tiered stand. The elevation creates visual drama and makes it easier for guests to select their treats. Consider placing the tray on a black tablecloth with scattered candy corn around the base for added festive appeal.
For children’s parties, set up a “parfait station” where kids can grab their cups along with a spoon. Placing small Halloween-themed flags or drink stirrers in each parfait adds an extra playful touch that young guests appreciate.
When hosting adult gatherings, elevate the presentation by using glass dessert cups or wine glasses instead of plastic. Add a cinnamon stick or a small cookie balanced on the rim for sophisticated styling. These refined touches transform a simple no-bake dessert into something that feels special and intentional.
For outdoor Halloween events, keep the parfaits in a cooler with ice packs until serving time. The filling can soften in warm temperatures, so maintaining coolness preserves both texture and appearance.
Consider offering spoons in coordinating Halloween colors—orange, black, or purple plastic spoons tied together with ribbon create a cohesive look. These small details enhance the overall experience and show guests you’ve thoughtfully planned every element.
Recipe Variations to Try
Pumpkin Spice Version
Add 2 tablespoons of pumpkin puree and ½ teaspoon of pumpkin pie spice to the cream cheese mixture along with the sugar. This creates an autumn-spiced flavor that pairs beautifully with the existing ingredients.
Chocolate Lovers’ Dream
Skip the orange food coloring and instead fold in 2 tablespoons of cocoa powder with the sugar. Use chocolate sandwich cookies instead of regular Oreos for an intensely chocolate experience.
Striped Rainbow Parfaits
Divide your cheesecake filling into multiple bowls and color each one differently—orange, purple, green, and black create a Halloween rainbow. Layer the different colors for a psychedelic, eye-catching effect.
Candy Corn Inspired
Create two separate batches of filling—one orange and one yellow. Layer them with white whipped cream between to mimic the iconic candy corn color pattern.
Berry Swirl
Skip the food coloring and instead swirl 2-3 tablespoons of strawberry or raspberry jam through the filling. The fruity tartness contrasts nicely with the sweet cream cheese base.
Cookies and Cream
Omit the orange coloring to keep the filling white, then fold in chopped Oreo pieces throughout the cheesecake layer. Top with whole mini Oreos for a cookies-and-cream cheesecake experience.
Make-Ahead Tips
These parfaits are wonderfully make-ahead friendly, which makes them ideal for stress-free entertaining. You can prepare them completely up to 48 hours before your event and keep them refrigerated until serving time. In fact, longer chilling allows the Oreo crumbs to soften slightly and meld with the cheesecake filling, creating an even more cohesive dessert.
The cream cheese filling can be prepared up to 3 days ahead and stored separately in an airtight container in the refrigerator. When you’re ready to assemble, give it a quick stir to restore its creamy consistency, then proceed with layering.
Crushed Oreos can be prepared up to 5 days in advance and stored at room temperature in a sealed container or ziplock bag. This advance preparation makes final assembly incredibly quick on party day—you’ll simply need to layer and chill.
If you’re making these for a large gathering, consider setting up an assembly line. Arrange all your cups, then work through each layer systematically rather than completing one parfait at a time. This efficient approach speeds up the process significantly when making dozens of servings.
For transporting to another location, keep the parfaits upright in a shallow box or cupcake carrier. Place a damp paper towel in the bottom of the container (not touching the cups) to create humidity that prevents the tops from drying out during transport.
Important Notes
Cream Cheese Temperature – Room temperature cream cheese is absolutely essential for achieving a smooth, lump-free filling. Cold cream cheese won’t blend properly and will leave chunks throughout your parfait. Plan ahead and take it out of the refrigerator at least 45 minutes before starting.
Food Coloring Intensity – Gel food coloring produces more vibrant colors with less product and doesn’t thin your mixture. If using liquid food coloring, you may need significantly more drops to achieve a bright orange, and your filling might become slightly thinner.
Folding vs. Stirring – When incorporating the whipped topping, always fold gently rather than stirring vigorously. Aggressive mixing deflates the air bubbles that give your filling its light, mousse-like texture.
Layer Thickness – Aim for relatively equal layers of cookies and filling for the best visual impact and flavor balance. Too much filling makes the parfaits overly rich, while too many cookie crumbs can make them dry.
Cup Selection – Clear cups are strongly recommended because they showcase the beautiful layers. Opaque cups hide all your hard work! Standard 9-ounce plastic cups work perfectly for this recipe.
Chilling Time – Don’t skip the refrigeration period! The filling needs time to firm up and develop its flavors. Serving too early results in a loose, soupy texture that doesn’t hold its shape well.
Sprinkle Application – Add sprinkles just before serving if possible. Some sprinkles can bleed their colors into whipped cream or moist surfaces if left sitting too long, creating an unappealing tie-dye effect.
Frequently Asked Questions
How many parfaits does this recipe make?
This recipe yields approximately 6-8 parfaits, depending on the size of your cups and how generously you fill them. Nine-ounce cups are standard, but you can use smaller or larger containers and adjust your yield accordingly.
Can I use low-fat or fat-free cream cheese?
You can, though the texture won’t be quite as rich and creamy. Full-fat cream cheese provides the best flavor and mouthfeel. If you do use reduced-fat versions, make sure they’re still block-style rather than spreadable varieties.
What if my filling seems too thin?
If your filling appears runny, refrigerate it for 15-20 minutes to let it firm up before layering. You can also fold in an additional ¼ cup of whipped topping to help thicken it. Avoid adding more cream cheese without also adding more sugar and flavorings.
Can I make these dairy-free?
Yes! Use dairy-free cream cheese and non-dairy whipped topping. The results will taste slightly different from the original but still delicious. Make sure to check all ingredient labels to ensure they meet your dietary requirements.
Why did my layers mix together?
This typically happens if the Oreo crumbs weren’t evenly distributed or if you pressed too hard when adding layers. Spoon gently and tap the cups to settle each layer rather than pressing down with force.
Can kids help make these?
Absolutely! Children can help crush cookies, add food coloring, and definitely help with the layering process. The assembly is forgiving enough that even young helpers can participate successfully with minimal mess.
What other cookies work well for the base?
Graham crackers, chocolate graham crackers, Nilla wafers, or even gingersnaps all work wonderfully. Each creates a different flavor profile, so feel free to experiment based on your preferences.
How do I achieve a really bright orange color?
Use gel food coloring rather than liquid, and don’t be afraid to add more than you think necessary. Orange typically requires more food coloring than other colors to achieve true vibrancy. Start with 4-5 drops of gel coloring and add more as needed.
Can I add alcohol to make these adults-only?
You can fold in 1-2 tablespoons of orange liqueur (like Grand Marnier) or vanilla vodka to the cream cheese mixture for a boozy twist. Just be sure to label them clearly if serving regular versions alongside them.
Will these work in a trifle bowl?
Definitely! A large trifle bowl creates a beautiful presentation for buffet-style serving. Simply layer the crushed cookies and filling in the bowl, repeating until you reach the top, then finish with sprinkles and whipped cream.
Recipe Details:
- Prep Time: 15 minutes
- Chill Time: 1 hour (minimum)
- Total Time: 1 hour 15 minutes
- Yield: 6-8 parfaits
- Course: Dessert
- Cuisine: American
- Diet: Vegetarian (can be made vegan with substitutions)
- Occasion: Halloween, Birthday Parties, Kids’ Events


