
Introduction
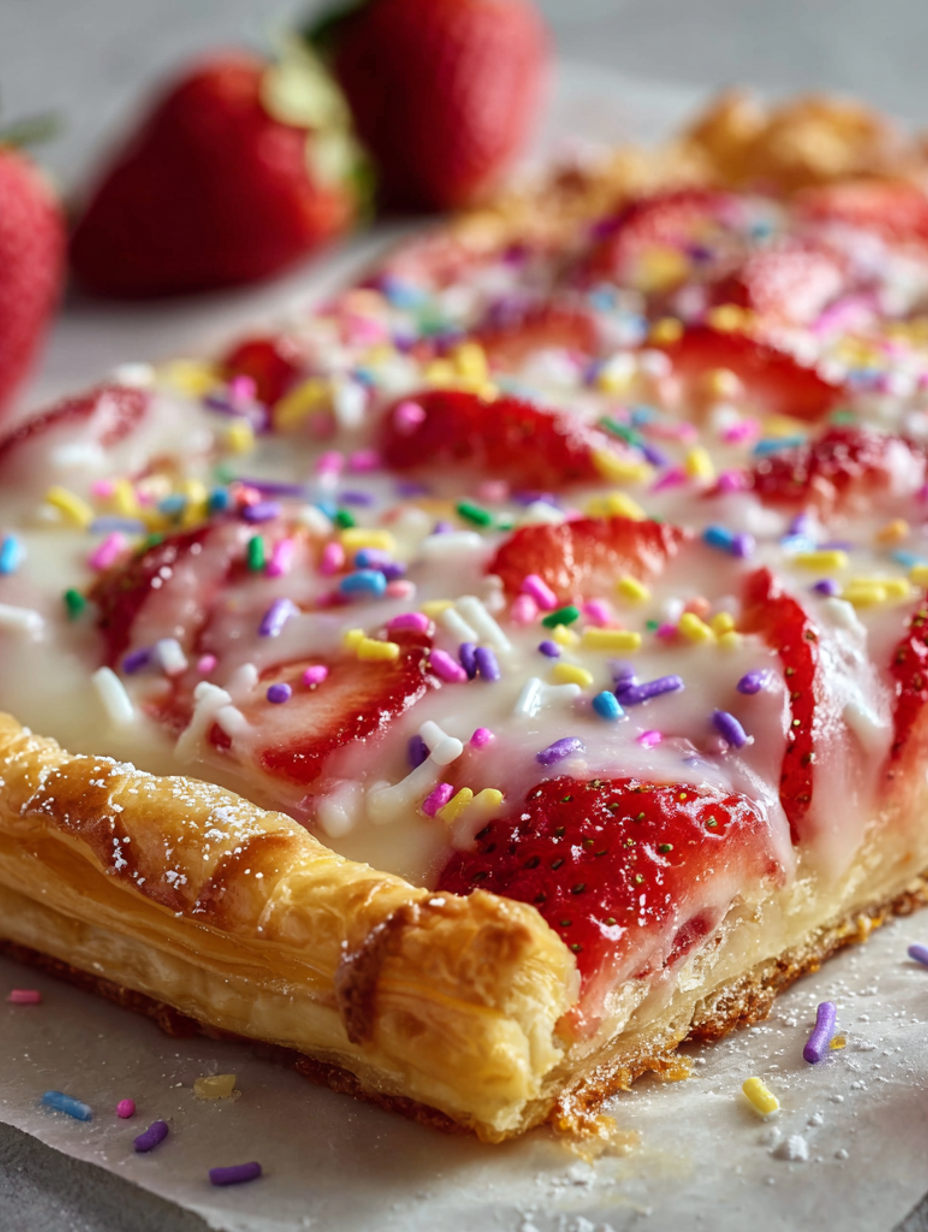
If you love the nostalgic sweetness of a toaster-style strawberry pop-tart, but want something bake-worthy and shareable, this Strawberry Pop Tart Slab Pie delivers in spades. A buttery, flaky homemade crust envelops a juicy strawberry filling that bursts with fresh flavour, and the whole pie is finished with a vanilla glazed icing and rainbow sprinkles — playful, comforting, and unforgettable. The contrast of crisp pastry, soft filling and sweet glaze makes it perfect for brunch, dessert or anytime you want something special.
Why You’ll Love This Recipe
- Big-batch and crowd-friendly: Built as a slab pie in a 9×13-inch pan, perfect for serving many at once.
- Homemade flavour upgrade: The crust is buttery and flakier than store-bought toaster pastries.
- Fun and festive finish: The glaze and rainbow sprinkles evoke the fun of classic pop-tarts but with a grown-up twist.
- Fresh strawberry filling: Uses fresh strawberries, sugar and cornstarch to give a bright flavour and satisfying texture.
- Versatile occasions: Great for breakfast, brunch, dessert or even snack time.
- Customizable: You can swap fruits, change the sprinkles, or use a store-bought crust if pressed for time.
Ingredients
For the Pie Crust:
- 2 ½ cups all-purpose flour
- 3 tablespoons sugar
- 1 teaspoon kosher salt
- 1 cup cold unsalted butter, cubed
- ¼ cup ice-cold water (add more if needed)
For the Filling & Glaze:
- 1 pound fresh strawberries, hulled and sliced
- ½ cup granulated sugar
- 2 tablespoons cornstarch
- 1 pinch kosher salt
- Juice from ½ lemon
- 1 cup confectioners’ (powdered) sugar
- 1 tablespoon milk
- ½ teaspoon vanilla extract
- Rainbow sprinkles (for topping)
Instructions
- Prepare the dough: In a food processor, pulse the flour, sugar and salt until combined. Add the cold butter cubes and pulse until the mixture resembles coarse crumbs. Gradually add the ice water and pulse just until the dough starts to come together.
- Chill the dough: Divide the dough into two portions, wrap each in plastic wrap and refrigerate for at least 30 minutes.
- Make the filling: In a bowl, combine the sliced strawberries, granulated sugar, cornstarch, salt and lemon juice. Stir well and let sit for 10–15 minutes to draw out juices.
- Preheat the oven to 400 °F (≈ 200 °C). Line a 9×13-inch baking pan with parchment paper.
- Roll out first portion of dough: On a lightly floured surface, roll one dough portion to fit the baking pan. Transfer it into the pan, pressing gently to fit.
- Add the filling: Spread the strawberry mixture evenly over the crust in the pan.
- Roll out second dough portion: Roll the second portion and place it over the strawberry layer. Crimp the edges to seal, then use a fork or knife to poke small holes across the top for steam venting.
- Brush top (optional): Brush the top crust with a little milk or cream for a golden finish.
- Bake: Place in the oven and bake for about 40 minutes — check at around 20 minutes to ensure the top isn’t browning too fast and that the vents are open.
- Cool completely: Remove from oven and let the pie cool fully — this is important so the filling sets and the glaze will hold.
- Glaze and sprinkle: In a small bowl whisk together the confectioners’ sugar, milk and vanilla until smooth. Spread the glaze evenly over the cooled slab, then immediately sprinkle with rainbow sprinkles.
- Slice and serve: Lift the slab out using the parchment overhang, slice into squares, and serve.
You Must Know
- Keep butter cold: Cold butter in the dough creates flaky layers; if it warms up too much the crust will be dense.
- Don’t skip the chill: Chilling the dough before baking helps the crust maintain structure and prevents shrinking.
- Ventilation is key: Poking holes in the top crust allows steam to escape so the filling doesn’t make the crust soggy.
- Allow full cooling before glazing: If you glaze while still warm, the glaze may melt or run, losing the aesthetic of sprinkles.
- Monitor browning: The top crust may brown faster than the inside cooks; if edges brown too quickly, cover with foil.
Storage Tips
- Room temperature: Store in an airtight container for up to 1 day — best served fresh.
- Refrigerator: Cover loosely with foil or plastic wrap and keep chilled for up to 3 days. Let come to nearly room temp before serving to restore flavour.
- Freezer: Wrap individual slices in plastic wrap and place in a freezer-safe container. Freeze up to 1 month. Thaw in the fridge then warm briefly in a low oven (~300 °F for 5–10 minutes) to refresh crust.
- Best texture: For crisp crust and fresh-berry filling, this is best within the first day.
Ingredient Substitutions
- Crust: If pressed for time, use store-bought pie dough or even a pre-made crust. The result won’t be quite as buttery, but it works.
- Filling fruit: You can substitute blueberries, raspberries, or a mixed berry combination if strawberries aren’t in season.
- Sugar: For less sweet, reduce granulated sugar in the filling slightly; you might need a little extra cornstarch if the fruit is especially juicy.
- Glaze: Use almond milk instead of regular milk for a slightly nutty flavour; or skip the glaze and serve with whipped cream.
- Sprinkles: If you prefer a more grown-up look, skip the rainbow sprinkles and dust with powdered sugar or add finely chopped nuts atop the glaze.
Serving Suggestions
- Accompaniments: Serve with a scoop of vanilla ice cream or a dollop of whipped cream for a comfort dessert.
- Brunch friendly: Pair with a light fruit salad or freshly brewed coffee or tea for a sweet brunch treat.
- Presentation tip: Slice into perfect squares, arrange on a marble or wooden board, and scatter a few fresh strawberries and extra sprinkles around for colour.
- Drink match: A chilled rosé or a sparkling elderflower beverage complements the sweet-berry profile nicely; for non-alcoholic, try iced hibiscus tea.
Pro Tips
- Use a pastry cutter or two knives to cut cold butter into the flour mixture if you don’t have a food processor — you’re aiming for pea-sized bits of butter.
- After rolling the second dough layer, lift it gently and drape over the filling rather than sliding — this prevents air-bubbles.
- To get super crisp underside, bake the pan on the lowest oven rack and place a baking sheet below to catch any drips from the filling.
- Let the slab rest completely before cutting — cooling allows the filling to firm up, making slicing cleaner and reducing leakage.
- For extra flair, after glazing, chill the pie briefly so glaze sets, then sprinkle edible glitter or decorate with fresh mint leaves for a dessert-table showstopper.
Frequently Asked Questions
→ Can I use frozen strawberries instead of fresh?
Yes — frozen strawberries can work. Thaw and drain excess liquid before mixing, as frozen fruit tends to release more water which may thin the filling.
→ What size pan should I use?
A 9×13-inch baking pan is recommended for the slab format to yield generous servings (approx 12-15 slices).
→ Why is my filling watery after baking?
Likely causes: too much liquid from overly ripe or melted fruit, or insufficient cornstarch. Ensure fruit is well coated, use the recommended cornstarch, and vent the top crust for steam release.
→ Can I make this ahead of time?
Yes — you can prepare the dough and even roll, then refrigerate. Bake the day of serving, then glaze and sprinkle shortly before serving to keep the sprinkles fresh.
→ How can I make it more “pop-tart” style rather than slab pie?
Cut the dough into individual rectangles instead of one large slab, assemble filling on each, seal with top layer, bake and glaze each one. This gives the individual toaster-pastry look.
This Strawberry Pop Tart Slab Pie offers all the fun of a beloved breakfast treat, elevated into a shareable dessert with bold flavour, eye-catching colour and charming nostalgia. Enjoy every buttery, berry-filled bite!


