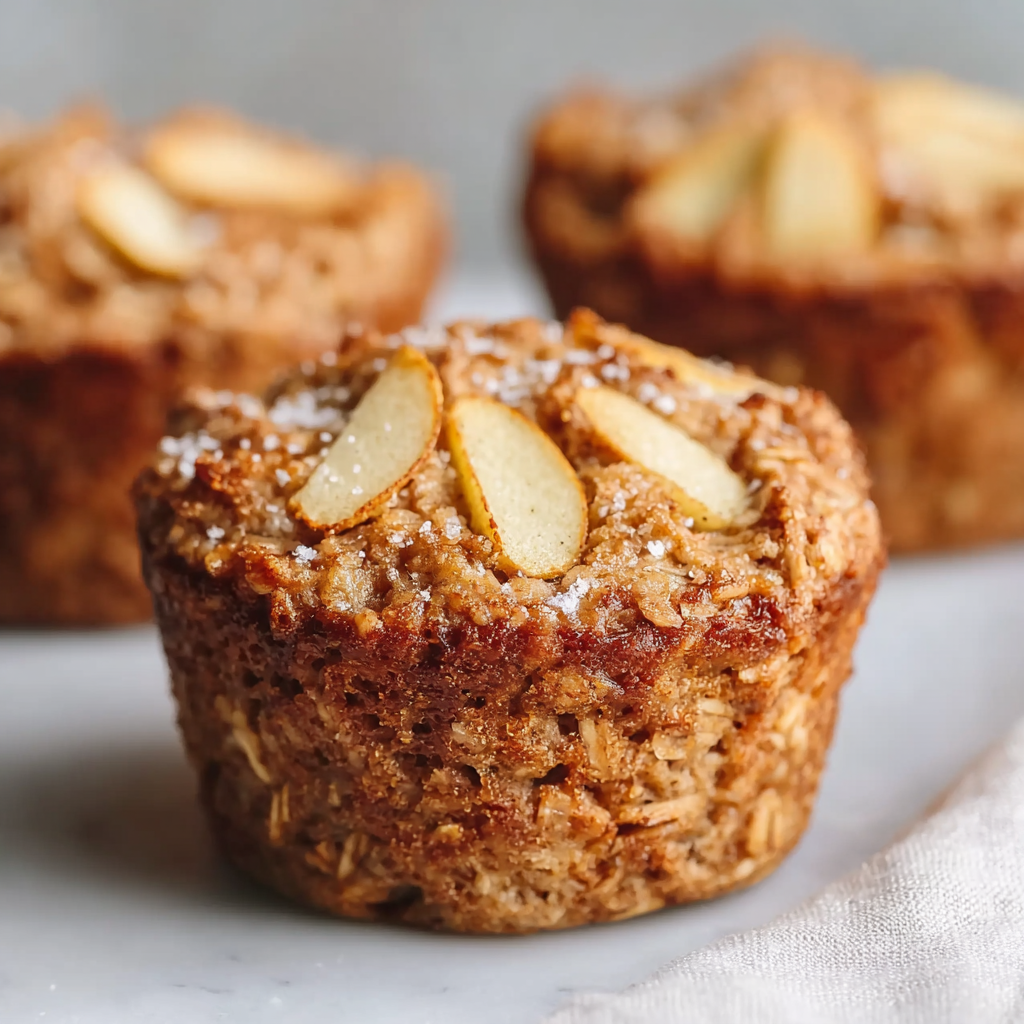
There’s nothing quite like waking up to the smell of cinnamon and baked apples wafting through your kitchen. These baked apple cinnamon oatmeal cups have become my secret weapon for busy mornings when I still want something warm, wholesome, and utterly delicious. I started making them on Sunday evenings, and by Wednesday morning when life gets hectic, I’m always grateful to have these grab-and-go cups ready in the fridge. They taste like apple pie and cozy fall mornings, but they’re actually packed with whole grains, fruit, and natural sweetness. My kids think they’re getting a treat, while I know they’re getting a nutritious breakfast that will fuel them until lunch. What I love most is how versatile they are—eat them warm or cold, plain or topped with yogurt, and they’re always satisfying.
Why You’ll Love This Recipe
These oatmeal cups are absolute perfection for anyone with a busy lifestyle. First and foremost, they transform your chaotic mornings into calm, nourished starts to the day. No more scrambling to make breakfast or skipping it altogether—these cups are ready when you need them, requiring nothing more than a quick reheat or even enjoyed straight from the fridge.
Moreover, they’re naturally sweetened with maple syrup and applesauce, which means no refined sugar while still delivering that comforting sweetness we all crave in the morning. The combination of apples, cinnamon, and nutmeg creates a flavor profile that’s reminiscent of apple pie, making breakfast feel like a treat rather than a chore.
What makes these even more appealing is their wholesome ingredient list—whole oats provide sustained energy and fiber, eggs add protein to keep you full, and fresh apples contribute natural sweetness and nutrients. Additionally, they’re incredibly versatile, working equally well as breakfast, a mid-morning snack, or even a healthier dessert option.
Best of all, this recipe is genuinely easy with minimal cleanup. One bowl, one whisk, and you’re basically done. They’re perfect for meal prep beginners or anyone who wants maximum results with minimum effort.
Equipment You’ll Need
Essential Tools
Standard 12-cup muffin pan – The foundation for perfectly portioned oatmeal cups.
Large mixing bowl – For combining all your ingredients in one place.
Whisk – To blend the wet ingredients smoothly.
Measuring cups and spoons – Precision ensures consistent results every time.
Silicone spatula or large spoon – For folding in the apples and nuts gently.
Nonstick cooking spray – Absolutely essential for preventing sticking and ensuring easy removal.
Aluminum foil – Optional but handy for covering the tops if they brown too quickly.
Wire cooling rack – Helps the cups cool evenly without getting soggy on the bottom.
Ingredients You’ll Need
Main Components
- 1½ cups milk (360ml) – use dairy or your favorite non-dairy alternative like almond, oat, or soy milk
- 2 large eggs – provides structure and protein
- ½ cup pure maple syrup (120ml) – natural sweetness that complements the apples beautifully
- ½ cup unsweetened applesauce (120g) – adds moisture and natural apple flavor without extra sugar
- 3 cups old-fashioned whole oats (255g) – the hearty base that provides fiber and staying power
- 1 teaspoon baking powder – gives a slight lift for lighter texture
- 1½ teaspoons cinnamon powder – warm spice that makes everything taste like fall
- ¼ teaspoon nutmeg powder – adds depth and complexity
- ½ teaspoon vanilla essence – enhances all the other flavors
- ¼ teaspoon salt – balances the sweetness and brings out the flavors
- 1 generous cup chopped peeled apple (120g) – fresh fruit that creates pockets of sweetness
Optional Add-Ins
- ½ cup chopped walnuts or pecans (50g) – adds crunch and healthy fats
- Coarse sugar for sprinkling – creates a delightfully sweet, crunchy top
Important Ingredient Notes
The type of oats matters here—use old-fashioned rolled oats, not quick oats or steel-cut oats. Quick oats will make the cups too mushy, while steel-cut oats won’t cook through properly in this baking time. Old-fashioned oats provide the perfect texture and chew.
For the apples, choose a variety that holds up well when baked. Granny Smith apples add tartness that balances the sweetness, while Honeycrisp or Gala apples contribute more natural sweetness. Avoid Red Delicious, which can become mushy when baked.
Step-by-Step Instructions
Preparing Your Workspace
Begin by preheating your oven to 350°F (177°C), giving it plenty of time to reach the proper temperature while you prepare the batter. This ensures even baking from the moment the oatmeal cups go in.
Next, generously spray your muffin pan with nonstick cooking spray, making sure to coat both the cups and the flat surface between them. Don’t be shy with the spray—oatmeal has a tendency to stick, and you want these cups to pop out cleanly. If you’re considering muffin liners, be aware that oatmeal cups tend to stick to paper liners stubbornly, so it’s actually better to skip them and spray the pan directly instead.
Mixing the Batter
In your large mixing bowl, combine the milk, eggs, maple syrup, and applesauce. Whisk these wet ingredients together vigorously until they’re completely smooth and well combined. You want the eggs fully incorporated with no streaks remaining, and the mixture should be homogeneous and slightly frothy.
Now add all your dry ingredients to the same bowl—the oats, baking powder, cinnamon, nutmeg, vanilla, and salt. Using your whisk or switching to a large spoon, stir everything together thoroughly. Make sure the oats are completely coated with the liquid mixture and there are no dry pockets hiding at the bottom. The batter will be quite liquid and might seem too thin, but don’t worry—this is exactly right. The oats need plenty of liquid to soften and cook properly.
Folding in the Good Stuff
Switch to a silicone spatula or large spoon for this step. Add your chopped apples (and nuts if you’re using them) to the bowl. Gently fold them into the batter using broad, sweeping motions. You want to distribute the apple pieces and nuts evenly throughout without deflating the mixture. Try to ensure every scoop will have a good mix of oats, liquid, and fruit.
Take a moment to check that your apples are cut into small, uniform pieces—about ½-inch cubes work perfectly. Pieces that are too large won’t cook through properly, while pieces that are too small will dissolve into the batter.
Filling the Muffin Cups
Using a ladle, large spoon, or even a measuring cup, portion the batter evenly among the 12 muffin cups. Here’s an important tip: fill each cup all the way to the top. These oatmeal cups don’t rise dramatically like muffins do, so filling them completely ensures you get full-sized portions rather than sad, small cups.
As you fill each cup, try to get a good balance of both the liquid and the solid ingredients. Give your bowl a stir between scoops to keep the apples and nuts from settling at the bottom. Each cup should have visible oat flakes, apple pieces, and plenty of liquid—this ensures even cooking and consistent texture.
If you’re adding coarse sugar for that bakery-style finish, now’s the time to sprinkle it generously over the tops. This creates a delightful sweet, crunchy crust that makes these feel extra special.
Baking to Golden Perfection
Carefully transfer your filled muffin pan to the preheated oven and bake for 28-30 minutes. You’re looking for edges that are lightly browned and tops that appear set rather than jiggly. The cups should have a gentle golden color and feel firm to a light touch.
Keep an eye on them during the last 10 minutes of baking. If you notice the tops browning too quickly before the centers are set, loosely tent a piece of aluminum foil over the entire muffin pan. This shields the tops from direct heat while allowing the centers to continue cooking through. The foil trick is especially useful if your oven runs hot or if you’re using dark-colored pans that absorb more heat.
Cooling for Best Texture
Once your timer goes off and the cups look perfectly golden, remove the pan from the oven and place it on a wire rack. Here’s where patience becomes important—let the oatmeal cups cool in the pan for 5-10 minutes before attempting to remove them. This brief cooling period allows the structure to set properly, making the cups much easier to handle and less likely to break apart.
After the cooling time, run a butter knife around the edges of each cup if needed, then gently pop them out. The generous coating of nonstick spray should allow them to release easily. If any are stubborn, give them another minute or two to cool before trying again.
Serving Suggestions
These versatile oatmeal cups can be enjoyed in countless delicious ways. The simplest approach is eating them warm right out of the oven with a pat of butter melting on top—pure comfort food at its finest. For a more indulgent breakfast, top them with a drizzle of additional maple syrup or honey and a dollop of Greek yogurt.
Create a balanced breakfast plate by serving one or two cups alongside fresh fruit and a protein source like scrambled eggs or turkey sausage. The oatmeal cups provide the grains and carbohydrates, while the additions round out the meal nutritionally.
For a portable breakfast, wrap a cooled cup in aluminum foil and eat it on your commute—they’re surprisingly good at room temperature. Alternatively, pack one in your lunch box with some nut butter on the side for dipping, creating a satisfying mid-morning snack.
Turn them into a healthier dessert by warming them slightly and serving with a scoop of vanilla ice cream or a drizzle of caramel sauce. The warm spices and apple pieces make them feel indulgent while still being relatively nutritious.
Recipe Variations
Fruit Swaps
While apples are classic, this recipe adapts beautifully to other fruits. Try diced pears for a softer, sweeter variation. Fresh or frozen blueberries create gorgeous purple-studded cups bursting with antioxidants. Diced peaches work wonderfully in summer, especially paired with a pinch of ginger. For a tropical twist, use diced mango and swap the cinnamon for cardamom.
Dried fruits are another excellent option—chopped dates, cranberries, or raisins all work well. If using dried fruit, reduce the maple syrup slightly since dried fruits are more concentrated in sweetness. You can also combine fruits, like apple-cranberry or pear-blueberry for complex flavor profiles.
Spice Variations
The warm spice combination is easily customized to your preferences. For a chai-spiced version, add ¼ teaspoon each of ground ginger and cardamom along with the cinnamon. A pumpkin spice variation works beautifully—use 2 teaspoons pumpkin pie spice instead of the cinnamon and nutmeg. For a simpler flavor profile, increase the cinnamon to 2 teaspoons and omit the nutmeg entirely.
Mix-In Ideas
Beyond nuts, consider adding ¼ cup of mini chocolate chips for a more dessert-like treat. Shredded coconut adds tropical flair and interesting texture. Hemp hearts or chia seeds boost the protein and omega-3 content. Dried goji berries or mulberries provide superfood benefits and chewy texture.
Dietary Modifications
Make these vegan by using plant-based milk and replacing the eggs with flax eggs (2 tablespoons ground flaxseed mixed with 6 tablespoons water, left to gel for 5 minutes). For a gluten-free version, use certified gluten-free oats. To reduce sugar, cut the maple syrup to ⅓ cup and ensure your apples are naturally sweet.
Make-Ahead Tips
These oatmeal cups are meal prep champions, making your entire week easier with one simple baking session. Once completely cooled, store them in an airtight container in the refrigerator for up to one week. They actually improve slightly after a day in the fridge as the flavors meld together and the oats fully absorb the liquid.
For reheating, microwave individual cups for 30-45 seconds until warmed through. You can also reheat several at once in a 300°F oven for about 10 minutes, which helps restore that fresh-baked texture. If you prefer them cold, they’re perfectly delicious straight from the fridge—the texture is similar to overnight oats but with more structure.
These cups freeze exceptionally well for up to 3 months. Let them cool completely, then wrap each cup individually in plastic wrap or aluminum foil. Place the wrapped cups in a freezer-safe bag or container, pressing out excess air. To enjoy, thaw overnight in the refrigerator, or defrost in the microwave using the defrost setting followed by regular reheating.
For ultimate convenience, you can prep the dry ingredients and wet ingredients separately the night before, then simply combine and bake in the morning. Store the chopped apples in a bowl of water with a squeeze of lemon juice to prevent browning.
Notes
Oat type is crucial: Only use old-fashioned rolled oats for this recipe. Quick oats will create a mushy texture, while steel-cut oats won’t soften properly in the baking time. The rolled oats provide the perfect tender-chewy texture these cups need.
Don’t skip the spray: Even with nonstick pans, generously spraying is essential. Oatmeal naturally contains starches that become sticky when baked, so you need a good barrier between the cups and the pan. Consider spraying twice for extra insurance.
Liquid batter is normal: New bakers often worry when they see how liquidy the batter is, but this is correct. The oats need that liquid to hydrate and soften during baking. A thick batter would result in dry, hard cups.
Fill cups completely: Unlike muffins that rise and dome, these oatmeal cups barely rise at all. Filling the cups to the top ensures you get satisfying, full-sized portions. Don’t worry about overflow—they won’t puff up over the edges.
Apple preparation matters: Always peel your apples unless you specifically like the texture of apple peels in baked goods. The peels can become tough and chewy. Also, cut them small—½-inch pieces or smaller ensure they cook through and distribute evenly.
Storage is key to freshness: Always store these covered tightly. Exposed to air, they’ll dry out quickly. If you notice them getting a bit dry after several days, brush with a little melted butter or spray with water before reheating.
Frequently Asked Questions
Can I use quick oats or instant oats instead?
It’s not recommended. Quick oats are cut smaller and will absorb liquid too quickly, resulting in mushy cups with no texture. Instant oats are even more processed and will turn into porridge-like mush. Stick with old-fashioned rolled oats for the best results—they’re in every grocery store and worth getting specifically for this recipe.
Why are my oatmeal cups sticking to the pan?
The most common cause is insufficient nonstick spray. Oatmeal contains starches that become quite sticky when heated, so you need a generous coating. Also, make sure you’re letting them cool for the full 5-10 minutes—trying to remove them too early almost always results in sticking and breaking.
Can I make these without eggs?
Yes! Replace the 2 eggs with 2 flax eggs (2 tablespoons ground flaxseed mixed with 6 tablespoons water, let sit for 5 minutes until gel-like). The texture will be slightly more dense but still delicious. You could also use chia eggs with the same ratio, or try ½ cup of mashed banana, though this will add banana flavor.
My oatmeal cups are too dry. What went wrong?
This usually happens when the oats-to-liquid ratio is off. Make sure you’re measuring correctly—scoop oats into the measuring cup and level off, don’t pack them down. Also, check your oven temperature with an oven thermometer; if it runs hot, you might be overbaking them. Finally, don’t use quick oats, as they absorb more liquid and can make the result drier.
Can I use steel-cut oats?
Unfortunately, no. Steel-cut oats are too hard and would remain crunchy even after 30 minutes of baking. They require much longer cooking times and more liquid. This recipe is specifically designed for old-fashioned rolled oats, which have been steamed and flattened to reduce cooking time.
How can I make these sweeter without adding more sugar?
Use sweeter apple varieties like Fuji, Gala, or Honeycrisp instead of tart Granny Smith apples. You can also add a handful of raisins or chopped dates, which provide natural sweetness. Another option is to drizzle honey or maple syrup over the baked cups when serving rather than changing the batter itself.
Why did my oatmeal cups turn out flat?
These cups don’t rise dramatically like muffins, so somewhat flat is normal. However, if they’re completely flat and dense, you may have forgotten the baking powder or used expired baking powder that lost its potency. Also, make sure you’re filling the cups all the way to the top—underfilled cups will look particularly flat.
Can I double this recipe?
Absolutely! This recipe doubles perfectly. Just make sure you have two muffin pans ready or bake in batches. The ingredient ratios scale up beautifully, and doubled batches are perfect for serious meal prep or feeding a crowd at brunch.
Are these supposed to be dry like muffins or moist like baked oatmeal?
They should be somewhere in between—moister and denser than a muffin, but more structured than a scoop of baked oatmeal. Think of them as having the texture of a hearty breakfast bar. If yours are too dry, add an extra ¼ cup of milk next time. If too wet and falling apart, reduce the milk by ¼ cup.
Estimated Nutrition (per cup, based on 12 servings without optional nuts/sugar): Calories: 135-145 kcal | Protein: 4-5g | Fat: 2.5-3.5g | Carbohydrates: 25-27g | Fiber: 3g | Sugar: 12g
Prep Time: 10-15 minutes | Bake Time: 28-30 minutes | Total Time: 40-45 minutes | Difficulty Level: Easy | Yield: 12 oatmeal cups


